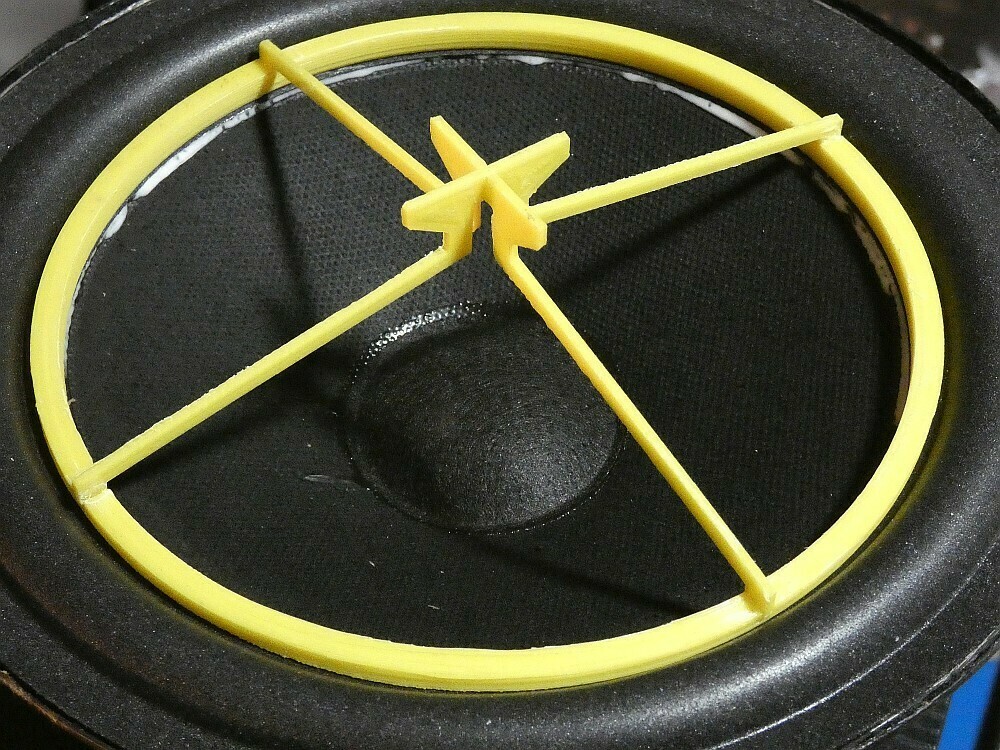
Essentially my need was to easily glue, with vinyl glue, a new foam suspension to the paper cones of a pair of 8" woofers, used on the excellent ESB CS-30 Italian loudspeakers from 1979.
The question arose spontaneously: how to keep the suspension in the right position and at the right pressure until the complete gluing took place?
Quick and clean! The best solution was to design the:
Circ-O-l8! (Circolotto for friends)
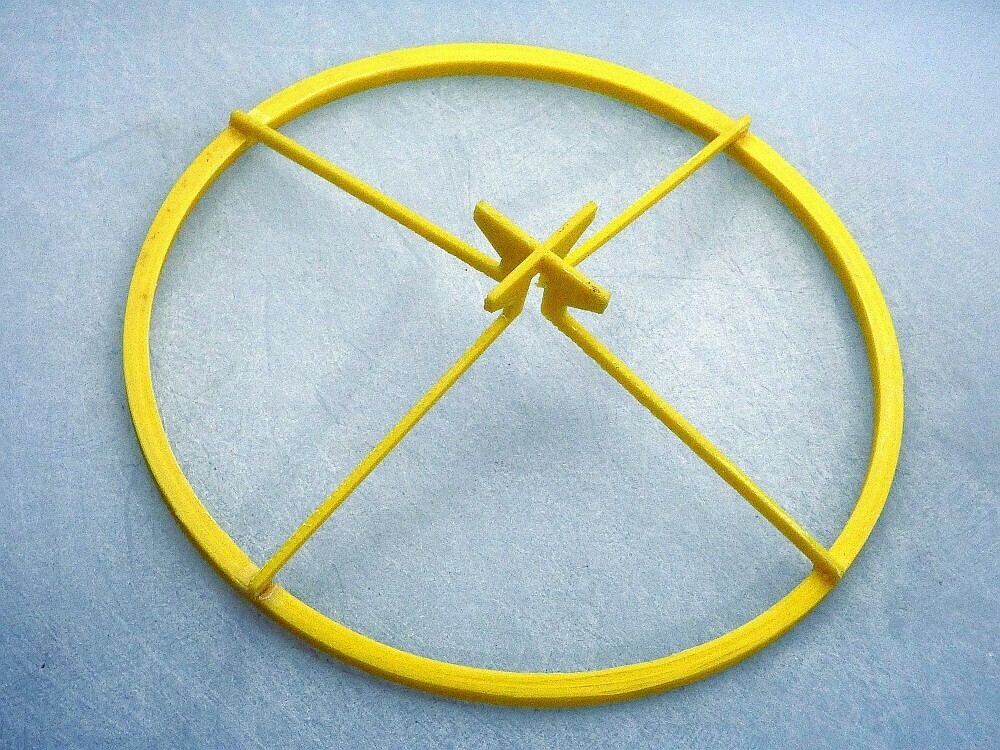
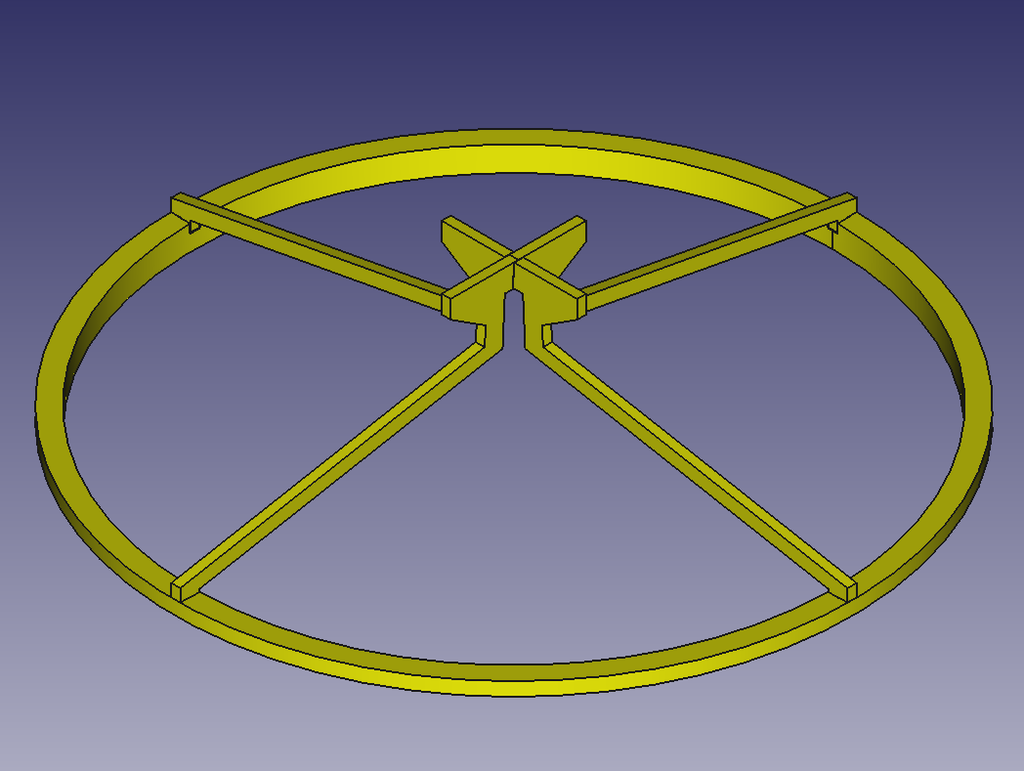
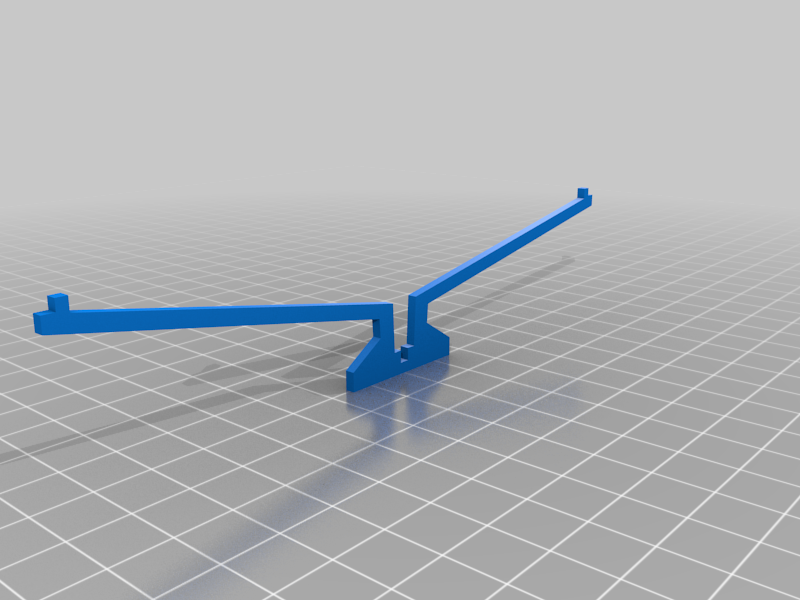
Circ-O-l8 is a frame, made up of two arms and a 15cm diameter ring, tapered at 30° on the side where it rests on the suspension which must be glued to the edge of the speaker cone.
In the center of the two arms there are two joints to be glued together making sure that they completely fit together to form a "flat" cross on their upper part (the smaller one).
Once the arms have been glued together, you need to glue the remaining four feet into the ring joints.
To glue the arms and the ring:
if you have printed them in ABS, just put a drop of acetone on each gluing point, hold the parts together and let them dry for about fifteen minutes;
if instead you have printed them in PLA or other materials, the right solution for gluing is the classic cyanoacrylate glue (superglue).
The crossing of the arms leaves, in the upper part, a small "surface" on which to place a little weight so that the frame presses the suspension which must be glued to the speaker cone.
I found that the correct weight to apply to the frame was a CD of "4 non blondes", but the CDs of Perez Prado, Logic, Phil Collins, Etta James, Bach, Zucchero or anyone else, weighing between 100 and 150 grams, are equally good :-) (you can use also pebbles, batteries, sinkers, rolls of line, fishes, potatoes or whatever you like, without exaggerating with the weight so as not to deform the speaker!).
If, like me, you will be using vinyl glue, the frame will have to be left in position until the glue becomes transparent (i.e. until completely dry).
Hints:
1) apply the glue to the edge of the speaker cone;
2) carefully position the suspension paying attention to its centering with the cone;
3) position the frame and apply the chosen weight;
4) carefully re-center the suspension by gently pushing it in or out where it may have moved.
5) check again after about ten minutes and, if necessary, re-center.
6) if everything is fine, let it dry.
7) A bit of French... Voilà, le jeux sont faits!
Italian, now :-)
La mia esigenza era essenzialmente quella di incollare, facilmente e con colla vinilica, una nuova sospensione in schiuma ai coni di carta di una coppia di woofer da 8" montati sugli eccellenti diffusori italiani ESB CS-30 del 1979.
La domanda è sorta spontanea: come mantenere la sospensione nella giusta posizione e alla giusta pressione fino al completo incollaggio?
Veloce e pulito! La soluzione migliore è stata progettare:
Circ-O-l8! (Circolotto per gli amici)
Si tratta di un telaio formato da due bracci e un cerchio di 15 cm di diametro, rastremato a 30° sul lato dove poggia sulla sospensione che deve essere incollata al bordo del cono dell'altoparlante.
I due bracci, al centro presentano due incastri che andranno incollati tra loro, facendo in modo che si incastrino completamente a formare una croce "piatta" sulla parte superiore.
Una volta che i bracci saranno stati incollati insieme, otterrete quattro piedini inferiori che andranno incollati nei quattro incastri che troverete sul cerchio.
Per incollare i bracci, se hai stampato i pezzi in ABS, basta mettere una goccia di acetone su ogni punto di incollaggio, fissare le parti insieme e lasciarle asciugare per una decina di minuti;
se invece le hai stampate in PLA o altro materiale, la soluzione giusta per l'incollaggio è la classica colla cianoacrilica (supercolla).
L'incrocio dei bracci lascia una piccola superficie su cui è possibile appoggiare un piccolo peso per premere il telaio sulla sospensione mentre quest'ultima si sta incollando al cono dell'altoparlante.
Ho scoperto che il peso corretto da applicare al telaio era un CD del gruppo "4 non blondes", ma i CD di Perez Prado, Logic, Phil Collins, Etta James, Bach, Zucchero o altri che pesino tra i 100 ed i 150 grammi, sono ugualmente buoni (puoi usare anche sassi, batterie, piombi da pesca, rotoli di lenza, pesci, patate o quello che più vi piace, senza esagerare con il peso per non deformare l'altoparlante)!
Se, come me, utilizzerai la colla vinilica, il telaio dovrà essere lasciato in posizione fino a quando la colla non diventa trasparente (cioè fino a completa asciugatura).
Suggerimenti:
1) applicare la colla sul bordo del cono dell'altoparlante;
2) posizionare con cura la sospensione facendo attenzione al suo centraggio con il cono;
3) posizionare il telaio e applicare il peso scelto;
4) Ricentrare con attenzione la sospensione spingendola delicatamente in dentro o in fuori nei punti in cui potrebbe essersi spostata.
5) ricontrollare dopo una decina di minuti e, se necessario, ricentrare.
6) se è tutto a posto, fare asciugare.
7) Un po' di francese... Voilà, le jeux sont faits!
:format(webp)/https://fbi.cults3d.com/uploaders/31662269/illustration-file/55ff47a2-4c93-493e-bb51-81cefaf67103/P1060601r.JPG)


/https://preview3d-images.cults3d.com/o6g3crqedl7p0buapz9tagpnsvoh)
/https://preview3d-images.cults3d.com/we3nw7czco2ifpw8bdwdmcgu5dcm)
/https://preview3d-images.cults3d.com/fs4km0a8t4gfxb0h26xsw8iridic)
