Audio Alert using a DFPlayer module
For a PCB SMT version see https://www.thingiverse.com/thing:3102114 or https://www.instructables.com/id/Audio-Alert/
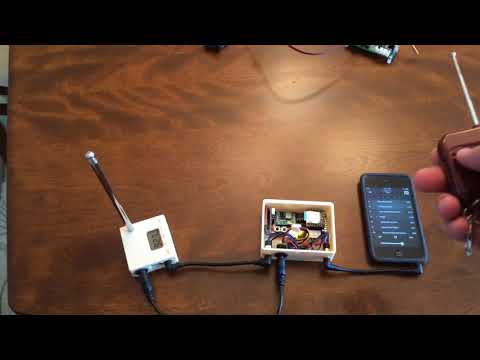
https://youtu.be/I41c7qiyuZw
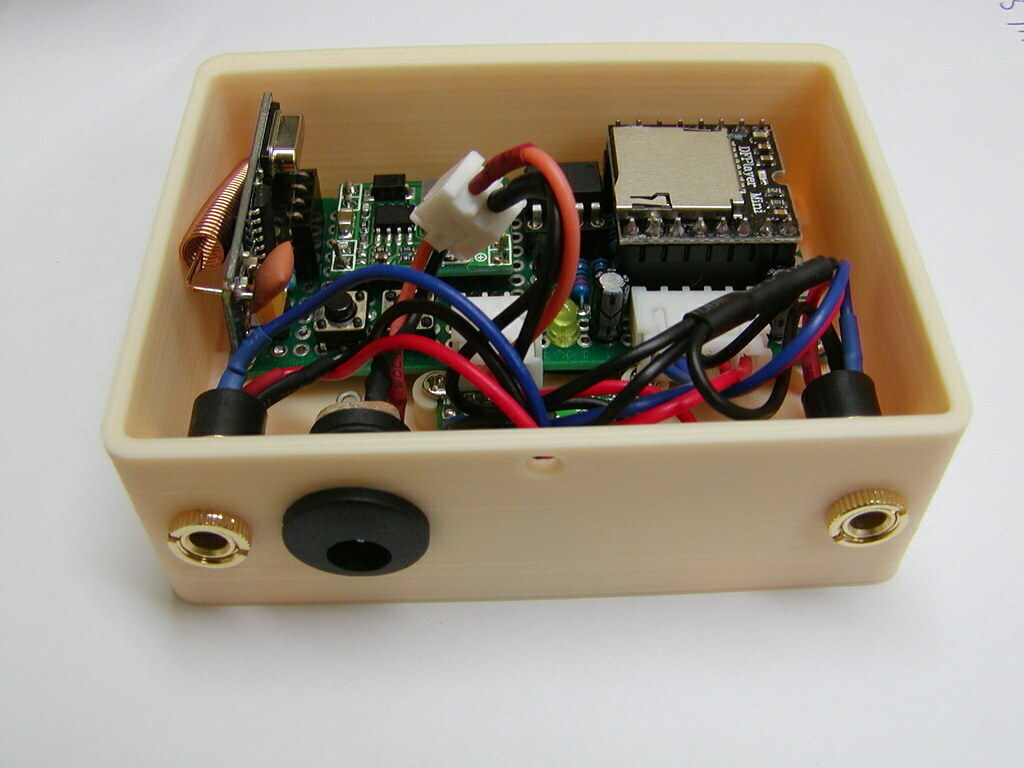
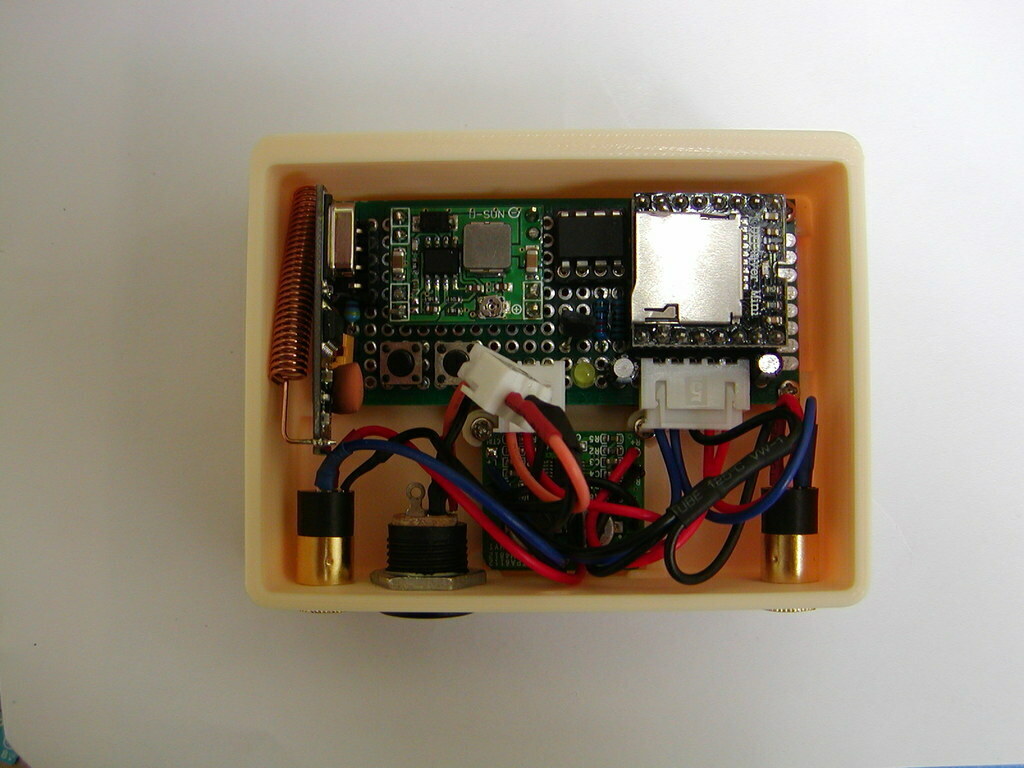
This Audio Alert box is placed between an audio source and an audio consumer such as an FM transmitter or amplifier. When the alert box wirelessly receives an encoded message, it breaks into the audio stream from the source and plays an mp3 sound clip. I designed the Audio Alert box for a project I recently published that detects when a wood shop dust collector is full. The original detector design would flash a warning light when the collector is full. The updated design, in addition to the flashing, now broadcasts an encoded message that is picked up by the Audio Alert box that plays an mp3 sound clip that I hear on my FM hearing protector headset. The number of messages that the Audio alert box can play/insert into the audio stream, is only limited by the number of mp3 files you can fit on a micro SD card.
I made a short video to show the Audio Alert in action. It demonstrates that it can be controlled by any device that sends a correctly encoded message. The bare PC board attached to a 9V battery is the updated dust collector full detector board.
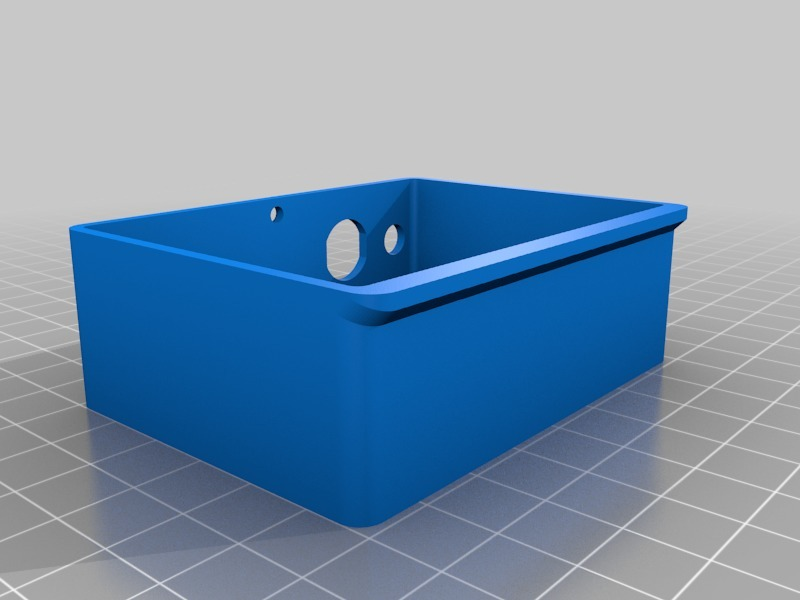
Prints, how I printed them, you do what you think best. Both prints, 20% fill, no support.
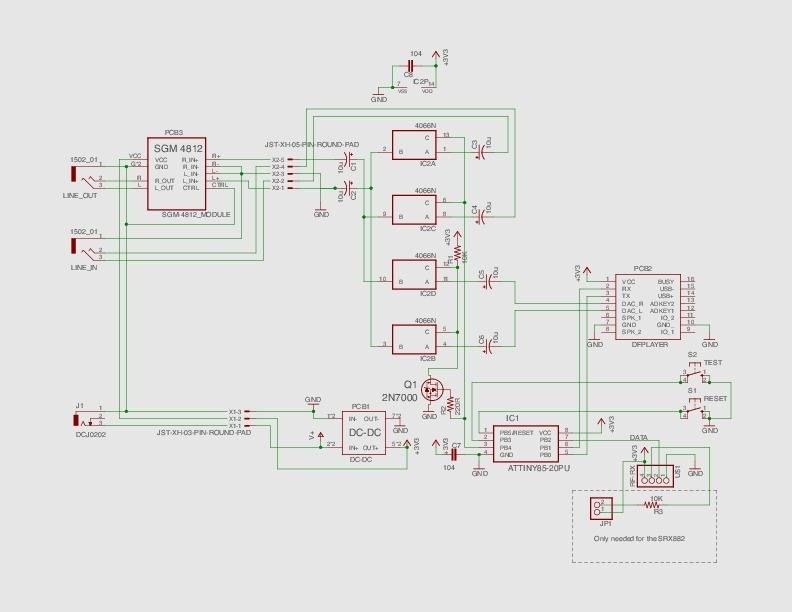
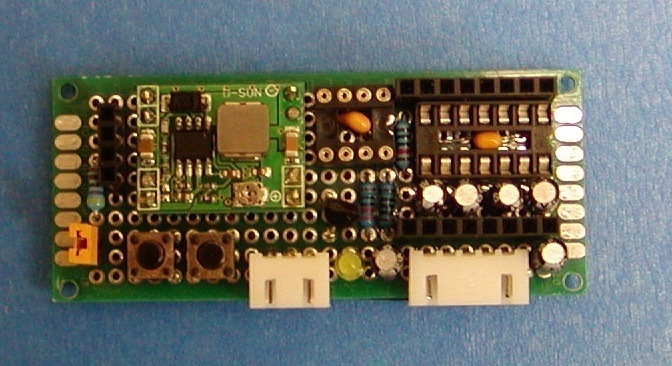
I’ve attached a schematic and the software sources needed by Audio Alert. You’ll see that there’s an analog switch chip that is controlled by an ATtiny85 MCU. The external audio source is on by default. When a message is received the source is switched to the internal DFPlayer. The MCU tells the DFPlayer to play the mp3 file that corresponds to the message received. Once the message finishes, the source is switched back to the external source. I found that the 4066 analog switch lowered the sound level quite a bit, so the design includes a small headphone amplifier to bring the level back up.
A DFPlayer is a serially controlled mp3 player module that can be purchased for under $1.50USD if you’re willing to wait about a month for it to arrive from China. The headphone amplifier costs about the same. As noted above, the MCU is an ATtiny85, but any small MCU will work, like an Arduino Pro Mini (for under $2). I used an ATtiny85 because it’s…. tiny. The ATtiny85 maybe too challenging for some to use because it doesn’t use an external crystal. You need to tweak the internal clock to be more precise than what Amtel sets it to at the factory. I have links in the sources related to tuning the internal clock.
https://www.aliexpress.com/item/DFPlayer-Mini-MP3-Player-Module-MP3-Voice-Decode-Board-For-Arduino-Supporting-TF-Card-U-Disk/32675552627.html
https://www.aliexpress.com/item/Headphone-Amplifier-Board-Differential-Balanced-SGM-4812-HIFI-Amp-Module-150-mW/32836131575.html
VERY IMPORTANT: The DFPlayer is a 3.3 volt device. This is another reason I use the ATtiny85. The ATtiny85 runs fine a 3.3 volts. (There’s also a 3.3 volt Arduino Pro Mini).
For a voltage regulator I use a cheap DC-DC converter. I like DC-DC converters better than the LDO voltage regulators such as the AMS1117. DC-DC converters are more efficient.
https://www.aliexpress.com/item/10PCS-Mini-3A-DC-DC-Converter-Step-Down-Module-Adjustable-3V-5V-16V-Power-for-RC/32670079322.html
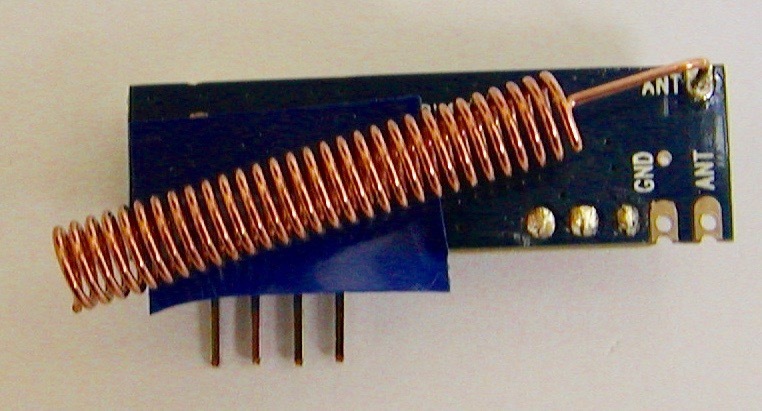
For the receiver I’m using an SRX882, but the more common XY-MK-5V also works well. Both work at 3.3 volts. The most important thing with these modules is the antenna. I tried a few spring antennas from various sources and one worked far and away better than the others (see link below). The difference is huge.
https://www.ebay.com/itm/10x-Helical-Spring-Screw-Antenna-315MHz-Direct-Weldment-Wholesale/262682897758
As you can see from the above link, I used 315MHz. Any frequency will work (with a properly matched antenna). For the transmitter I had a problem with the STX882. Maybe I have a few from a bad batch (I tried 2). The FS1000A worked great so long as you keep it away from the DC-DC converter.
I’m not recommending a source for the SRX882 receiver because most come bundled with the STX882 and a spring antenna . As noted this STX882 transmitter and the antenna I received with it didn’t perform very well. So look at the screenshot of the antenna in the link, and the screenshot of the hundreds of sources for receivers, and try to find one that looks like the one in the link. The thing to look for is the spacing between the coils. The bad ones are very tight, almost no space. I found this to be true for 433MHz antennas as well.
In the video you’ll see that I use a common 315MHz remote. The chip that these use to encode the message is a PT2264. It’s easy to change the code these remotes transmit by filling in and removing solder gaps that represent the bit pattern to be transmitted. I wrote a software implementation of the PT2264 chip and the corresponding PT2294 decoder chip. This is why the MCU clock needs to be somewhat precise. The Arduino Pro Mini uses an external crystal so it’s already accurate enough and therefore easier to use. Note that not all remotes use the PT2264 chip. Many look exactly like the one shown in the video. You need to look for a “fixed code” transmitter.
Other parts:
ATTINY85-20PU
- or -
https://www.aliexpress.com/item/WAVGAT-Atmega328-3-3V-Version-Pro-Mini-Module-8M-For-Arduino-Compatible/32827888556.html
https://www.aliexpress.com/item/10PCS-LOT-CD4066BE-CD4066-4066BE-4066-DIP14-TI-CMOS-QUAD-BILATERAL-SWITCH-IC/32810263381.html
https://www.aliexpress.com/item/1-PC-4-Channel-315MHz-433MHz-Wireless-RF-Remote-Control-Controller-Fr-Light-Bulb-Door/32777732046.html
https://www.aliexpress.com/item/5PCS-315Mhz-WL-RF-transmitter-and-receiver-link-kit-ARM-MCU-Good/32639255382.html
https://www.aliexpress.com/item/Gold-5-Pcs-PJ392-3-5mm-Stereo-Female-Sockect-Jack-3-5-Audio-Headphone-Connector/32832960027.html
https://www.aliexpress.com/item/10PCS-LOT-DC-022-DC-Power-Jack-Socket-dc-connector-Adapter-interface-DC022-5-5X2-1MM/32802087337.html
https://www.aliexpress.com/item/10pcs-lot-3cm-x-7cm-Double-Side-prototype-pcb-3-7-Proto-Board/32684354535.html
4 & 8 pin female headers:
https://www.aliexpress.com/item/Single-row-female-2-54mm-Pitch-PCB-Female-Pin-Header-Connector-Straight-Single-Row-2-3/32838866439.html
The holes to attach the boards are M2.
The screw that holds the cover shut is M3x5
The Dust Collector Full project: https://www.thingiverse.com/thing:2657033
The updated schematic now includes the optional transmitter.
FM transmitter project: https://www.thingiverse.com/thing:2247929
The sound clips were made using the free service from http://www.fromtexttospeech.com (voice Daisy)
Very very optional: I figured out how to get the DFPlayer module to use an SPI EEPROM rather than the much easier to use micro SD card. If anyone is interested let me know. The W25Q64FV is referred to in the DFPlayer documentation as flash or NORFLASH. The only reason to use flash would be to save a few dollars over using a micro SD card (the W25Q64FV chip is under $1).
Disclaimer: I don’t claim to be an expert on circuit design. The schematic I provided was cobbled together from my past experience and extensive Googling.
:format(webp)/https://fbi.cults3d.com/uploaders/31968667/illustration-file/e2f28df0-9625-44dc-9ff6-7c6e232ccb32/P1110034.jpg)


/https://preview3d-images.cults3d.com/5xe8w0q29sjb8lxjfex6umfsif08)
/https://preview3d-images.cults3d.com/6ah9w8sibd2cnsua2vec04i3mtaz)

