PlayBaseStation - PS5 Wall Mount and Stand
PlayBaseStation - PS5 Wall Mount and Stand


Print Profile(1)

Description
PlayBaseStation currently only supports Digital Edition PS5s!
Looking for Measurements from Disk Edition PlayStation 5 owners! Please DM me!
PlayBaseStation is designed to be a unique stand/wall-mount for PlayStation 5 that matches the sleek and curved design of the PS5, while being flexible and extensible for other fun customizations!
If you like the project but don't want to print and assemble all the required materials, I have the PlayBaseStation available on my Etsy here: https://denver3d.etsy.com/listing/1665916419/playbasestation-unique-ps5-stand-and
Printer Compatibility
At this time, I have printed these parts on the 256mm bed of the Bambu X1C and my 350mm Voron 2.4. These parts will likely not be printable on beds smaller than 256mm! It's a very tight fit on the Bambu X1/P1 bed sizes. I've included STEP files if you feel like modifying the geometry to fit your bed, the Top and Bottom plates should be the main issue.
What to Print
If you want your PS5 to face RIGHT, print the Right-Facing files (.3mf full plate recommended). Print Left-Facing files for your PS5 to face Left, go figure.
The front Symbols have no left/right variants, print them the same for either orientation.
When you're done, you should 1 of each part:
PS5 Connector Plate, Top Plate, Main Body, Bottom Plate, Front Plate, and 1 of each Symbol.
Non-Printed Bill of Materials
- 6 x M3 Heatset Inserts, 3-5mm height should work fine
- 4 x M3x8mm Screws to Mount Bottom Plate to Main Body
- 2 x M3x12mm Screws to Mount PS5 Connector Plate + Top Plate to Main Body
- (Optional, Recommended) 1 x M3x25mm Screw to Attach PS5 to PlayBaseStation. See pictures to see an example of how this is done.
- (Optional) 3 Wood/Drywall/Other Screws for Wall Mounting
Print Settings
All settings should be configured in the .3mf build plates for you. But otherwise…
Print all pieces except the Main Body with whatever your standard/default settings are for the colors you're using.
For me, that's 3 walls, 5 top/bottom surfaces (top and bottom plates in White should have more surfaces to prevent infill from being visible), and 15% infill @ 0.2 height w/ a 0.4mm nozzle.
The Main Body should be printed with Strong settings, especially if you plan on wall-mounting the PlayBaseStation! In my case, I did 6 walls, 6 top/bottom surfaces, and 40% cubic infill.
Supports only needed for the Front Plate (use tree/organic supports, build plate only)
Assembly
Hopefully text instructions should suffice, but lmk if you need more pictures…
Use a soldering iron to embed the Heatset inserts into the Main Body. There should be 2 on top and 4 on the bottom, Ignoring the middle hole! This hole is solely used for a screwdriver to fit later when we want to attach the PS5 itself to the base (picture later).
Then, assemble your pieces in the following order. Note the softest/most gradual curved sides for the Top/Bottom plates should be interior, towards the Main Body.
PS5 Connector PlateTop PlateMain BodyBottom Plate
Use the 2 M3x12 screws to attach the Connector Plate to the Main Body (sandwiching the Top Plate).
Use the 4 M3x8 screws to attach the Bottom Plate to the Main Body.
If you plan on wall-mounting your PlayBaseStation, do so now (recommended you find and utilize at least 1 stud if mounting to Drywall, definitely use drywall anchors if no studs are available).
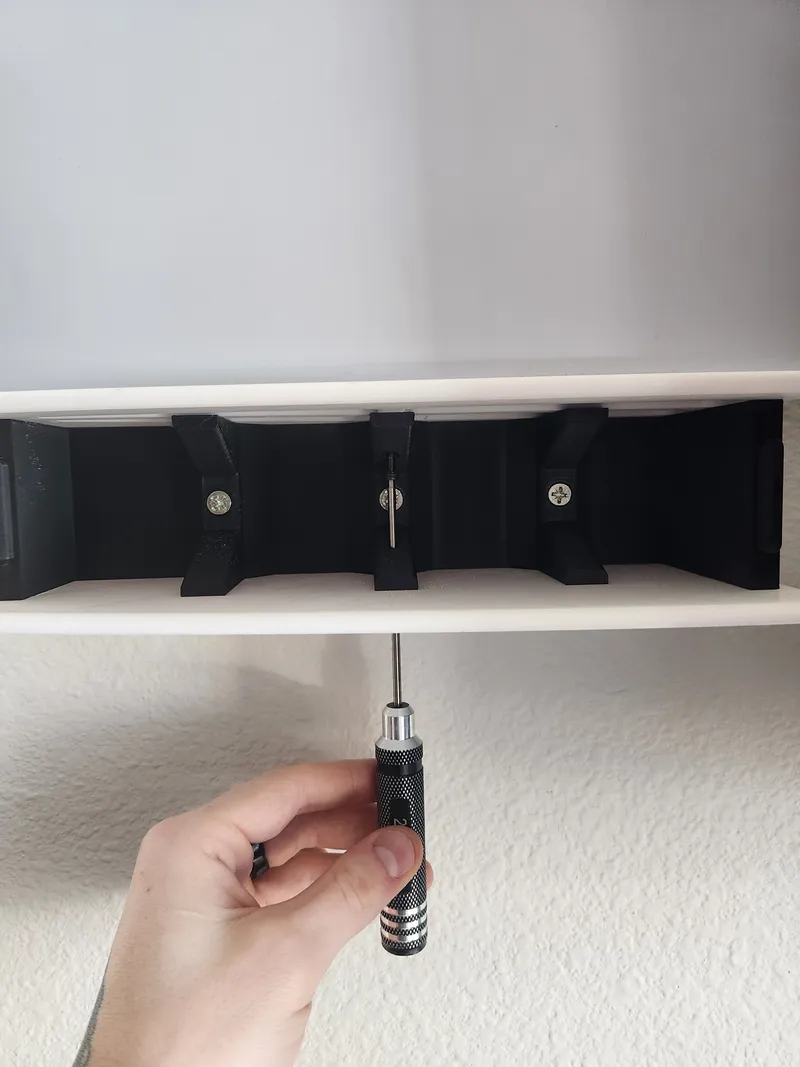
If using the M3x25mm screw to mount your PS5 (it has an M3 screw thread on the bottom) to the PlayBaseStation, do so now. There is a hole in the bottom of the Main Body and Bottom Plates to allow you to get the screw situated.
Now you can slide the Symbols into the Front Plate, and attach the Front Plate to the Main Body! These pieces should all friction fit nicely, but sand down the Symbols or nubs on the Main Body for a looser fit. The front plate and symbols are designed to be freely swapped or customized, if desired.


