Skip to content

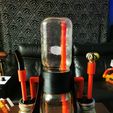
DOUBLE BUBBLER Mason Jar Gravity Bong

Advertising
Advertising
?
Creation quality: 5.0/5 (1 vote)
Evaluation of members on the printability, utility, level of detail, etc.

  • 3.5k views
  • 9 likes
  • 17 downloads
  • 1 comment
  • 1 make

License
3D design format
3MF and STL Folder details Close
  • DOUBLE BUBBLER v39.stl
  • DOUBLE BUBBLER v40 (SEX BA-BONG).stl
  • syphon collector v1.3mf
  • valve mod v6.3mf

Learn more about the formats

Last update 2024-02-20 at 06:20
Publication date 2024-02-15 at 23:42
Design number 1791648

3dpsqu

3D printer file info

3D model description

PLEASE READ ENTIRE DESCRIPTION! MODS AND UPDATES DESCRIBED WITHIN!

So this is inspired by the Mason Jar gravity bong remix by PUFFDADDY to which I created a bubble mod for. This is about 37 steps further however and is a complete redesign. I used PETG and TPU for this entire model, and it was printed on a BAMBU P1S with a .4mm nozzle using generic profiles.

You have two main files to choose from, the only differences will be the embossed wording on them. One will print out as DOUBLE BUBBLER, and the other will print out as SEX BA-BONG.

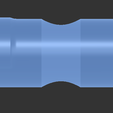
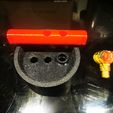
In this model you will print a stand base, which will allow you to mount a valve and valve body. The valve is a much thicker stem, designed to be orientation specific with cutout place holders to keep it seated in the stand, and its no longer fragile!

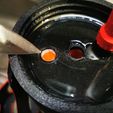
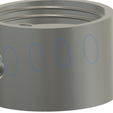
The main valve body has been adapted with improved thread design, beveled entry holes, and a much larger O-ring design to facilitate the oversized valve stem. The threads are an imported design from https://www.printables.com/model/254382-wide-mouth-mason-jar-thread
and were reduced in scale on the XY by 1% for a snugger fit.

You will need 2 large wide mouth mason jars, and 2 small wide mouth mason jars. You will also need 4 O-rings. I used standard thick black O-rings from my local hardware store, specs are .812x1.000x.103

You will require some food grade silicone grease to lubricate the O-rings, but also to help seal the exit valve path to prevent water leakage into the second bubble filter. I did use melted bees wax as a temporary solution for this, but the silicone seems to work better. -- MODDED FILE ATTACHED, SEE BELOW

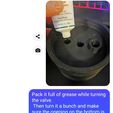
There is an added valve modification file, I recommend you print this instead of the original. It has a couple of features to help reduce water escape and tighten up the closed hole on top so that water cant work its way around and syphon out the exhaust side. You need to add silicone food grade grease into that section and flip it until it seals. Just disassemble and reassemble and flip as many times as you have to, it should eventually seal.

I'm also adding a file for a syphon capture device, that's really not super effective, but you can try it if you like. Works with the original valve, not the upgraded one.

3D printing settings

When adding the file to your slicer, it will initially come up as one object. You must right click on it and use the split to object(s) function which will break apart the file and separate the pieces. Then make multiple plates and drag and drop the pieces onto each plate. You can print like pieces together, but I dont suggest printing unlike pieces or more than 2 on a plate, just to ensure a good print.

All settings are on Bambu studio.

Print the mason jar seals with TPU. Concentric top and bottom.

Valve Stem - PETG - print on end, I used 5 walls, 5 layers top and bottom, and 100% infill rectilinear.
Supports to 20 degrees, standard snug, 5mm brim in and out, and seam set to back (rotate part 90 degrees on tray to make it a straight vertical line)

Valve body- PETG - 5 walls, 5 layers top and bottom, 15% infill honeycomb.
Supports set to 20 degrees, untick bed only, seam set to back, no brim.

Elbows - PETG - these should be printed with similar above settings, but orientation should be 45 degrees off vertical and the pointy end up. This makes a pretty clean print.
Supports on standard and set to 45 degrees, tick on bed only, no brim, seams to your preference.

Tubes - PETG- print vertical, above settings, standard support snug, and brim 5mm in and out.

Caps - PETG- flat side down, 5 walls, 5 layers top and bottom, no supports or brim.

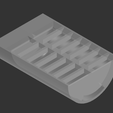
Stand plate - PETG - this should be printed on the diagonal from corner to corner of the plate. 4 walls, 3 layers top and bottom, honeycomb infill, tree supports auto default for the ovals at 20 degrees, base plate only, and remove small overhangs is off.

Advertising


Issue with this design? Report a problem.

Would you like to support Cults?

You like Cults and you want to help us continue the adventure independently? Please note that we are a small team of 3 people, therefore it is very simple to support us to maintain the activity and create future developments. Here are 4 solutions accessible to all:

  • ADVERTISING: Disable your banner blocker (AdBlock, …) and click on our banner ads.

  • AFFILIATION: Make your purchases online by clicking on our affiliate links here Amazon.

  • DONATE: If you want, you can make a donation via Ko-Fi πŸ’œ.

  • WORD OF MOUTH: Invite your friends to come, discover the platform and the magnificent 3D files shared by the community!


Sharing and downloading on Cults3D guarantees that designs remain in makers community hands! And not in the hands of the 3D printing or software giants who own the competing platforms and exploit the designs for their own commercial interests.

Cults3D is an independent, self-financed site that is not accountable to any investor or brand. Almost all of the site's revenues are paid back to the platform's makers. The content published on the site serves only the interests of its authors and not those of 3D printer brands who also wish to control the 3D modeling market.
100% secure payment by credit card, PayPal, Apple Pay, Google Pay, etc.
View all payment options.