Skip to content

Airsoft NUPROL 72bb grenade speedloader kit

🔫 3D models of guns or weapons are dummy objects or prop toys and have no real functionality as weapons. They are intended for entertainment or decorative purposes only. For any design violating our T&Cs, please report them.

Advertising
Advertising
?
Creation quality: 0.0/5 (0 votes)
Evaluation of members on the printability, utility, level of detail, etc.

  • 602 views
  • 1 like

License
3D design format
STL Folder details Close
  • 72BB Counter tray.stl
  • 72BB Storage bottle.stl
  • Allignment ring.stl
  • Loader.stl
  • Pin Cutting tool.stl
  • Pusher.stl
  • Storage Bottle Lid.stl

Learn more about the formats

Publication date 2024-02-26 at 23:09
Design number 1818385

3D printer file info

3D model description

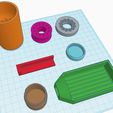
This is everything you will need to speed load a 72BB grenade.

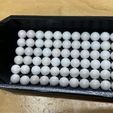
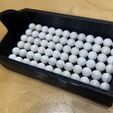
• 72bb counter tray
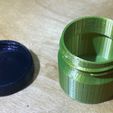
• Storage bottle (no lid, these can be got from milk cartons)
• Pin Cutting/Measuring jig
• Loader
• Pusher
• Pin alignment jig
• Storage bottle lid


NOT INCLUDED

• 4mm aluminium-rod needed for the pins

I found 3D printed pins were just too brittle. The aluminium-rod is anodised so runs really smoothly.
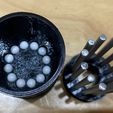
It contains a 72BB tray to accurately measure out 72bb's.
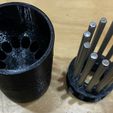
A storage bottle for the 72bbs if you wish to have everything just ready to pour in to the loader.

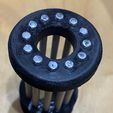
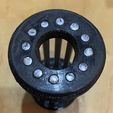
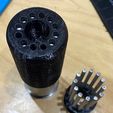
The Loader and pusher.

What you will need to purchase is a 1 x Rothley Anodised Aluminium Rod 1000mm x 4mm x 4mm (128JP). I got mine from Screwfix.

https://www.screwfix.com/p/rothley-anodised-aluminium-rod-1000mm-x-4mm-x-4mm/128jp
£3.99.

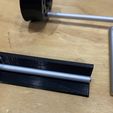
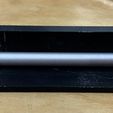
Use the Pin cutter tool to accurately measure the lengths of the pins and the cut. I also put a recess in for 5mm so mark the pin as this 5mm is what goes in to the pusher. this also help when making sure you've inserted the pin enough as well as getting them all the same length t the end.

I used a plumber’s pipe cutter which proved very easy to use.
Then sand the cut end lightly to remove any burr.
To chamfer the ends I used a pencil sharpener.
Doing this help align the pins and cleans the ends up.
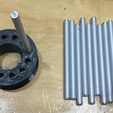
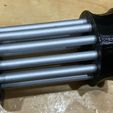
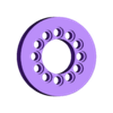
Using the alignment ring is so you get them all straight and the same length.
A very gentle tape with a hammer and a light sand/polish completes the installation.

With the Loader it is recommended that you sand the holes.
For the 4mm hole I just used a 4mm bolt as it doesn't need much to smooth it out.

For the 6mm I used a drill bit on a drill just a gentle slow drill running in the hole cleans it up.

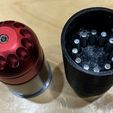
Load the 72BB’s from the storage bottle or from the tray in to the Loader.

Use you finger/thumb to make sure they are all in place and put the grenade in.

The grenade will line up with the bb’s
Hold it in place and turn upside down.
Insert the pusher/pins and push down.

The bb’s will now be loaded and none should be free. Remove the grenade and fill with gas.

3D printing settings

I used PETG for strength and but I think PLA+ should work.
0.2 height
50% infill
no supports

Advertising


Issue with this design? Report a problem.

Would you like to support Cults?

You like Cults and you want to help us continue the adventure independently? Please note that we are a small team of 3 people, therefore it is very simple to support us to maintain the activity and create future developments. Here are 4 solutions accessible to all:

  • ADVERTISING: Disable your banner blocker (AdBlock, …) and click on our banner ads.

  • AFFILIATION: Make your purchases online by clicking on our affiliate links here Amazon.

  • DONATE: If you want, you can make a donation via Ko-Fi 💜.

  • WORD OF MOUTH: Invite your friends to come, discover the platform and the magnificent 3D files shared by the community!


Sharing and downloading on Cults3D guarantees that designs remain in makers community hands! And not in the hands of the 3D printing or software giants who own the competing platforms and exploit the designs for their own commercial interests.

Cults3D is an independent, self-financed site that is not accountable to any investor or brand. Almost all of the site's revenues are paid back to the platform's makers. The content published on the site serves only the interests of its authors and not those of 3D printer brands who also wish to control the 3D modeling market.

100% secure payment by credit card, PayPal, Apple Pay, Google Pay, etc.
View all payment options.