Skip to content

Centerlocks for OZ Ultraleggera, OZ Superleggera, and others

Advertising
Advertising
?
Creation quality: 5.0/5 (1 vote)
Evaluation of members on the printability, utility, level of detail, etc.

  • 777 views
  • 4 likes
  • 6 downloads

License
3D design format
STL Folder details Close
  • Attach piece v1 51.5mm.stl
  • Attach piece v1 53.5mm.stl
  • Attach piece v1 60mm.stl
  • Attach piece v1 65mm.stl
  • Attach piece v2 51.5mm.stl
  • Attach piece v2 53mm.stl
  • Attach piece v2 55mm.stl
  • Attach piece v2 57mm.stl
  • Attach piece v2 59mm.stl
  • Attach piece v2 61mm.stl
  • Attach piece v2 63mm.stl
  • Attach piece v2 65mm.stl
  • Attach piece v2 68mm.stl
  • Center Cap.stl
  • Center Nut M8 No Lettering.stl
  • Center Nut M8 With Lettering.stl
  • Plate 142mm.stl
  • Plate 150mm.stl
  • Ring no Lettering.stl
  • Ring with Lettering.stl

Learn more about the formats

Publication date 2024-03-02 at 00:18
Design number 1827159

ReyesR

3D printer file info

3D model description

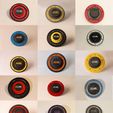
This centerlock fits most wheels, ideally made for OZ Ultraleggera and OZ Superleggera.

Attention: The files do not contain the OZ logo, its a blank cap.

The STLs contain multiple versions of some files.

---Hardware nedeed---
For each set of 4 centerlocks, you will need:

  • 4x M8 bolts with at least 35mm (might need to cut the end if too long)
  • 4x M8 nuts
  • 20x M3x10 (to fix the rings to the plates)
  • 20x M3 self locking nuts

plus
- 4x M8 nuts (if you use the Attach piece V1)

or
- 4x M8 nuts (if you use the Attach piece V2)
- 12x M3x12 bolts (if you use the Attach piece V2)
- 12x M3 self locking nuts (if you use the Attach piece V2)

---Before Printing---
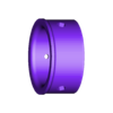
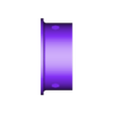
There are multiple sizes for the Attach Piece, you should measure the inside of your wheels before, to check which fits best.

---Instructions---
1 - Put the M8 bolt inside the 'Center Nut'
2 - Put the 'Center cap' inside the 'Center Nut'
3 - Put the 'Ring' on the 'Plate' and attach M3 bolts and M3 self locking nuts
4 - Put the M8 nut on the 'Attach piece V1'
or
Put the M8 nut, M3 bolts and M3 self locking nuts on the 'Attach piece V2'
5 - Combine all together and that's it.

3D printing settings

Usually printed in PETG, works just fine with 20% infill.
Just for safety, I print the Attach Piece with 50% infill.

Advertising


Issue with this design? Report a problem.

Would you like to support Cults?

You like Cults and you want to help us continue the adventure independently? Please note that we are a small team of 3 people, therefore it is very simple to support us to maintain the activity and create future developments. Here are 4 solutions accessible to all:

  • ADVERTISING: Disable your banner blocker (AdBlock, …) and click on our banner ads.

  • AFFILIATION: Make your purchases online by clicking on our affiliate links here Amazon.

  • DONATE: If you want, you can make a donation via Ko-Fi πŸ’œ.

  • WORD OF MOUTH: Invite your friends to come, discover the platform and the magnificent 3D files shared by the community!


Sharing and downloading on Cults3D guarantees that designs remain in makers community hands! And not in the hands of the 3D printing or software giants who own the competing platforms and exploit the designs for their own commercial interests.

Cults3D is an independent, self-financed site that is not accountable to any investor or brand. Almost all of the site's revenues are paid back to the platform's makers. The content published on the site serves only the interests of its authors and not those of 3D printer brands who also wish to control the 3D modeling market.

100% secure payment by credit card, PayPal, Apple Pay, Google Pay, etc.
View all payment options.