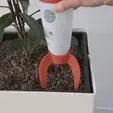
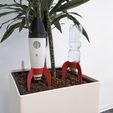
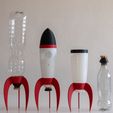
With this modular system you can turn standard PET bottles into a drip irrigation device to keep your plants hydrated while you’re away. Inside the rocket, you can hide a plastic bottle to have an elegant watering solution. Thanks to the windows and holes in the fuselage, you can track how much water is left at any time.
It works with most 500ml (16.9 oz) plastic bottles (soda drinks, coke, etc.) as long as they have a 28mm thread. Not all brands have the same exact threads, and some may not fit perfectly leading to leaks, especially those with a very short thread.
When calibrated according to the steps below, it can dispense drops at a very slow rate, allowing a 500ml bottle to last up to 2 weeks. Make sure to create a very small hole or cut at the bottom of the bottle to prevent it from being airtight; otherwise, a vacuum will form, causing the drops to stop coming out after a few hours.
Also, check if the flow rate suits your plant. For additional flow or duration, a 1.5L bottle can be used without the rocket fuselage, placed directly on the legs—especially useful for larger gardens.
Setup steps:
1. Make sure to print the following three pieces with one of these combinations of materials:
- Bottom screw and inner screw: PETG, Bottle cap: PLA (recommended)
- Bottom screw and inner screw: PLA, Bottle cap: PETG
- All three pieces in PETG
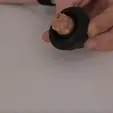
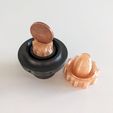
2. Secure the inner screw inside the bottle cap tightly, you can use a small coin to turn it.
3. Screw and tighten the bottom screw inside the other end.
4. Screw the whole cap to the bottle and fit it inside the rocket fuselage upside down.
5. Create a little hole in the bottom part of the bottle. Making a circle with a marker around the hole will help you to identify it easily and cover it with your finger the next time you need to refill the bottle.
6. Mount the fuselage on the legs and cover it.
7. Wait a few minutes until you see some water drops come out.
8. With a stopwatch, measure the time between drops and aim for over 2 minutes:
- if drops come out faster than expected, tighten the bottom screw with your hand. Then wait a few minutes for it to make effect; it can take several drops until the difference in time is noticeable.
- If no water is coming at all or it is too slow, unscrew the bottom screw very slightly and wait for the drops to come out. Alternatively, it can be that the inner screw blocks completely the flow, in that case you may have to disassemble the cap and unscrew it a bit.
9. With a time between drops of 2.5 to 3 minutes, the 500ml of water can last around 2 weeks. The maximum I have achieved is around 5 minutes, tightening all pieces strongly. But not all plants are the same - you may want to give yours some more flow.
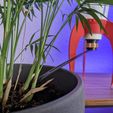
10. After calibrating the flow you can attach the boom to extend the range of the water.
Important: As mentioned above, some parts need to be printed with PETG so that it works as intended. Printing only with PLA seems to work but it won’t provide a very slow drip as it is too rigid to create tight closures; it's better to combine both materials. So far, I had good results with Bambu PLA Basic and PETG Translucent and Basic.
For outdoor use, consider PETG or ASA for increased durability in sunlight-exposed parts.
Let me know in the comments if there is anything that can be improved in the design. Happy printing!

