Description:
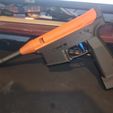
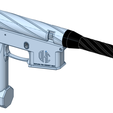
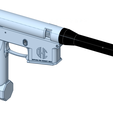
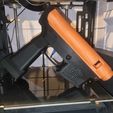
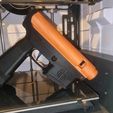
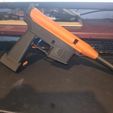
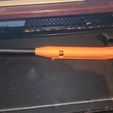
Elevate your Speedsoft game to unprecedented levels with our cutting-edge Vortex SP4C HPA Speedsoft Receiver for Wolverine Category 5 Regulators, available now on CULTS3D. Crafted with precision and designed for peak performance, this receiver is engineered to redefine your airsoft experience.
Purpose-built for HPA drop-in engines, this M4-style receiver is a game-changer in the world of airsoft customization. Say goodbye to gearboxes and welcome easy engine fitment with flawless alignment every time.
Key Features:
Effortless Fitment: No more struggling with gearboxes – the Vortex HPA SP4C guarantees easy engine installation for a hassle-free upgrade process.
Engine Compatibility: Tailored for most HPA drop-in engines on the market, ensuring versatility and performance excellence.
Trigger Board Compatibility: Designed to work seamlessly with a variety of trigger boards, giving you the freedom to choose your preferred setup.
AEG Barrel and Handguard Compatibility: The upper is designed to accommodate AEG barrels, handguards, and barrel nuts, offering a familiar touch to your customization.
Three Fire Positions: Enjoy a full range of tactical options with safe, semi, and full-auto modes, empowering you to dominate the battlefield.
Building Your HPA Receiver - Step-by-Step Guide
Parts You Will Need:
1. PolarStar F2 or Jack / Wolverine Inferno / Reaper
Maxx Hop M4P (works with the original, remove bottom spring)
M4 Small Body Pin or M3x30 Screw
Mag Catch of your choice (or use supplied one with M2x5 screw and spring)
Trigger Board Screw (any from a standard gearbox)
Your choice of trigger (Speed Trigger recommended)
M2x5 Screw for the fire selector, and a spring with ball bearing from any M4 airsoft gun.
barrel length of up to 200mm ( if you require a different length hand guard let me know and i can make you one
9.A M2 square nut and a 10/M2 screw
10.A Pneumatic Push to Quick Connect Fittings 1/8NPT Male X 6mm
- Aeg Safety Latch Spring
Lower Instructions:
Step One: Install Mag Catch
Step Two: Place the full auto switch through the lower receiver from the inside. Attach the fire selector with the optional spring and ball bearing onto the peg,
securing it with an M2x5 screw. Leave it in the upward (semi) position.
Lower is now ready for the trigger box.
Trigger Box Installation:
Step One: Install trigger board and secure with the trigger board screw.
Step Two (for FCU-based boards, Spartan boards skip to step three): Plug wiring connections into the trigger board,
route the FCU and wiring around the peg, and down through the lower gap.
Step Three : Install safety latch with a aeg latch spring
Step Four: Install trigger and trigger spring (if desired), then close the trigger box.
Step Five: Place the fire selector plate and trigger box together and slide them into the lower.
Route the FCU and wiring down the grip and secure using the M4 body pin or an M3x30 screw.
The lower is now fully built.
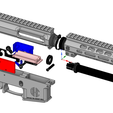
Upper Installations :
Step One: Screw handguard onto upper.
Step Two: Place Maxx Hop into the upper receiver with the barrel spring attached.
Step Three: Attach the desired engine cap to the front of the engine and slide it into the upper receiver. Secure in place using the specific Fitting Plate.
Step Four: Connect solenoid wire to the engine, put the lower and upper receiver together, and secure using the front body pin.
Your replica is now built.
Installing Regulator
- Build receiver and gather the necessary tools, including your Storm cat 5 Regulator, You will need
- A 7/8" spanner,
- A 1/2" spanner or adjustable spanner.
- A M2 square nut.
- A M2*10 screw.
A Pneumatic Push to Quick Connect Fittings 1/8NPT Male X 6mm
For better leverage, it is recommended to screw the regulator onto an empty tank while
performing the installation steps.
Using the 7/8" spanner, carefully remove the gauge from the regulator. Set the gauge
aside for now.
Using a 1/2" spanner or adjustable spanner, remove the quick disconnect fitting from the
regulator.
Place the regulator into the HPA Grip, aligning the holes on the grip with the corresponding holes on the regulator.
Insert the push fit into the hole inside the grip. While holding the hex key through the reg, turn it counter-clockwise to tighten the push fit securely.
Reattach the gauge to the regulator, ensuring it is tightened properly.
screw speedsoft reg cap onto regulator.
Using a razor knife or tube slicer, carefully cut the macro line to the required length.
Using pointed nose pliers, install the macro line into the push-fit connector, ensuring it is
fully inserted.7. Using pointed nose pliers, install the macro line into the push-fit connector, ensuring it is
fully inserted.
Congratulations! The regulator is now successfully installed into the grip.

