Growing up in the 80’s was fantastic! A real renaissance period here in the states. There was so much culture and diversity in TV, music, movies, clothing, ect. No mater what you where into there was something for everyone. It was a great time to be a kid, and were all so excited about the future and what it might bring.
I absolutely loved “Back to the Future Part 2”, which showed us a glimpse of what we might have in 2015. Flying cars, auto drying jackets that talk, hoverboards, food hydrators that somehow enlarge pizza?? I was so excited to see what might be possible!! I remember begging to go out to Pizza Hut to get those supper cool sunglasses, and could have only dreamed of getting an actual Hoverboard.
Well, 2015 came and went. Unfortunately, we don’t have flying cars, or hoverboards, but we do have some amazing 3D printers now. I am at least thankful for that, as I can now create some amazing toys and replicas of my childhood dreams.
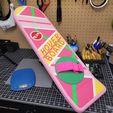
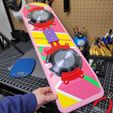
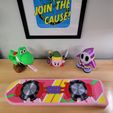
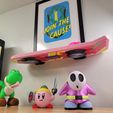
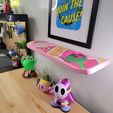
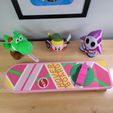
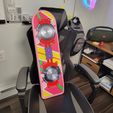
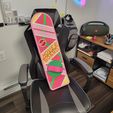
I give to you, my Hoverboard Design to create your own replica that can be mounted to a wall creating a floating shelf.
Once completed the Board measures 30 x 9.5 x 1.25 inch
Filament and additional parts used…
Velcro straps
https://www.amazon.com/dp/B07K685CLP?ref=product_details&th=1
Wall Anchors – about the best dry wall anchors I have ever used and so easily installed
https://www.amazon.com/dp/B0CC1YGYVK?psc=1&ref=product_details
Screws mainly for decoration
https://www.amazon.com/dp/B09955X4K1?psc=1&ref=product_details
PLA Gloop (Glue)
https://www.3dgloop.com/
Oveture Light Pink PLA, Need 2 spools
Duramic Dark Pink (Magenta) PLA
Duramic Red PLA
E-sun Yellow PLA
Sunlu Green PLA
Duramic Darker Green PLA
Mchyi Silk Black PLA
Ziro Silk Gray PLA
Bambu Matt white PLA
Bambu ABS Black
Print settings…
There is a lot of parts to be printed with this design and the weight of all the pieces add up rather quickly. Using the following settings the board will weigh over 2,800 grams. Honestly if you can eliminate some more of that weight I would highly recommend doing so. Two walls, 2 bottom layers, and 4 top layers at 0.2mm layer height with 8% to 10% infill on each part of the board should be sufficient.
The Dark pink pieces will load into your slicer oriented upside down. So even if the top layers of the print is less than desirable this surface will not be seen once the pieces are assembled. All the other colored pieces are oriented right side up, so if you do have an issue with the top surfaces with your print settings you need to flip these pieces over to get the best results.
The keys to attach each piece will need a bit more material as these pieces are crucial for the structural integrity of the board. I printed them out with 3 walls and 25% infill.
If mounting to a wall to use as a floating shelf, please print out the wall mount pieces in ABS. I’m not sure if PETG wouldn’t flex too much to hold the shelf level against the wall. I printed out the V2 wall mount rails at 6 walls and 25% infill in ABS and there was a slight angle to the board mounting it to the wall. Witch was nice to display the board, and I was able to put some printed figures on top without them sliding off, but wanted it to hang perpendicular to the wall and created V3 wall mount parts.
V3 wall mount parts appear to hold up and hang the board perpendicular to the wall when printed out in ABS with 6 walls, and 40% infill.
Pink Main Board parts…
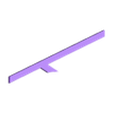
I broke the board down a bit differently so the pieces print out flat on the build plate and require little support material. I created these dove tail style keys to hold the top and bottom pieces together in a way that forces them together creating a better seam, even when printing them on a surface that isn’t perfectly flat. I recommend printing them in this orientation if you are not printing on glass or a mirror.
There are 60mm, 75mm, and 140mm keys to hold these pieces together. All three 75mm keys are used for the tail end of the main board. One 60mm key is for the front center arch piece. The other two are to be placed in the sides of the very back piece next to the tail of the main board.
The two rectangular bent keys to attach the tail can be a bit difficult to orient them correctly. As always dry fit the parts together to make sure you have the correct orientation before glueing the pieces. The shortest part of the key is designed to be inserted in the tail, if that helps.
Assembly…
I highly recommend printing out all the parts and dry fitting everything together before glueing anything.
Start by assembling the pink main board parts first and glueing all the pieces together of the main board to create a map for the other pieces to be added. There are indents in the main board marking the locations of the dark pink pieces. These indents of the dark pink pieces will help guide you to the locations of the other colored pieces.
Print out or study the pictures of the completed board to get a good idea of how to place all the parts on the top and bottom of the assembled board. I laid out all the top, or front pieces first and created the pattern of pieces together before starting to glue anything to the completed main board. Then laid out the back pieces to see where everything went.
Keep in mind that these pieces are designed to fit loosely together. There is a clearance between all the colored pieces. This way if the orientation of a piece glued in place is slightly off it shouldn’t affect the addition of the next piece. You do not want to glue the pieces on the main tightly up against each other.
Make sure to install the Velcro strap around the Dark green foot pad, cut it to length, and cut off the excess logo area before glueing this piece in place to the top of the board.
Attaching the wall mount spacers and the back decor should be done last. You will need the wall mount rails printed out to help you align these pieces. Insert the rails in place while glueing the other pieces to the Board to keep everything aligned, BUT NEVER GLUE THE WALL MOUNT RAILS IN PLACE!
Wall Mounting the rails…
With the board fully assembled correctly, you should be able to insert the wall mount rails in through the wall mount plates and then the bottom hover disks. Side the rails out of the board far enough to mark the wall when holding it up in place. You should have someone help hold the board level and trace out the mounting plates on the wall. You can remove the mounting plates from the rails and mark the three holes in the plate.
Use wall anchors listed above to secure the mounting plates and rails to the wall. The rails will look like they are tilted upwards without the board in place. Once the board is slid onto the rails, they should sit level. Use the Screws listed above to attach the board to the rails.

/https://fbi.cults3d.com/uploaders/16675644/illustration-file/e86db6f2-1f42-4810-838c-99103e80d23d/20240114_092319-1.jpg)
