Skip to content

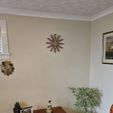
Basic Designer Style Wall Clock - Large

Advertising
Advertising
?
Creation quality: 0.0/5 (0 votes)
Evaluation of members on the printability, utility, level of detail, etc.

  • 78 views
  • 2 downloads

License
3D design format
STL Folder details Close
  • BD-Clock-Align.stl
  • BD-Clock-Centre.stl
  • BD-Clock-End.stl
  • BD-Clock-Hr.stl
  • BD-Clock-Mid.stl
  • BD-Clock-Min.stl
  • BD-Clock-Stem.stl

Learn more about the formats

Publication date 2024-03-17 at 17:22
Design number 1861128

3D printer file info

3D model description

This large designer style wall clock features reflective mosaic tiles to make it shine!

Super easy print and assembly!

Although the clock is quite large (350mm diameter), I printed these on a Flashforge Finder with a bed size of 140mm x 140mm!

I got the mosaic tiles from Ebay here:
https://www.ebay.co.uk/itm/123762662664
The round ones I have used from this pack are 17.5mm in diameter (although it says otherwise in the listing, its the square ones that are 15mm and they are all only a couple of mm in thickness).

If you want to use other sized mirror mosaic round tiles, then just scale all the STL's up using 17.5mm as the dividing number (i.e. want to use 20mm round tiles, then do 20 divided by 17.5 = 1.143 and scale the STL's up by this amount).

3D printing settings

Turn off supports.
Leave bridging on.
Use your own standard bed plate adhesion settings (I don't use anything for these STL's).

The file 'Align' is a set of vertical alignment plinths to allow the mirror tiles to all be perfectly flat within their housing. This helps with how the light reflects off them when the clock is hung. Just select the plinth that suits best, put it on a flat surface, put the 'Mid', 'End' or 'Stem' housing over the top of it upside down, put the mirror tile into the housing and make sure it sits flush with the plinth then glue the mirror tile into place. Do this for all if the 'Mid', 'End' and 'Stem' housings then assemble all the pieces together with glue thereafter. Once the stems are all complete, they can be slotted into the 'Centre' piece. Use a standard clock mechanism with a stalk length of about 15mm.

Need any help with this then just contact me!

Advertising


Issue with this design? Report a problem.

Would you like to support Cults?

You like Cults and you want to help us continue the adventure independently? Please note that we are a small team of 3 people, therefore it is very simple to support us to maintain the activity and create future developments. Here are 4 solutions accessible to all:

  • ADVERTISING: Disable your banner blocker (AdBlock, …) and click on our banner ads.

  • AFFILIATION: Make your purchases online by clicking on our affiliate links here Amazon.

  • DONATE: If you want, you can make a donation via Ko-Fi πŸ’œ.

  • WORD OF MOUTH: Invite your friends to come, discover the platform and the magnificent 3D files shared by the community!


Sharing and downloading on Cults3D guarantees that designs remain in makers community hands! And not in the hands of the 3D printing or software giants who own the competing platforms and exploit the designs for their own commercial interests.

Cults3D is an independent, self-financed site that is not accountable to any investor or brand. Almost all of the site's revenues are paid back to the platform's makers. The content published on the site serves only the interests of its authors and not those of 3D printer brands who also wish to control the 3D modeling market.

100% secure payment by credit card, PayPal, Apple Pay, Google Pay, etc.
View all payment options.