UPDATE
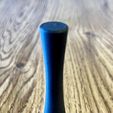
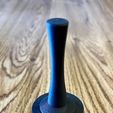
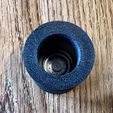
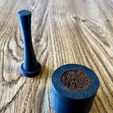
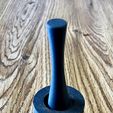
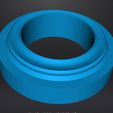
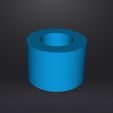
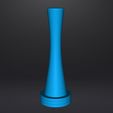
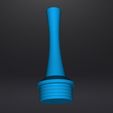
To help prevent over-compressing of Espresso Grounds, I've included a new Tamper to limit the compression stroke. When used with the 12mm Pod Lid, the new tamper (ie. File "9. Stroke Limted Tamper.STL") will bottom out against the Pod Lid with 1mm intrusion into the pod.
I love Nespresso Machines
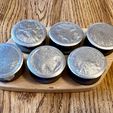
I have a Nespresso Creatista Plus coffee machine, and recently purchased Stainless Steel refills from Capmesso, that use adhesive foil covers. They work great and allow me to use my Coffee bean of choice from local roasters. However, the problem is that reloading Capmesso pods is messy, and I spill a lot of Espresso grounds.
Why I Designed This
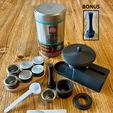
I searched for a mess-free pod-loading solution and was not able to find a commercial or 3D printed option, so I designed a loading system to virtually eliminate all spillage, and this is Version 4 of my design. After testing it a few weeks and being happy with the results, I wanted to post this design in case someone could benefit from it.
STL Files
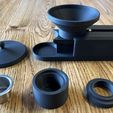
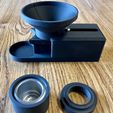
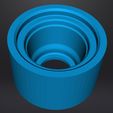
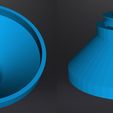
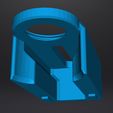
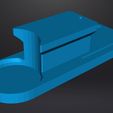
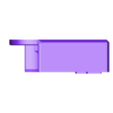
There are now 9 STL's to print, with minimal supports, and only 1 screw required for assembly. (I added a tamper .STL that limits the stroke and prevents over-compression of grounds with the 12mm Pod Lid).
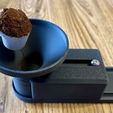
The system works as follows:
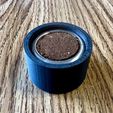
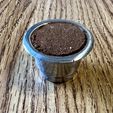
1. Place a stainless Capmesso Pod into the Pod Holder
2. Place a Pod Lid on top of the Pod Holder
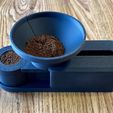
3. Install the Assembled Pod Holder into the Base
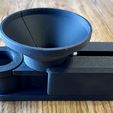
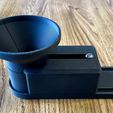
4. Slide the Funnel in position above the Base
5. Remove the dust lid from the funnel
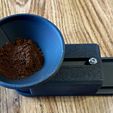
6. Load 20 mL of Espresso grounds into the funnel (ie. 2 doses of grounds from a 10 mL scoop)
7. Carefully slide the funnel away from the Pod Holder
8. Remove the Pod Holder from the base
9. Use the Tamper to press grounds firmly into the pod
10. Remove the Tamper and Pod Lid
11. Push on bottom of Pod Holder to release and remove pod
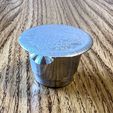
12. Place Pod on a stable surface, and apply adhesive foil.
13. To Fill additional Capmesso pods, repeat steps 1-12.
14. When finished, empty any Espresso from the funnel back into the container, and replace Dust Lid over the Funnel.
Design Notes:
I used a Buttress Thread design to attach the Funnel to the Slide, which allows for removal of the funnel for cleaning, and replacement, and options to upgrade the funnel in the future.
There is one (1) M5x12mm screw required for assembly with a printed sleeve that limits the stroke of the slide, and can be installed after the slide has been assembled.
CapMesso Pod Refill instructions:
1. I use an 40mm Conical Burr coffee Grinder with 24 Grind Settings (link below), and have found that Grind setting #10 provides similar performance to BestPresso Aluminum Pods.
2. Dose grounds into the funnel directly over the CapMesso pod, and without tapping, directly slide the funnel back to make a "cut."
3. Remove the Pod Holder with loose Espresso Grounds, and then insert the Tamper tool to compress grounds flush with the top of the CapMesso Pod.
4. Remove the CapMesso Pod from the Holder, and apply an adhesive Aluminum Foil from CapMesso.
5. Weighing grounds with this method I have measured 5.380 - 5.390 grams of Espresso per pod, which is in the ballpark with BestPresso pods.
Experimental Work for Grind Size:
- I have experimented with different Compaction Levels by varying the height of "Pod Lid.STL" file over a range of 4 sizes, including: 4.5mm (.178in), 7.0mm (.278in), 9.5mm (.378in), and the one included in this kit, 12mm (.478in)
- The 12mm Pod Lid with Espresso Grind Setting #10 (coarser side of Espresso grind), captures the same mass of grounds (5.385g) as a BestPresso pod, and can be pressed to fit the pod. When used in Nespresso Creatista machine, I see no channeling, as the grind is course enough to allow water to flow freely through the grounds.
- Experimenting with finer grind settings (ie, <= Setting #6), my grinder produces too many "fines" which block the free-flow of water through my Nespresso machine, and produces channeling. Some extremely fine grinds (ie, <= Setting #3), produces no flow through the pod, and water escapes around the pod, indicating too fine of grind for this machine.
UPDATE
- I reduced the grind size further (from #10 to #9) to make a smaller grind size and reduce compaction level. The result is a finer grind, with no fines, no channeling, and a better extraction with my Nespresso Creatista. Definitely dial in with your own grinder, but for my setup #9 is so far an "Ideal" grind setting for me. Working with the compression limited tamper, it's an ideal setup.
Grinder Link:
(https://www.amazon.com/gp/product/B0CR4713ZN/ref=ppx_yo_dt_b_search_asin_image?ie=UTF8&th=1)

/https://fbi.cults3d.com/uploaders/17548748/illustration-file/5d05ea6c-54dc-4938-bcb8-74ae21ed8020/1a.-Nespresso-Loader.jpg)
