Skip to content

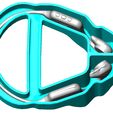
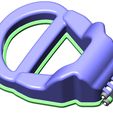
Bone Conductor Headphone Case

Advertising
Advertising
?
Creation quality: 0.0/5 (0 votes)
Evaluation of members on the printability, utility, level of detail, etc.

  • 132 views

License
3D design format
STL Folder details Close
  • Case.STL
  • Hinge Pieces.STL
  • Hinge Pin Nails.STL
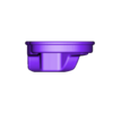
  • Lid.STL
  • New Case + Lid.STL

Learn more about the formats

Publication date 2024-03-18 at 04:01
Design number 1862742

3D printer file info

3D model description

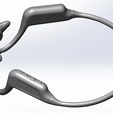
This is a 3D Printed Protective Carrying Case for traveling with NANK Bone Conductor Headphones. This was designed for the "NANK Runner Diver2" model, but may fit other models as well.

Why Design This?
I recently traveled a few hours by car to my parents home over the holidays, and packed my favorite bluetooth Bone Conductor headphones, only to discover they were damaged in transit. I was able to repair them with Cyanoacrylate glue (aka "SuperGlue"), but this experience highlighted a need for a 3D Printed Protective Case for my bone conductor headphones.

Bone Conductor Model
I purchased my Bone Conductor headphones from Amazon for $140: NANK Runner Diver2 Bone Conduction Headphones (IP68 Swimming Headphones with MP3 Player Built-in 32G Memory, Bluetooth 5.3 Open Ear Headphones with CVC6.0).

3D Scanner Was Used
I used the Einscan SP 3D scanner to create a 3D image of the head phones, and then designed a hinged case with snap detail to hold the headphones.

Hinge Details
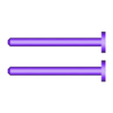
The hinge is made with 3 connecting pieces that attach to both halves of the carrying case via 2 hinge pins that are a common construction nail, cut to length.

Snap Closure Design
There is a snap-detail in 2 locations on the top and bottom of the carrying case, that keeps it safely closed while protecting your bone conducting headphones.

3D printing settings

3D Printed on a Prusa i3 MK3s with PETG filament, 0.4mm nozzle, 0.2mm layer height, 3 perimeters, 4 solid bottom layers, and 5 solid top layers.

Assembly Instructions
Assemble with 2 construction nails, cut to length. Place the cover on the case, assemble the 3 smaller hinge pieces, and slide 2 nails through the hinge holes. Hinge is designed with clearance for the nails. Then use a pliers to force the small ring onto the end of the nail; the ring is an interference fit, designed to grip tightly to the nail, and preserve the hinge integrity.

Advertising


Issue with this design? Report a problem.

Would you like to support Cults?

You like Cults and you want to help us continue the adventure independently? Please note that we are a small team of 3 people, therefore it is very simple to support us to maintain the activity and create future developments. Here are 4 solutions accessible to all:

  • ADVERTISING: Disable your banner blocker (AdBlock, …) and click on our banner ads.

  • AFFILIATION: Make your purchases online by clicking on our affiliate links here Amazon.

  • DONATE: If you want, you can make a donation via Ko-Fi πŸ’œ.

  • WORD OF MOUTH: Invite your friends to come, discover the platform and the magnificent 3D files shared by the community!


Sharing and downloading on Cults3D guarantees that designs remain in makers community hands! And not in the hands of the 3D printing or software giants who own the competing platforms and exploit the designs for their own commercial interests.

Cults3D is an independent, self-financed site that is not accountable to any investor or brand. Almost all of the site's revenues are paid back to the platform's makers. The content published on the site serves only the interests of its authors and not those of 3D printer brands who also wish to control the 3D modeling market.

100% secure payment by credit card, PayPal, Apple Pay, Google Pay, etc.
View all payment options.