Skip to content

Filament Spool Labeling System

Advertising
Advertising
?
Creation quality: 0.0/5 (0 votes)
Evaluation of members on the printability, utility, level of detail, etc.

  • 100 views

License
3D design format
Folder details Close
  • Label-Template.stl
  • filament_label_clip.4mm_Nozzle.3mf
  • filament_label_clip.6mm_Nozzle.3mf

Learn more about the formats

Publication date 2024-03-18 at 02:26
?
Published to Thingiverse on: 2024-03-11 at 20:14
Design number 1862301

3D printer file info

3D model description

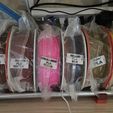
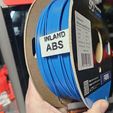
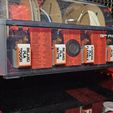
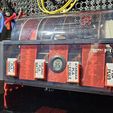
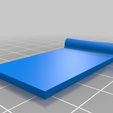
So i was looking for Filament labels i could use with my vacuum sealed bags, there were options out there but i ended up making my own simple design with a way to mount the tag you just took off your spool to the front of the ams so its not sitting around getting ready to get lost!

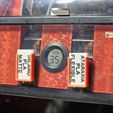
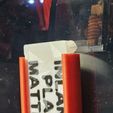
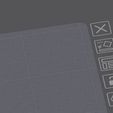
Its a fairly basic design, leveraging your slicer for the text on your labels consisting of a label blank and a mount to secure to the front of your ams with 3m VHB tape (or any thicker double sided tape)

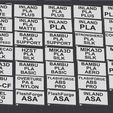
I have 2 print profiles included, one for .4mm nozzle and one for .6mm nozzle. The 3mf files have a lot of labels from my last batch i made (24 to be exact), so you can edit the text on those, delete the remaining etc. Printing 24 of these labels took 2.5 hours including 5 color changes by the AMS, Doing a single label is around 20-25 minutes so the more you do the quicker it will be.

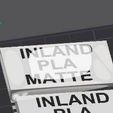
You will want to print these face down, but they need to be upright for the text to attach to the model surface properly.

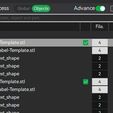
Select the label.tile that you want to change, you must be in objects, not global. But once you select the tile, it will highlight the blank itself along with the 2 or 3 text objects. You can right click a text object and choose Edit Text
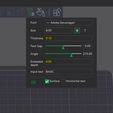
Make note of the text settings, specifically thickness and embedded depth. (To limit color changes in the ams, make the embedded depth 2 layers deep, So .4 if you are using .2mm layers (the images shown, i was using my .6mm nozzle)
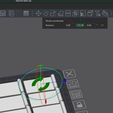
After you have your tiles situated, you need to flip them face down on the build plate by pressing β€œF” and selecting the center face like this:
Slice and print and you're done.

I found that if i tried to edit the tiles while they were face down, bambu studio did all sorts of crazy things with the text, so if you need to make more changes, just select the tile you need to modify, and rotate it on the Y axis, back to zero. and repeat the process

Enjoy!

Advertising


Issue with this design? Report a problem.

Would you like to support Cults?

You like Cults and you want to help us continue the adventure independently? Please note that we are a small team of 3 people, therefore it is very simple to support us to maintain the activity and create future developments. Here are 4 solutions accessible to all:

  • ADVERTISING: Disable your banner blocker (AdBlock, …) and click on our banner ads.

  • AFFILIATION: Make your purchases online by clicking on our affiliate links here Amazon.

  • DONATE: If you want, you can make a donation via Ko-Fi πŸ’œ.

  • WORD OF MOUTH: Invite your friends to come, discover the platform and the magnificent 3D files shared by the community!


Sharing and downloading on Cults3D guarantees that designs remain in makers community hands! And not in the hands of the 3D printing or software giants who own the competing platforms and exploit the designs for their own commercial interests.

Cults3D is an independent, self-financed site that is not accountable to any investor or brand. Almost all of the site's revenues are paid back to the platform's makers. The content published on the site serves only the interests of its authors and not those of 3D printer brands who also wish to control the 3D modeling market.
100% secure payment by credit card, PayPal, Apple Pay, Google Pay, etc.
View all payment options.