Skip to content

NIMITZ CLASS AIRCRAFT CARRIER DIORAMA AND DISPLAY BASE (1:48 SCALE 300MM)

Advertising
Advertising
?
Creation quality: 5.0/5 (1 vote)
Evaluation of members on the printability, utility, level of detail, etc.

  • 703 views
  • 16 likes
  • 5 downloads
  • 1 collection

License
3D design format
STL Folder details Close
  • Nimitz Claass 148 PtC 300.stl
  • Nimitz Claass 148 PtE 300.stl
  • Nimitz Class 148 PtA.stl
  • Nimitz Class 148 PtB.stl
  • Nimitz Class 148 PtD.stl

Learn more about the formats

Publication date 2024-03-19 at 20:10
Design number 1866674

3D printer file info

3D model description

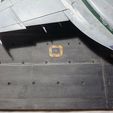
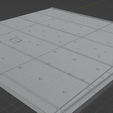
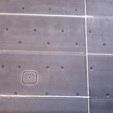
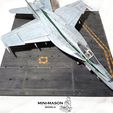
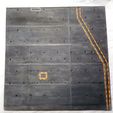
A textured diorama and display base replicating the flight deck of the US navy's Nimitz class aircraft carriers.
The base is 300mm x 300 and 8mms in depth.

Intended for resin printers.

Others Scales and Sizes will soon be available.

This is a multi-part kit comprising 5 sections which need to be fitted together and fixed to a wooden board.
The total print for all sections is about 460 grams of resin.

*** Important: The files are fairly large, both in terms of the file size and physical size. The sections have a Z dimension of up to 195mm and a length of up to 182mm, so smaller printers will be unable to print them. While the model can be rescaled, the tolerances will be scaled in kind, affecting fitment and necessitating additional trimming. The model has only been printed thus far at 1:48 scale. ***

Example printed with Creality resin on an Anycubic Photon Mono X.
The Model aircraft pictured is for illustration purposes only and is not a part of the model.

Follow on Instagram for updates and new model releases:
https://www.instagram.com/minimasonmodels/

or Facebook
https://www.facebook.com/MiniMasonModels

3D printing settings

The sections need to be printed standing on end to give the best resolution and space on the build plate. Files are pre-orientated.

The model has support structures included where necessary.

A raft is recommended to keep the sections stable and avoid shifting layers, but the model has been successfully printed without it.

Uneven curing (in sunlight without a curing machine will likely result in warping). This can be rectified by submerging in hot water for about 15min to soften it up and then weighing it down with a book.

I recommend filled the seams between the sections with either UV resin (cleaning between applications to avoid losing detail) or with model putty (see phots).

Advertising


Issue with this design? Report a problem.

Would you like to support Cults?

You like Cults and you want to help us continue the adventure independently? Please note that we are a small team of 3 people, therefore it is very simple to support us to maintain the activity and create future developments. Here are 4 solutions accessible to all:

  • ADVERTISING: Disable your banner blocker (AdBlock, …) and click on our banner ads.

  • AFFILIATION: Make your purchases online by clicking on our affiliate links here Amazon.

  • DONATE: If you want, you can make a donation via Ko-Fi 💜.

  • WORD OF MOUTH: Invite your friends to come, discover the platform and the magnificent 3D files shared by the community!


Sharing and downloading on Cults3D guarantees that designs remain in makers community hands! And not in the hands of the 3D printing or software giants who own the competing platforms and exploit the designs for their own commercial interests.

Cults3D is an independent, self-financed site that is not accountable to any investor or brand. Almost all of the site's revenues are paid back to the platform's makers. The content published on the site serves only the interests of its authors and not those of 3D printer brands who also wish to control the 3D modeling market.
100% secure payment by credit card, PayPal, Apple Pay, Google Pay, etc.
View all payment options.