VergeFlow Water Usage Clock - Verge & Foliot Escapement
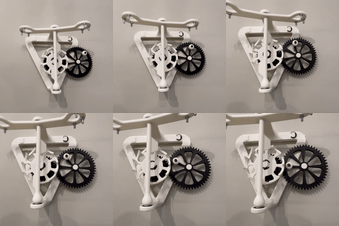
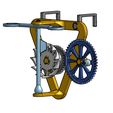
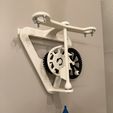
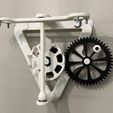
Move over toothbrush holders and soap trays, there's something more exciting for your bathroom. The Verge and Foliot Gravity Escapement has been around since the early 1200s, yet it's still one of the more interesting escapements to watch. I specifically designed this to be used as a "water usage timer", as a fun and interesting take on monitoring how long you're in the shower and to add some fun mechanical art to a room you use every day.
Just to be clear, this is a mechanical art piece and will not actually run the typical length of a shower. It's more of a fun visual reminder to take quick showers, and get to watch some interesting mechanical gears in actions.
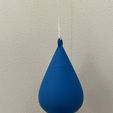
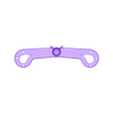
Just crank it up and enjoy watching the motion of the mechanisms. There are several water themed elements throughout the design, such as the water drops on the foliot, the base of the verge, and of course the water drop weight. This 3D printed piece, while functional, servers more as an art installation and a reminder to save water, than actually resetting it with each shower.
You can modify the timing of the escapement by changing the amount of weight on the top arm (the foliot) or the amount of weight placed within water drop. The mechanisms themselves have some resistance to turning, so you may want to add some lubrication to the shafts to ensure smooth turning.
Purchased Parts List
- (2) ¼"-20 x ½" bolt
- (2) ¼" washer
- 5 to 10' of high strength fishing line
- (2) 608 2RS ball bearings
- Small weights, such as BBs or assortment of bolts for water drop and foliot weights.
- PLA glue or super glue
- (2) Large 3M Command Strips
Printing & Assembly
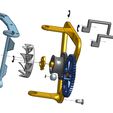
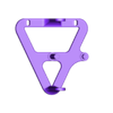
- Print Components: Begin the adventure by printing the parts in the following order: Base Plate, Verge and Foliot, Escapement Gear, Spur Gears, and Clips. Finish with the Water Drop Weight for efficient workflow.
- Install Bearings: Place the bearings into the top and bottom openings of the Base Plate. Use a small rubber mallet for gentle taps if they fit tightly, being cautious not to damage the printed arms.
- Assemble Escapement Wheel: Connect the Ratchet Piece with 6-Fins to the back of the Escapement Wheel, ensuring the 3 alignment pins fit snugly. A small rubber mallet may help to secure them together gently.
- Combine Ratcheting Piece and Gear: Attach the small ratcheting piece to the Escapement Wheel, then fix this assembly onto the smaller of the Spur Gears that includes the fishing line hub. This configuration allows for later resetting of the escapement via the crank.
- Mount Middle Shaft Assembly: Slide the previously assembled components onto the middle shaft of the Base Plate. Secure them in place with a C-Clip.
- Install Large Spur Gear: Position the large Spur Gear onto the smaller right shaft of the Base Plate. Lock it in place using another C-Clip.
- Attach Handle: Fit the handle onto the tiny shaft protruding from the larger Spur Gear. Use the smallest C-Clip provided to secure it.
- Ensure Smooth Gear Movement: Before proceeding, manually rotate the gears to confirm they move smoothly without obstruction.
- Install Verge and Foliot: Place a washer at the bottom of the Verge, then secure it with a ¼" bolt through the Base Plate and into the Verge. Repeat the process at the top. Tighten the bolts firmly but avoid overtightening.
- Prepare for Wall Mounting: Fix the back bottom pin into the designated hole on the back of the Base Plate. Attach the Command Strip hangers and secure the final two C-Clips in place.
- Finalize Water Drop Weight: Fill the Water Drop Weight with the desired amount for BBs or loose bolts. Seal the cap using high-strength super glue and ensure it fully cures for full strength.
- Attach Fishing Line: Tie one end of the fishing line to the hub on the small Spur Gear, threading it through the provided hole. Measure and cut the appropriate length of line, then tie the Water Drop Weight to the other end.
- Wall Mounting: Carefully mount the escapement on the wall at the desired location, ensuring it's securely attached.
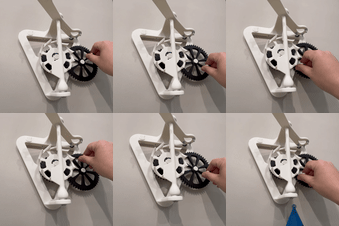
- Operation Test: Gently turn the handle clockwise to wind the mechanism. Release and watch gravity power your Mechanical Escapement Model. Add weights as necessary using the holes in the foliot.
Woo hoo! You've just completed an awesome project, share your make and stay awesome.
Support & Feedback
Your input is invaluable as I'm always seeking ways to improve. I welcome your feedback, suggestions, and comments. If you require assistance or have any questions, please don't hesitate to get in touch.
Credits
I would like to extend a special acknowledgment to JBV Creative, whose innovative designs have inspired my work. While I have not downloaded or purchased the Verge escapement model, the creativity and ingenuity behind it influenced my approach. Go check out his stuff. My design was conceived and developed from the ground up in OnShape, ensuring it stands as a unique creation.
What creations would you like to see next?

/https://fbi.cults3d.com/uploaders/32041845/illustration-file/ed92db24-01ac-4c73-9c0d-b9f3c2f90844/Verge-2-Low.gif)
