Skip to content

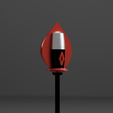
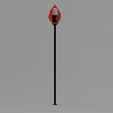
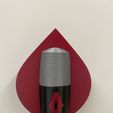
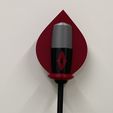
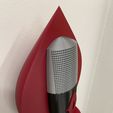
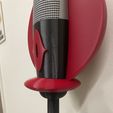
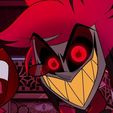
Alastor's Microphone Staff/Cane from Hazbin Hotel Cosplay Prop (Toolless!) (Accurate Size!! Over 4.5 feet tall!))

Advertising
Advertising
?
Creation quality: 0.0/5 (0 votes)
Evaluation of members on the printability, utility, level of detail, etc.

  • 629 views
  • 1 download

License
3D design format
STL Folder details Close
  • Alastor Microphone Complete.stl
  • Cane 0 (bottom).stl
  • Cane 1.stl
  • Cane 2.stl
  • Cane 3.stl
  • Cane 4.stl
  • Cane 5.stl
  • Cane 6.stl
  • Cane 7 (top).stl
  • Eye.stl
  • Large Part (bottom).stl
  • Large Part (top).stl
  • Large Part.stl
  • Mic Lower.stl
  • Mic Upper.stl
  • Top Base.stl

Learn more about the formats

Publication date 2024-03-20 at 01:58
Design number 1867171

JSprints

3D printer file info

3D model description

Hello!

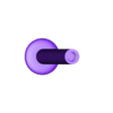
Here is Alastor's Microphone/Staff/Cane? from Hazbin Hotel!! Most parts have some method of joinery to make sure the fitment is correct, so assembly is very easy, just requires glue or plastiweld. I personally recommend plastiweld, but a good Loctite super glue should work fine as well. Of course be careful when using either.

Printing

  • Cane parts (BLACK)
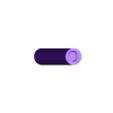
    Cane 7 can be printed without supports. Cane 0 will need some supports near the base, but ensure that there are no supports between the threads! As for the others, place them with the internal threads down and external threads above. For ease, you can group Canes 1-6 onto one build plate. The flat overhang in the bottom of the internal thread may need support, or can be bridged if you have your printer dialed in. I printed with supports just on that flat face and it was fine. Again, make sure your supports don't end up between the threads! Print all of these at infill of 20% or higher. 25% is most recommended for strength.

  • Eye (RED)
    This piece is kinda awkward due to the curvature. My recommendation is to print it vertically with supports at the base to prevent it from falling over, and to get the parts that overhand on the left and right. Print with low-ish infill (~10%)

  • Mic Lower (BLACK)
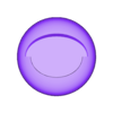
    Place upside-down (top face on the bed). I wouldn't recommend printing it on its back because the layer lines will look super obvious. Supports are just needed below the center of the eye and a tiny bit in the corners of the eye pocket as well. Print with low (~5%) infill.

  • Mic Upper (SILVER or WHITE) (canonically white in season 1, but I think silver looks better in real life)
    Place right-side-up on bed. No supports needed. Again, don't print on the back. Print with low (~5%) infill.

  • Top base (RED)
    Place with the bottom part (NOT the part with the two sections cut out) on the build plate. Some supports are necessary near the base. Print with low (~5%) infill.

  • Large part (RED)
    This part will need to be cut in two. I have provided it cut in two, but you can also do it yourself in Cura or PrusaSlicer. I would recommend printing it on its flat face, not on the face where the two parts join. Although this would result in some layer lines, this is done to reduce warping. If you feel confident in your printer's ability to not warp the print, then place a large brim (~1cm) on each part and place it on the bed where the two parts would join together. Print with low (~5%) infill. This can be printed in one piece on a Prusa XL or a similar sized printer.

Assembly

  1. Cane/Shaft
    Remove the supports from the internal thread part of each part. These were printed with Fusion's default tolerances in threads, so they fit VERY tight. This was by design, as they hold really nicely once forced together. Keep in mind that they are not intended to come apart. Starting from bottom to top, thread the bottom piece onto Cane 1 leaving a small gap. Put some glue/plastiweld in the gap, then turn all the way shut. Repeat with all of the next pieces. Be careful with the top part (Cane 7) as the corners are sharp, I recommend using gloves or a rag to hold on with.

  2. Top
    If you printed your Large Part in two pieces, glue them together. Then starting with Top Base, place the assembled Large Part in the larger semicircle with glue or plastiweld. The Eye must be press-fit into the Mic Lower. Using a rubber mallet with a rag over the eye, gently hammer it into place. It shouldn't need any glue. Then, place this assembled Mic Lower + Eye into the smaller semicircle and glue it to the Top Base and the Large Part at the same time. Then, glue Mic Upper on top of that, to the Mic Lower and Large Part. This part has no joinery, so make sure its lined up before gluing. Then attach the whole head assembly to the top of the cane with glue. Again, this part has no joinery so make sure it is centered.

Thank you!

Thank you so much for stopping by. If you built it, congrats!! And thank you for supporting me. Let me know in the comments if there are any questions, and please post your make as well!

3D printing settings

See description instructions for FDM printing specifics.

Advertising


Issue with this design? Report a problem.

Would you like to support Cults?

You like Cults and you want to help us continue the adventure independently? Please note that we are a small team of 3 people, therefore it is very simple to support us to maintain the activity and create future developments. Here are 4 solutions accessible to all:

  • ADVERTISING: Disable your banner blocker (AdBlock, …) and click on our banner ads.

  • AFFILIATION: Make your purchases online by clicking on our affiliate links here Amazon.

  • DONATE: If you want, you can make a donation via Ko-Fi πŸ’œ.

  • WORD OF MOUTH: Invite your friends to come, discover the platform and the magnificent 3D files shared by the community!


Sharing and downloading on Cults3D guarantees that designs remain in makers community hands! And not in the hands of the 3D printing or software giants who own the competing platforms and exploit the designs for their own commercial interests.

Cults3D is an independent, self-financed site that is not accountable to any investor or brand. Almost all of the site's revenues are paid back to the platform's makers. The content published on the site serves only the interests of its authors and not those of 3D printer brands who also wish to control the 3D modeling market.

100% secure payment by credit card, PayPal, Apple Pay, Google Pay, etc.
View all payment options.