Skip to content

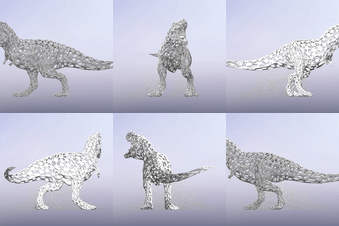
Dinosaur - Trex - Spider Web Parametric

Advertising
Advertising
?
Creation quality: 0.0/5 (0 votes)
Evaluation of members on the printability, utility, level of detail, etc.

  • 139 views

License
3D design format
STL Folder details Close
  • 04.stl

Learn more about the formats

Publication date 2024-03-24 at 22:14
Design number 1877616

3D printer file info

3D model description

Embark on a Journey into the World of Art and Aesthetics! 🌌✨

Dear art and design enthusiasts,

We invite you to the enchanting universe of low-poly 3D models, where every line is a piece of art! Takes pride in presenting a dream of art where every detail is meticulously chosen, colors dance in harmony, and aesthetic designs take the spotlight.

Why Our Models?

🌈 Visual Extravaganza: Our models provide a visual feast, drawing inspiration from the depths of the color palette. We speak the language of art through aesthetic designs that captivate the eye.

🌍 Diverse Categories: From toys to architecture and pieces inspired by nature, we ignite your creativity with a wide range of models. We're here to support you in every project.

πŸš€ Ease of Use: Presented in the popular STL format, our models await to bring your projects to life. Get ready for limitless creativity in the 3D world!

Join Our Aesthetic World!

We invite you to the magical world where colors and forms intertwine. In a realm where each detail carries meaning and art surpasses imagination, find your place.

Wishing You Days Blended with Art and Aesthetics!

3D printing settings

Here are the corresponding settings in Ultimaker Cura based on the parameters you provided:

Profile: Choose or create a profile with a layer height of 0.2mm.

Wall Line Count: Under "Shell" settings, set the "Wall Line Count" to 4.

Top/Bottom Thickness: In the "Shell" settings, set the "Top/Bottom Thickness" to 1.12mm.

Top/Bottom Layers: Still under "Shell," set the "Top Layers" and "Bottom Layers" both to 4.

Infill: In the "Infill" settings, set the infill pattern to your preference (e.g., "Zig Zag") and adjust the infill density to at least 10%. You can enter the desired infill percentage directly in the Infill Density field.

After adjusting these settings, you can review other parameters such as print temperature, print speed, support structures, and build plate adhesion settings based on your specific printer and material requirements. Always check the preview in Ultimaker Cura to ensure the slicing results align with your expectations before initiating the actual 3D print.

Advertising


Issue with this design? Report a problem.

Would you like to support Cults?

You like Cults and you want to help us continue the adventure independently? Please note that we are a small team of 3 people, therefore it is very simple to support us to maintain the activity and create future developments. Here are 4 solutions accessible to all:

  • ADVERTISING: Disable your banner blocker (AdBlock, …) and click on our banner ads.

  • AFFILIATION: Make your purchases online by clicking on our affiliate links here Amazon.

  • DONATE: If you want, you can make a donation via Ko-Fi πŸ’œ.

  • WORD OF MOUTH: Invite your friends to come, discover the platform and the magnificent 3D files shared by the community!


Sharing and downloading on Cults3D guarantees that designs remain in makers community hands! And not in the hands of the 3D printing or software giants who own the competing platforms and exploit the designs for their own commercial interests.

Cults3D is an independent, self-financed site that is not accountable to any investor or brand. Almost all of the site's revenues are paid back to the platform's makers. The content published on the site serves only the interests of its authors and not those of 3D printer brands who also wish to control the 3D modeling market.
100% secure payment by credit card, PayPal, Apple Pay, Google Pay, etc.
View all payment options.