Skip to content

Corsair 600T Computer Case Front Mounted AIO Adapter Bracket

Advertising
Advertising
?
Creation quality: 0.0/5 (0 votes)
Evaluation of members on the printability, utility, level of detail, etc.

  • 70 views

License
3D design format
FCSTD and STL Folder details Close
  • AioLowerBracket.FCStd
  • AioLowerBracket.stl

Learn more about the formats

Publication date 2024-03-26 at 02:33
Design number 1880763

3D printer file info

3D model description

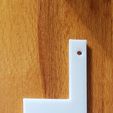
This bracket allows you to adapt and mount a 240mm or 360mm AIO water cooler to the front of the older Corsair 600T case. It provides hole alignment with the front case fan holes and adapts it to two standard consecutive 120mm fans, allowing for front mounted AIO support.

Backstory

I wanted to use my old Corsair 600T case with a newer PC build while waiting on a case I had back ordered. I was upgrading from air cooling to a 360mm AIO cooler. This case as it stands could support at most a 240mm AIO mounted to the top. All DIY instructions for fitting a 360mm AIO involved cutting out a large chunk of the top of the metal chassis and plastic paneling. This was more modification than what I wanted to do and was irreversible.

So instead I looked into other places to mount it and came to the conclusion the front would be best. Instead of cutting into the case I simply had to remove the front external drive tray. I no longer needed any external facing drives and the modification would be much less intrusive and possibly reversible with some small bolts or pop rivets. The front is also all mesh so there were no air flow restrictions and the external shell would remain as is.

Instructions for use

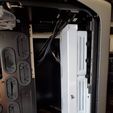
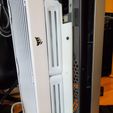
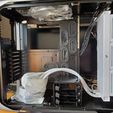
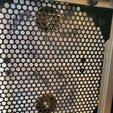
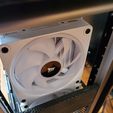
See photos for examples of placement and orientation.

  1. Print two copies of the bracket using a sturdy plastic (ABS, PLA, etc.)
  2. Remove all components from the computer case.
  3. Remove all of the external plastic case panels. Search online for how to do this.
  4. Unscrew and remove the front hard drive trays, including the plastic riser on the bottom.
  5. Remove the front fan, hold on to the rubber grommets and screws.
  6. Optionally, unplug the fan control cables from the top control panel. I didn't find much use for them anymore and they only took up extra space.
  7. With just the bare metal chassis, identify the pop rivets holding the external drive tray in. There should be around 18 in total.
  8. In a location where you can easily clean up metal shavings, use a drill with an 1/8 inch drill bit to drill out each pop rivet. Simply drill through the middle of the rivet to remove.
  9. Screw the bracket to both long sides of the AIO.
    • The bracket should be flush with the bottom of the AIO.
    • The AIO tubes should be at the bottom.
    • The narrow edge of the bracket facing towards the top.
    • The side of the bracket with two holes facing outwards.
    • Either screw the bracket in a pull configuration to the front of the fans or in a push configuration directly on the AIO radiator.
  10. Connect any cables or run any wires for the AIO as space may be limited after it is in place.
  11. Line up the outside holes of the bracket with the holes for the front chassis fan. Use the screws and grommets from the front case fan and screw directly into the bracket. The plastic should be pliable enough for the threads to grab and take hold.
  12. Reassemble the external panels and place a hard drive tray in the alternative slot if necessary.

What's included

A stl file as well as a fully parameterized FreeCAD model is provided to allow for tweaking the design to match your AIO and use case.

Precautions

The main cautions are that the bracket is fairly thin and only two thirds of the AIO is actually screwed in, so be careful when moving the computer. No guarantees or warranties are provided with the use of this design.

Advertising


Issue with this design? Report a problem.

Would you like to support Cults?

You like Cults and you want to help us continue the adventure independently? Please note that we are a small team of 3 people, therefore it is very simple to support us to maintain the activity and create future developments. Here are 4 solutions accessible to all:

  • ADVERTISING: Disable your banner blocker (AdBlock, …) and click on our banner ads.

  • AFFILIATION: Make your purchases online by clicking on our affiliate links here Amazon.

  • DONATE: If you want, you can make a donation via Ko-Fi πŸ’œ.

  • WORD OF MOUTH: Invite your friends to come, discover the platform and the magnificent 3D files shared by the community!


Sharing and downloading on Cults3D guarantees that designs remain in makers community hands! And not in the hands of the 3D printing or software giants who own the competing platforms and exploit the designs for their own commercial interests.

Cults3D is an independent, self-financed site that is not accountable to any investor or brand. Almost all of the site's revenues are paid back to the platform's makers. The content published on the site serves only the interests of its authors and not those of 3D printer brands who also wish to control the 3D modeling market.

100% secure payment by credit card, PayPal, Apple Pay, Google Pay, etc.
View all payment options.