Filament Spool Rewinder Improvements
Filament Spool Rewinder Improvements


Print Profile(1)
Description
Remix of a popular filament spool rewinder.
The standard rewinder supports using a manual crank or using a drill.
I tried the drill option and stripped the adapter due to the torque of driving a loaded takeup spool.
I also noticed several other problems with the standard model.
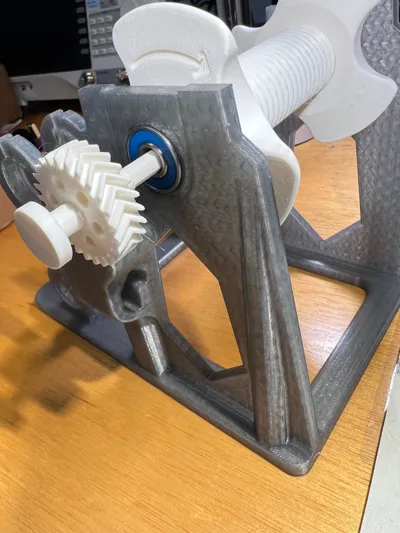
- During rapid rewinding, there is too much friction between the stand and the takeup spool axle.
I redesigned the takeup spool axle and stand areas to put bearings on both sides.
I also included a stand model with these changes integrated.
There is also some adapter models to convert an existing stand to support the bearing modification.
NOTE: Using the adapters with an existing stand, can cause the spool to want to jump out of the stand when you stop rewinding, due to inertia of the loaded takeup spool.
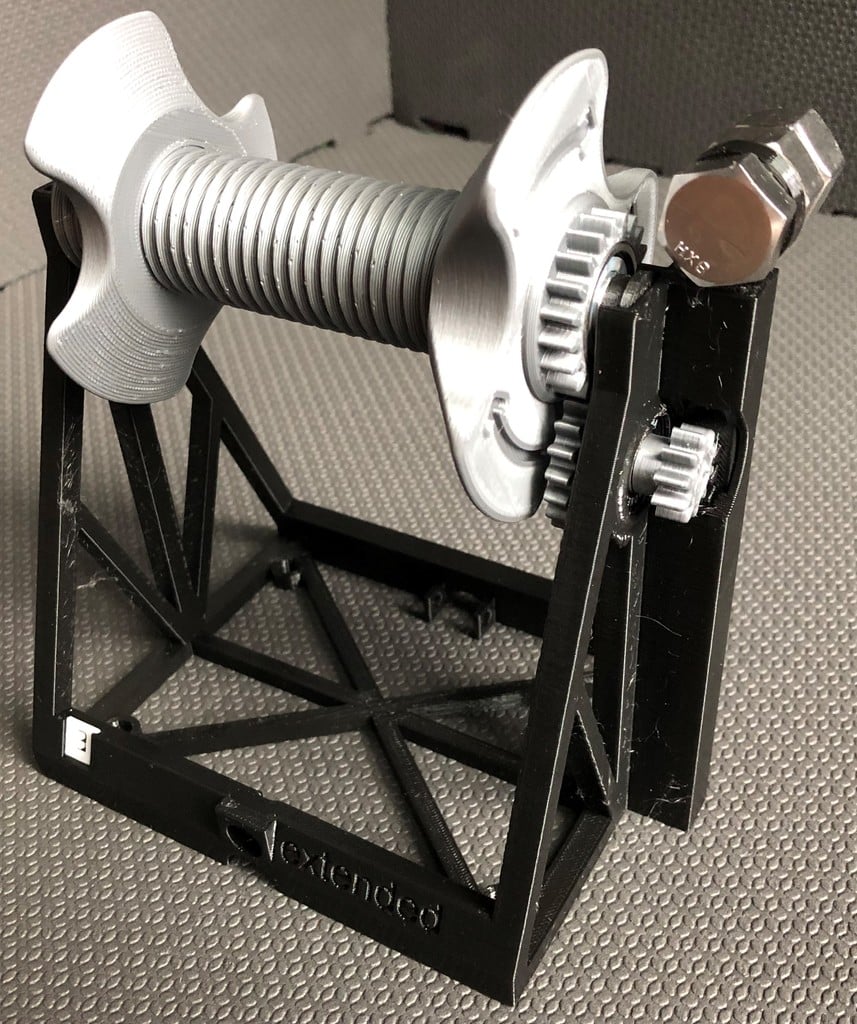
- I didn't like having to use/print adapter washers to fit a spool hub interior dimension. The first spools I tried, the adapters
were for hubs with bigger diameter spool interiors and they didn't fit my spools. I remixed a screw axle with end nuts from another
spool holder that I liked a lot. I used my spool holder for the donor spool (which has that style axle) and printed a new axle
for the takeup spool. This should allow any almost any diameter interior hub for either spool (takeup or donor). No adapters
required.
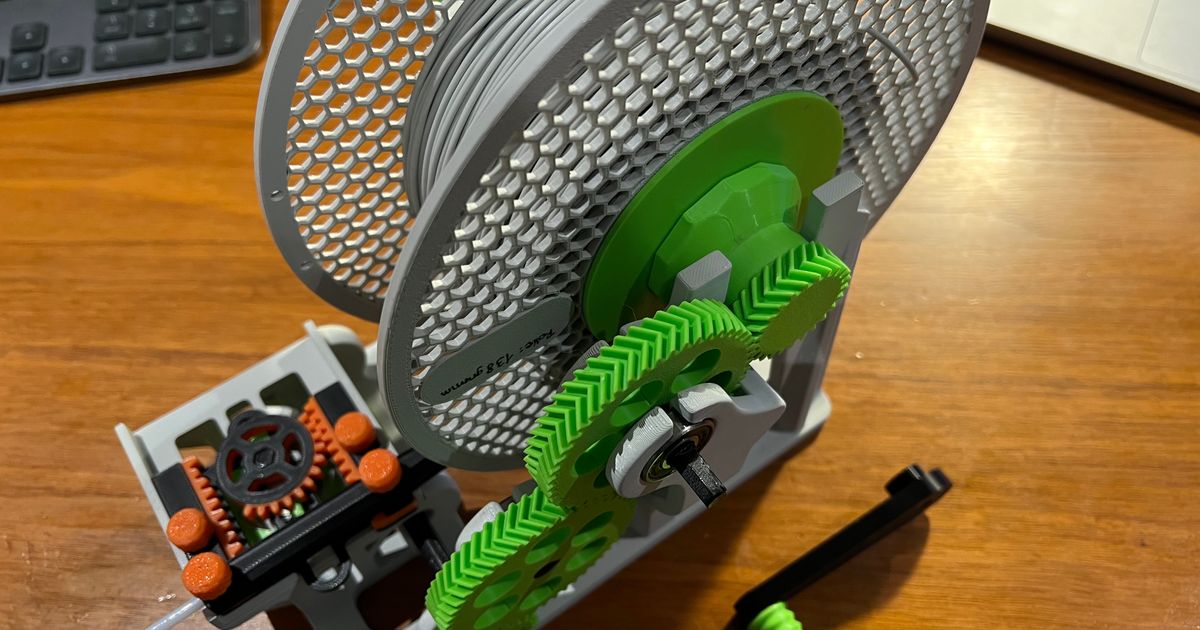
- The lowest gear on the side (and the next big gear) like to dislodge from the stand during rewinding. This is due to the force of driving the worm gear.
I added a clip to hold the lowest gear in place. Simple and seems to work well.
- The carriage slide tended to get stuck at extreme excursions during rewinding. It didn't want to change direction.
I cut the last teeth on the linear gears a little more steeply to avoid this binding. That seems to fix it.
- When using a drill to drive the rewinder, the drill drive adapter attached to the main takeup spool gear can be easily stripped, partly due to large torque required to drive the loaded takeup spool. The normal drill adapter uses a small hex shaft to attach the drill to the drill adapter. It is east to strip the hex faces on the adapter. It is also difficult to select and maintain a good speed with a drill as it is at the low range of a drill.
So I changed the drive point to instead drive the worm gear on the filament carriage. There is less torque required to drive from this point. This is also about a 4x faster speed compared to the normal attachment point, which makes it a little easier to select and hold a drill speed. I also changed the drill adapter to present a 3/8" hex head (like a bolt head). Then use a normal 3/8" socket on the drill to connect to the adapter. This works much better and avoids stripping the adapter. But the speed control is still difficult.
- NOTE: When I used the drill adapter with the original stand design, the bearing support for the lower large gear broke due to stress. This remix modifies the design to close the openings at the top of the 3 bearing supports for the gears for better strength.
I also bought a 12V 160rpm motor ( https://www.amazon.com/dp/B08M9HSW47). Along with a
speed controller (https://www.amazon.com/dp/B071H2YQG5) and 5A 12V power brick (https://www.amazon.com/dp/B07G4CDG5J). And designed a case to hold the motor&controller.
I also designed a stand and clip to hold the motor at the correct height and keep it engaged on the
drive shaft. I attached it on a longer shaft driving the worm gear on the carriage.
The motor is a little under powered. It runs out of steam at about the last 4 layers on the takeup spool.
You have to manually help it by spinning the drive gear for the takeup spool.
It takes about 6 minutes to rewind a spool.
To use this remix, you can either modify an existing rewinder or print a new rewinder.
To modify an existing rewinder, you can print the parts on the first plate. It includes the lower gear clip, and carriage w/ modified linear gears. It also includes the screw axle, gear, bearing nub, bearing drive shaft, thick&thin nuts and 2 stand adapters. Finally, it includes the modified drill adapter,
To print a new rewinder, print most of the normal rewinder, but don't print the stand, axle axle nut or spool adapter washers of the normal model.
Print the remix first plate (optionally without the 2 stand bearing adapters, U shaped) and the 2nd plate (the integrated stand).
To use the motor driver, you can print the 3rd plate for a basic box and stand/clip. The motor I used had 4 m3 screws hold the motor in the box. And 4 M2 screws to hold the speed controller. The screw terminal to barrel connector adapter for the power brick is a simple force fit in the box.
Printed in petg with standard settings, but with supports and brims on a few parts as configured the plates.
Comment & Rating (1)


This remix is based on