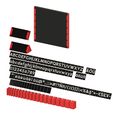
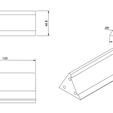
I needed a classic desk sign and simply designed one and printed it out.
This gave me the idea of designing a universal stand in which the individual letters can simply be inserted and which can also be used as a price tag, for example.
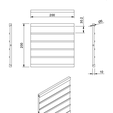
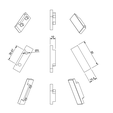
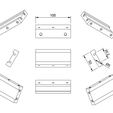
After the signs and letters were created, I thought that the letters and signs could also be used for other purposes, so I generated two more holders. Firstly, a square sign, which is ideal for labeling rooms such as meeting rooms, for example. Then there is a single-line variant.
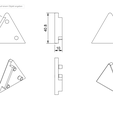
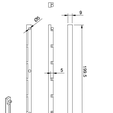
All holder shapes can be plugged together using the pins.
As the characters have different widths, there are also "spaces" in widths of 1 - 20 mm. These are used to fill up to the edge and as spaces, e.g. between first name and surname.
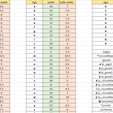
So that the determination of the total length does not become a guessing game, you will also find, in addition to the STL files, an EXCEL table in which I have entered the width in mm for each available character.
If you want to print a name, for example, as one continuous part, the individual characters can easily be combined into a single part in your slicer. However, as the objects are normally placed over the center point in the slicer programs, you will of course need half the width of the letters to be able to place them exactly next to each other, which is why I have also included this information in the EXCEL table.
I have published a video on YouTube explaining how to combine several parts into a single part in the slicer and how to split the STL file into individual parts in order to assign them to different filament colors. You can find it here: (link will be added)
As the results vary depending on the printer, all letters, numbers and characters are included in two different versions. The only difference between the two versions is the height of the inlays. There is one version with an inlay height of 0.4mm (I use this on my Bambu Lab printer with AMS) and the second version has an inlay height of 0.6mm, i.e. three layers on top of each other with a layer height of 0.2mm.
In order to store the individual letters and characters sensibly, I also created a separate box for each possible character width, in which the correspondingly wide characters can then be placed precisely and closed with a lid.
ZIP file content:
Excel file with the widths of the individual characters
Directories with the .stl files for the basic bodies, the boxes, the cones and the letters and characters.
The characters are available in two versions (each in a separate directory) with 0.4 mm inlays and with 0.6 mm inlays.
The spaces, also in their own directory.
Where appropriate, you will always find an STL file containing all parts (e.g. of a letter) and then the individual parts as separate stl files. In the directory of the letter [i], for example, you will find 4 stl files.
the file [i.stl] with the complete character.
the file [i_Body.stl] with the body without inlay
the file [i_Inlay.stl] with the lower part of the i inlay
the file [i_Inlay_a.stl] with the i-point of the i. inlay


