An airsoft replica inspired by the old-school KAC QD Suppressor with the working quick-detach functionality.
Additional parts / options
- Muzzle Brake M4QD-type
- Cage as 3MF PrusaProject file where you can set your own serial number and custom text
- Gyroid sound suppressor baffles (PETG)
- Baffles adapter (PETG)
Printing
All the STL parts have their corresponding 3MF PrusaSlicer project files with the settings for Prusa MK4, and the support enforcers / blockers where required.
If you don't want to use 3MF files, you can use the STL files and import the into a slicer of your choice.
I used eSUN ePLA Matte that is quite sturdy and prints beautifully.
Cage Custom Text
The cage is an STL model without any markings (Cage-Clean.stl). The corresponding Cage.3mf file is a PrusaSlicer project file with placeholders where you can set your own custom text, a dummy serial number, and whatever makes you tick. It is entirely up to you, and I bear no responsibility for your choices.
Assembly
Pictures P1 through P10 show the details of the process.
- Print all the parts and carefully remove supports.
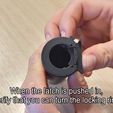
- Insert the lock into the body. If might require some force, but once in, the lock should be able to slide in and out when pulled. You can use a file to file off and clean the body where the latch sits.
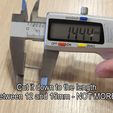
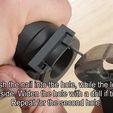
- To prevent the latch from falling out, use two thin nails (I used 1.6mm) and cut them down to 12-14mm length. Insert them into the two holes in the body, on the sides of the lock. If you find it too difficult to insert, use a thin drill to widen the holes. Instead of nails, you could use two sharpened pieces of the 1.75mm filament.
- Put the locking ring into the place by bending it slightly. Once in, you should be able to rotate it to fix and release the lock. If you find it too difficult to move, use the file to clean the ridge where the latch sits.
- Slide the cage onto the body. See the following chapter for the details.
Assembling the Cage
- The cage should snugly fit onto the body, but if you find it too loose or too tight, scale the cage up or down in the XY axis by 0.5%. To check the fit, you can print just the fist 1 cm of the cage and try sliding it onto the body, before printing the full part.
- Orient the cage so your custom text is starting from the suppressor mouth side and goes towards the latch side.
- Turn the cage so the parts of the surface with no holes are placed at 12, 3, 6 and 9-o-clock positions regarding the latch.
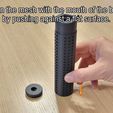
- Remove the cap and place the suppressor so the threaded side of the suppressor is laid on the desk. Slide the cage all the way down so it is aligned with the threaded side of the body.
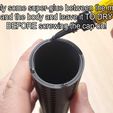
- Apply a tiny drop of super-glue on the side between the cage and the body. Do not use too much to prevent dripping, and be careful not to glue the threads!!!
Baffles
IMPORTANT: Check the laws of your country to verify the legality of suppressing the sound of airsoft replicas. In cases where it is not allowed, you should not be using the baffles!
To suppress the sound of a replica, you can either cut and place an old propulsion spring wrapped in a sponge inside the suppressor, or you can print the baffles and place them in baffle adapter tube.
IMPORTANT NOTE: The baffles should be printed using no perimeters, no top and bottom side, using 30% gyroid infill and 0.20mm layer thickness, to get sponge-like disks.
The "sponge" disks should be stacked inside the baffle adapter tube (so they could be easily removed if you decide so), by alternating disks with the wide inner holes with the disks with the narrow inner holes.
I have tested those and found them to be a good replacement for a regular sponge.
Post-Processing
I used the eSUN ePLA Matte filament, which has a very consistent thickness and beautifully hides layer lines, but you can optionally do the following:
- Smooth the holes on the cage using a 4mm drill
- Sand the printed parts to hide the layers
- Spray the model with some Armamat or similar matte spray.
Mounting the Muzzle Brake
The muzzle brake should be screwed onto the replica (CCW thread) so the windows are facing upwards. Use the enclosed "M4 Flash Hider Timing Washers.3mf" to print a set of washers of thicknesses between 0.2mm and 0.9mm (in steps of 0.1mm) to adjust the timing.
You can optionally use a headless M3 headless Allen screw to fix the flash hider in place. Do not overtighten!

/https://fbi.cults3d.com/uploaders/13485921/illustration-file/fee58dcf-5981-4991-b696-3eedee138f25/01.jpg)


