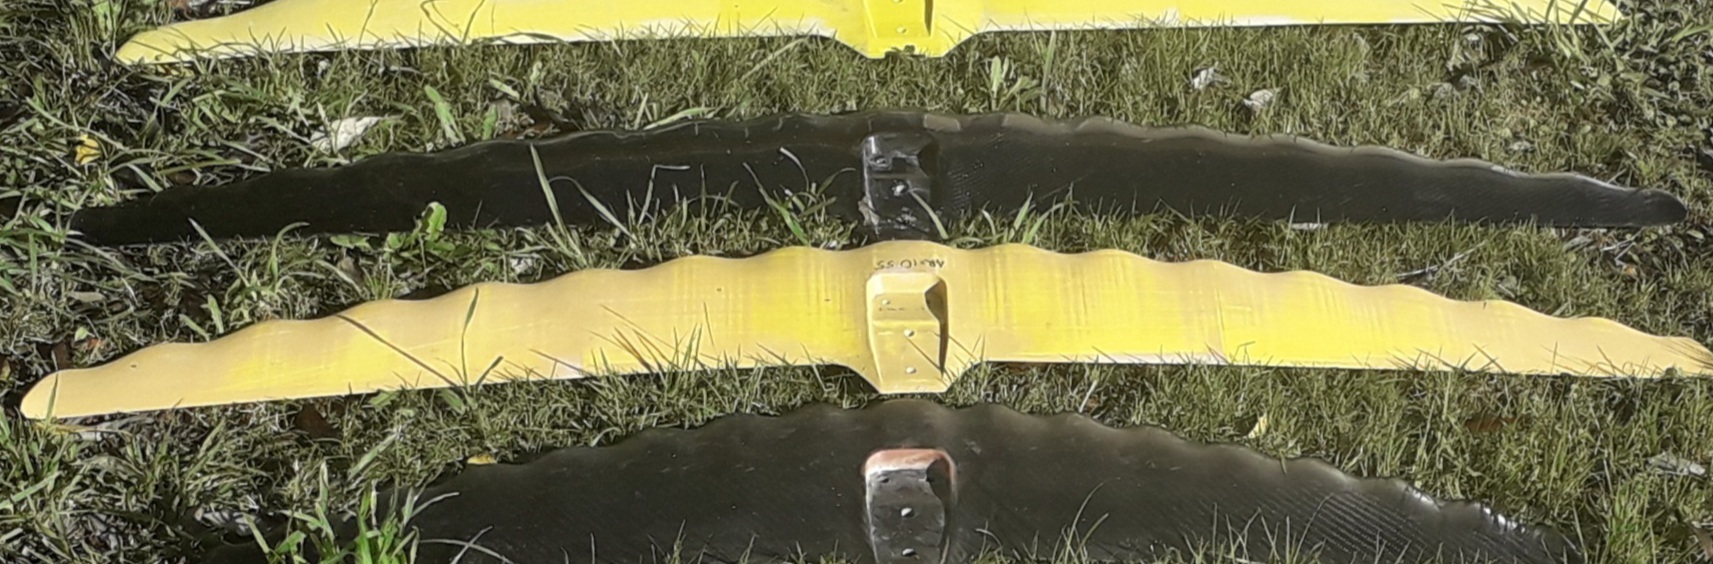
High aspect, fast, black fuselage compatible. Tubercles. Needs a 400mm square build area. This is one of my early 2022 designs. I go back to it if I want speed, otherwise I ride my high washout versions which have a higher stall angle but are more draggy.
This is 1245 sq cm x 1160mm span
How is the ride? It's a thin section so it goes quite fast. Once I came to a very abrupt stop when I misjudged clearing height from a sting ray, I saw that same stingray in a similar area the next day, at an angle in the water. (I think it was a near lethal hit) There's a lot of chord reduction at the tips so it steers through centreline side weight shifting very responsively for it's size. Since switching from the standard short Axis fuselage to the advanced short axis fuselage, I'm finding I only outset my front foot much starting, the better leverage of bringing the front foil closer to the mast makes turning initiated by yaw much more responsive, this wing works very well with the advanced fuselage. I've been riding this wing a lot more recently because it has great glide. My other 3 wings I designed shortly after this in 2022 are more fun, but also a bit more draggy. This definitely has the speed and glide advantage and will reward you if you are gybing or tacking.
For construction I print the model, fit it together with dowels and superglue after dry fit check, then fill and sand to as much perfection as my patience can stand. I highly recommend Shellac with isopropyl alcohol as a thinner, far less waiting for cure. Orbital sand 180 grit starting to 400 grit final.
To mould, I tape packing tape out from all the edges on both sides to form a mould edge separation membrane. Then mist on PVA mould release, couple of light coats both sides. And resin infuse. Chopped strand fibreglass sandwich with infusion mesh on the inside works pretty well. I use ISO polyester with 1.25 % hardner, spiral wrap leading in and a chux resin brake at the end of my layup to promote full infusion and slow the flow as soon as it switches from air to resin. XL vacuum clothing bags from hardware store work well, you can use bluetack to seal around the inlet and outlet.
I hang the bag so that resin infuses from the leading edge upwards to the trailing edge.
Once cured, hold up to a light and mark around the outer edge of the tape with marker pen. Drill a couple of 6mm holes at the trailing edge corners about 10mm inside the outer tape edge. Trim all the excess composite from your resin infusion with a Dremmel or an angle grinder with a thin blade (use dust mask!!)
Split the halves carefully with plastic putty knives(Full cure first!!)
Clean inside your mould halves.
Spray mould release.
For a mould like this, I recommend Epoxy resin, one outer layer of carbon woven twill, (no kevlar), minimum two layers of carbon unidirectional and spherecore to gap fill between the sides. This will give you a stronger wing than many of the manufacturers sell for a fraction of the price. Note that spherecore is compressible, I wet it out thouroughly and then I wet out short-chopped carbon and feed it into the leading edge to prevent cut-through when cleaning up the leading edge later.
All this is pretty time-sensitive once you mix the epoxy so I like to pre-cut the cloth, the uni and the spherecore all to size. All the woven and uni scraps I will use to stiffen the inside portions of the wing, especially by the bolt area and in front of it. There should be soilid fibre there the bolts go through to resist compression and deformation from the screws. I close the traing edge first. Before closing, rub out any bubbles at the sides and around the mast foot.
I 3D print or laser cut push-on clamps for the mould halves, you can use hardware store clamps but keep in mind that too much weight from big clamps can deform the mould, especially when the epoxy inside is curing and hot. Note that this stage will push the spherecore and chopped fibres hard into the leading edge, be sure you are wearing gloves and check as you close that the spherecore isn't escaping. Give it a very generous time before opening, there's no point opening it and then trying to finish-sand before the resin is fully hard.
Dust mask again:
Cleanup with a cutoff tool, don't use a band saw, you will make the belt's teeth go round. Leave a couple mm proud for the leading edge, you can take it closer with a wet sharpening stone or file.
Once everything is trimmed correctly to the design profile, I recommend wet sanding with a battery orbital sander and 400 grit. There's no point going lower, the 400 grit will do the job over time and leave a ridable surface.
Preparation for the black axis fuselage(I recommend their "advanced" one) as follows:
Get a 6.5mm drill bit, an 8.5mm drill bit and a sharp countersunk bit. Wet drill back holes to 8.5mm, front to 6.5mm and check fit(should fit nicely. Wet countersunk so that the bolt CSK heads sit level(you will be thankful here for all the carbon scrap you put in this region now!)
Sources for Carbon fibre(What I use):
Twill cloth:
https://www.aliexpress.com/item/32800404295.html
Uni:
https://www.aliexpress.com/item/32371670940.html
Short chopped carbon:
https://www.aliexpress.com/item/1005001961336422.html
Make sure your resin isn't a fast cure type unless you are working in winter temperatures.
Have fun on the waves!
:format(webp)/https://fbi.cults3d.com/uploaders/18821739/illustration-file/e8952d95-8bf3-417f-aab7-d9a4f4a791d5/Wingk.png)

/https://preview3d-images.cults3d.com/oulfcyoj4d4itsvno871sp7b7beb)
/https://preview3d-images.cults3d.com/h4r7udir6u4byhxzlq51jnhfh077)


