Skip to content

Adjustable Lamp

Advertising
Advertising
?
Creation quality: 5.0/5 (1 vote)
Evaluation of members on the printability, utility, level of detail, etc.

  • 787 views
  • 6 likes
  • 2 collections

License
3D design format
STL Folder details Close
  • Adjust Left (No Magnets).stl
  • Adjust Left.stl
  • Adjust Right (No Magnets).stl
  • Adjust Right.stl
  • Base (No Magnets).stl
  • Base Lid.stl
  • Base.stl
  • Cap Left (No Magnets).stl
  • Cap Left.stl
  • Cap Right (No Magnets).stl
  • Cap Right.stl
  • Tension Nut.stl

Learn more about the formats

Publication date 2024-01-05 at 15:04
Design number 1689981

3D printer file info

3D model description

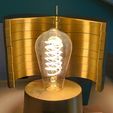
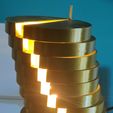
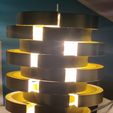
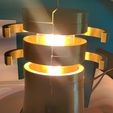
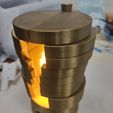
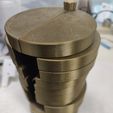
Adjustable lamp, open and close each individual wing to control the light level and the look of the lamp. Recommend using a nice Edison bulb and obviously regardless of what bulb you choose it does need to be LED reduce heat.
There is an option to add magnets to the arms to have them 'snap' into alignment a bit better. If you don't want this simply print the 'No Magnets' version. Really only matters for aesthetics as you could simply not populate the magnet spots.
Sturdy base when filled with concrete so it doesn't want to tip. Very simple electrical work, only two screws and one solder or wire nut joint.

Requires some threaded M4 rod like this: https://www.amazon.com/gp/product/B01MAYQ12S/
A lamp base: https://www.homedepot.com/p/Leviton-660-Watt-Phenolic-Incandescent-Lampholder-Black-3352-F/202077688
A rocker switch: https://www.amazon.com/gp/product/B07S2QJKTX
And a cord: https://www.homedepot.com/p/GE-8-ft-Replacement-Cord-Set-with-Polarized-Plug-on-1-End-Black-54435/203735885
And lastly one M4 screw and a ziptie for strain relief.
I liked this bulb: https://www.homedepot.com/p/Feit-Electric-60-Watt-Equivalent-ST19-Dimmable-Spiral-Filament-Amber-Glass-E26-Vintage-Edison-LED-Light-Bulb-Warm-White-ST1960-S-LED-HDRP/313397383
If you use magnets they are 6x2mm like these: https://www.amazon.com/gp/product/B07XRNWZFQ/

Assembly:
1. Remove the side flange on the lamp holder to insert it into the base.
2. Insert the cord through the back hole. Attach one wire to one of the lamp holder screws.
3. Insert the rocker switch with its two wires attached, it should click into place.
Attach one of the wires to the other screw on the lamp base. Trim it to the correct distance to make things cleaner, but there is space in the base if you don't want to cut it shorter.
4. Solder the other wire from the cord and the switch together trimming as necessary. Or use a small wire nut. However you do it make sure you don't have any exposed wire.
5. Check the wiring and screw a bulb in, plug it in and check that everything works.
6. Fill the base and the base lid with concrete nearly up to the level where it would overflow taking care to not get anything on the threads. Let this cure for a few hours or overnight.
7. Screw the base lid onto the base (clean threads if necessary to make it go smoothly).
8. Screw the threaded rod into the base, you may want to use pliers near the base of the screw to make sure it goes it well. It should go in just shy of 18mm.
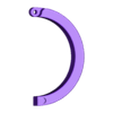
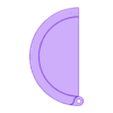
9. Add the Adjust Left and Right pieces on the rod (alternating obviously so they fit together).
10. Add the Cap and then the Tension Nut on the top. If it does not snug up well you may need to either screw the rod in (or out) a bit more, or trim it off with a Dremel, but it is designed to sit at the correct height.
11. Enjoy.

3D printing settings

Print 7x Adjust Left and Right and one of everything else. Insert a M4 nut into the Tension Nut. Otherwise print standard 2-3 perimeters, 0.2mm layer height, nothing fancy. Only one part needs a small area of support when printed in the orientation provided.

Advertising


Issue with this design? Report a problem.

Would you like to support Cults?

You like Cults and you want to help us continue the adventure independently? Please note that we are a small team of 3 people, therefore it is very simple to support us to maintain the activity and create future developments. Here are 4 solutions accessible to all:

  • ADVERTISING: Disable your banner blocker (AdBlock, …) and click on our banner ads.

  • AFFILIATION: Make your purchases online by clicking on our affiliate links here Amazon.

  • DONATE: If you want, you can make a donation via Ko-Fi πŸ’œ.

  • WORD OF MOUTH: Invite your friends to come, discover the platform and the magnificent 3D files shared by the community!


Sharing and downloading on Cults3D guarantees that designs remain in makers community hands! And not in the hands of the 3D printing or software giants who own the competing platforms and exploit the designs for their own commercial interests.

Cults3D is an independent, self-financed site that is not accountable to any investor or brand. Almost all of the site's revenues are paid back to the platform's makers. The content published on the site serves only the interests of its authors and not those of 3D printer brands who also wish to control the 3D modeling market.

100% secure payment by credit card, PayPal, Apple Pay, Google Pay, etc.
View all payment options.