Skip to content

Piggy bank letter E

Advertising
Advertising
?
Creation quality: 0.0/5 (0 votes)
Evaluation of members on the printability, utility, level of detail, etc.

  • 115 views

License
3D design format
STEP and STL Folder details Close
  • E.STEP
  • E.STL

Learn more about the formats

Publication date 2024-01-07 at 16:57
Design number 1695108

3D printer file info

3D model description

Please read 3D printing settings carefully to print the model without problems.
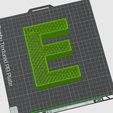
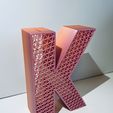
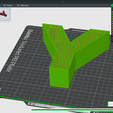
!Pictures might have different letters in them than the one that is selling!

Comercial license piggy bank letter E

Print in place - No glue and assembly required.

Made some cool looking letter savings boxes.

Had seen something like this made out of wood and acrylic so i decided to give it a go in 3D printing.

It is a great gift for birthday or other celebration.

The opening for money is big enough so you can take it out when needed without breaking the letter.

For the letters P and F i have made a little reinforced base.

For letters W,V,Y,U,H,K,X and M i have made multiple coin insertion points so you don't have to shake the money in place.

3D printing settings

Made in bambu slicer, should work with other slicers as well, but the setting names can vary.

The settings:

The build plate should be cleaned well before printing. (can use a hairspray for better adhesion as well)

I recommend printing them with 0.6mm nozzle and 0.3mm layer height strength profile for more rigid triangle pattern, but the 0.4mm nozzle and 0.2mm layer height will also work.

You should place the model flat on the bed if it's not already laying flat.
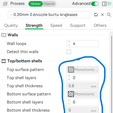
Choose strenght 0.2mm profile for 0.4mm nozzle or 0.3mm strenght profile for 0.6mm nozzle.
0 Top shell layers
0 bottom shell layers
Sparse infill pattern - Triangles
Sparse infill density - 25%
Sparse infill pattern Triangles works the best for me, but feel free to experiment with other patterns as well.

Open the height range modifier by clicking the right mouse button on the model(might vary depending of slicer you using)

Change the settings (set height range - from 42mm to atleast 43.2mm on 0.6mm nozzle(depending of what layer height you use) and sparse infill speed to 30mm/s)

When sliced, changing the color scheme to speed(in the right top corner) you should see that the top surface first sparse infill layers are in different color(slower speed).
If necessary you can also use outer brim so it doesn't warp. (I haven't had issues without brim)
If there is any issue with speed or cooling there can be a small cleanup needed at the first top layer, just take a small thin tweezers and clean it up.

Advertising


Issue with this design? Report a problem.

Would you like to support Cults?

You like Cults and you want to help us continue the adventure independently? Please note that we are a small team of 3 people, therefore it is very simple to support us to maintain the activity and create future developments. Here are 4 solutions accessible to all:

  • ADVERTISING: Disable your banner blocker (AdBlock, …) and click on our banner ads.

  • AFFILIATION: Make your purchases online by clicking on our affiliate links here Amazon.

  • DONATE: If you want, you can make a donation via Ko-Fi πŸ’œ.

  • WORD OF MOUTH: Invite your friends to come, discover the platform and the magnificent 3D files shared by the community!


Sharing and downloading on Cults3D guarantees that designs remain in makers community hands! And not in the hands of the 3D printing or software giants who own the competing platforms and exploit the designs for their own commercial interests.

Cults3D is an independent, self-financed site that is not accountable to any investor or brand. Almost all of the site's revenues are paid back to the platform's makers. The content published on the site serves only the interests of its authors and not those of 3D printer brands who also wish to control the 3D modeling market.

100% secure payment by credit card, PayPal, Apple Pay, Google Pay, etc.
View all payment options.