Skip to content

Teleidoscope

Advertising
Advertising
?
Creation quality: 0.0/5 (0 votes)
Evaluation of members on the printability, utility, level of detail, etc.

  • 144 views
  • 1 like

License
3D design format
STL Folder details Close
  • Equilateral Triangle Teleidoscope-Body-Lens cover elaborate.STL
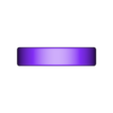
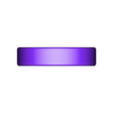
  • Equilateral Triangle Teleidoscope-Ornamental Ring.STL
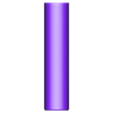
  • Equilateral Triangle Teleidoscope-Shaft.STL

Learn more about the formats

Publication date 2024-01-09 at 06:05
Design number 1699055

ckrome

3D printer file info

3D model description

DIY Teleidoscope

Requires the purchase of one 30mm glass ball, three reqular/first surface mirror (6 5/16 inches long by 1 1/16 inches wide, approx Thickness of .0485 inches), one 1.5" diameter 1/8th inch thick clear acrylic lens, packing tape, and glue/contact cement of choice.

Glass ball link:
https://www.amazon.com/HUELE-Fengshui-Miniature-Oornaments-Decoration/dp/B0714MGF59/ref=as_li_ss_tl?ie=UTF8&qid=1521292658&sr=8-4&keywords=30mm+crystal+ball&linkCode=sl1&tag=madeineuphori-20&linkId=bd8dad6472504545a7918bc8fd173f84

First Surface mirror link:
https://www.kaleidoscopestoyou.com/first-surface-mirrors-for-kaleidoscopes-7.html

Clear Acrylic Lens link:
https://www.amazon.com/Enoin-Acrylic-Plexiglass-Transparent-Paintings/dp/B09MFNLKWT/ref=sr_1_11?crid=TXFU3XNXWYPQ&keywords=1.5%22%2Bdiameter%2B1%2F8%2Bthick%2Bacrylic%2Bdisk&qid=1704781048&sprefix=1.5%2Bdiameter%2B1%2F8%2Bthick%2Bacrylic%2Bdisk%2Caps%2C116&sr=8-11&th=1

Steps:

  1. Print parts.
  2. Clean up prints of any rough edges.
  3. Glue acrylic lens into lens cover.
  4. Drop crystal ball into shaft slowly so that its slightly poking out of tapered side of the shaft.
  5. Take the three mirrors and form an equilateral triangle. Hold in this shape and wrap around outside of the mirrors till you go completely around them. I did this a twice equally spacing the tape along the length of the mirrors.
  6. Slide mirrors uncovered into shaft, add stuffing material between wall of shaft and exterior of mirrors as needed to make sure they don't move in the future.
  7. Slide ornamental ring to desired location along the length of the shaft.
  8. Take dried lens cover and lens, and cap the open side of the teleidoscope. I found that a friction fit worked fine here, however depending on your printers tolerancing some glue may be required.

3D printing settings

QTY: 1 Teleidoscope shaft should be printed so that the tapered side is facing the bed. LARGEST print is roughly 6.8in tall

QTY: 1 Teleidoscope lens cover should be printed so that the flat face is facing the bed.

QTY: (Up to you) Teleidoscope ornamental ring can be printed in any orientation.
Model tolerances have been set up for FDM 3d printing.

I printed each part with 3 wall perimeters and 15% infill. Can do less perimeters as desired to decrease print time, I simply wanted mine to be extra strong.

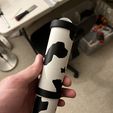
I decided to make mine have a cow print exterior cause why not!

Advertising


Issue with this design? Report a problem.

Would you like to support Cults?

You like Cults and you want to help us continue the adventure independently? Please note that we are a small team of 3 people, therefore it is very simple to support us to maintain the activity and create future developments. Here are 4 solutions accessible to all:

  • ADVERTISING: Disable your banner blocker (AdBlock, …) and click on our banner ads.

  • AFFILIATION: Make your purchases online by clicking on our affiliate links here Amazon.

  • DONATE: If you want, you can make a donation via Ko-Fi πŸ’œ.

  • WORD OF MOUTH: Invite your friends to come, discover the platform and the magnificent 3D files shared by the community!


Sharing and downloading on Cults3D guarantees that designs remain in makers community hands! And not in the hands of the 3D printing or software giants who own the competing platforms and exploit the designs for their own commercial interests.

Cults3D is an independent, self-financed site that is not accountable to any investor or brand. Almost all of the site's revenues are paid back to the platform's makers. The content published on the site serves only the interests of its authors and not those of 3D printer brands who also wish to control the 3D modeling market.

100% secure payment by credit card, PayPal, Apple Pay, Google Pay, etc.
View all payment options.