3D model description
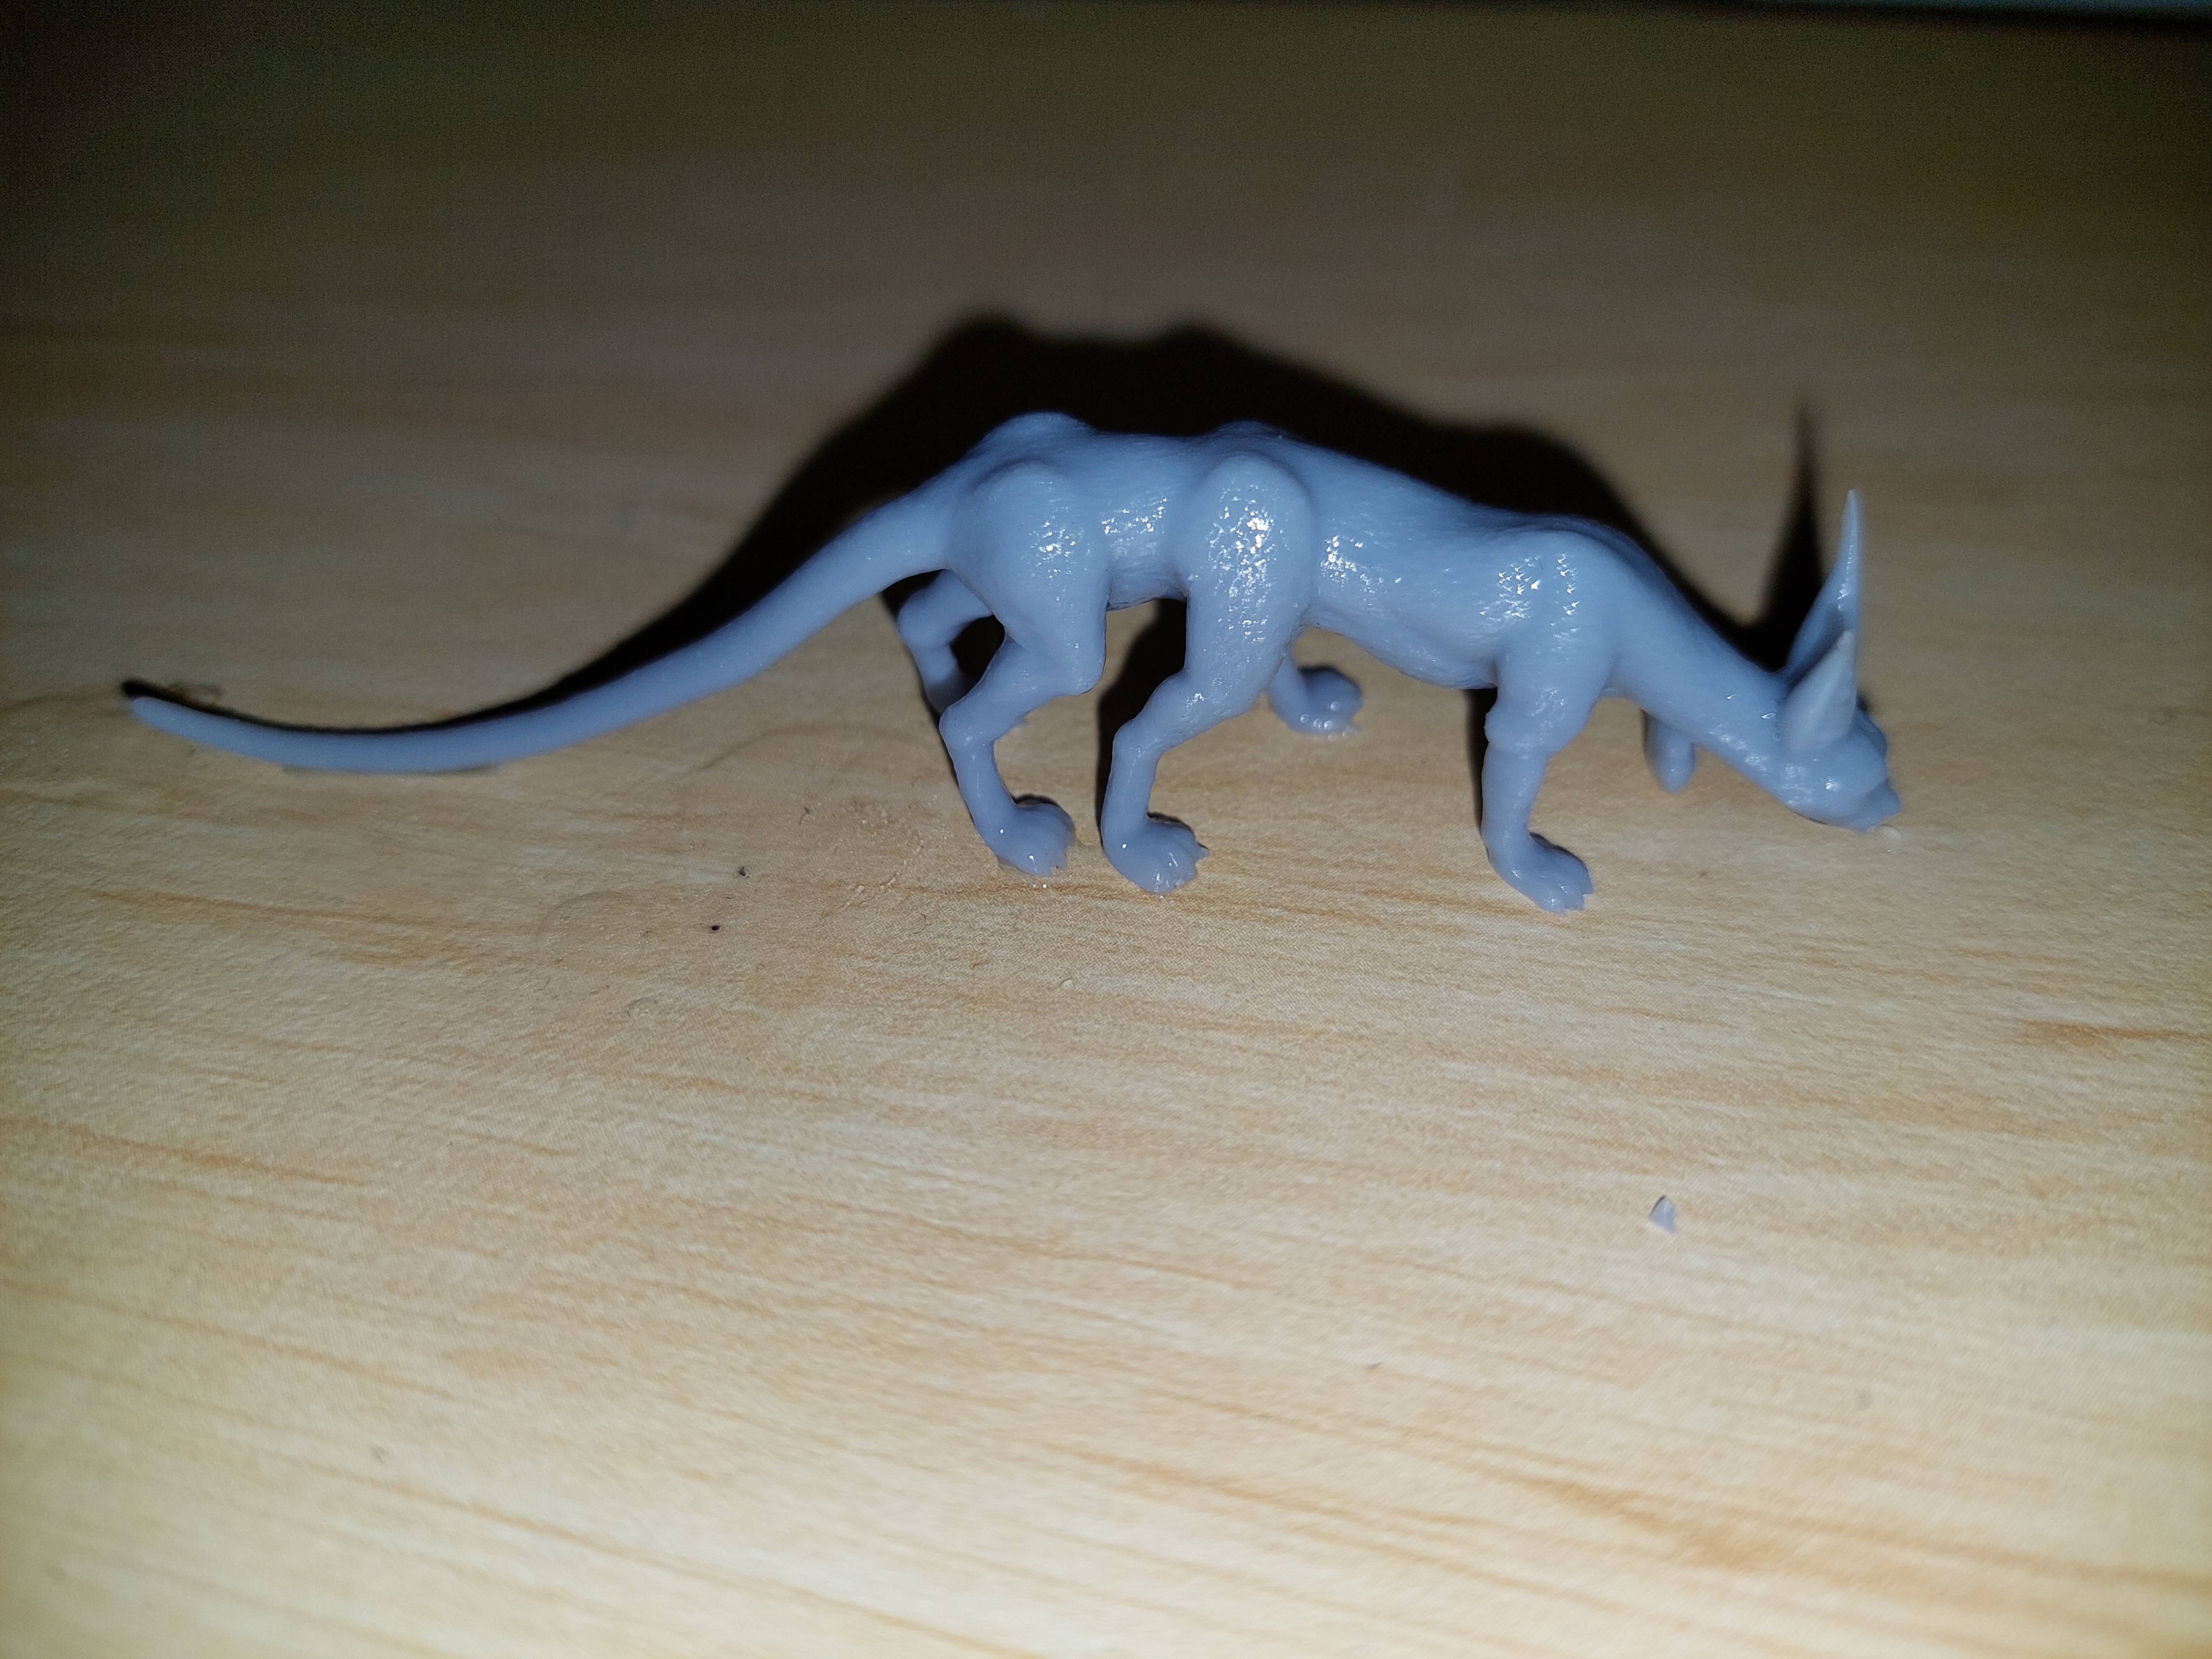
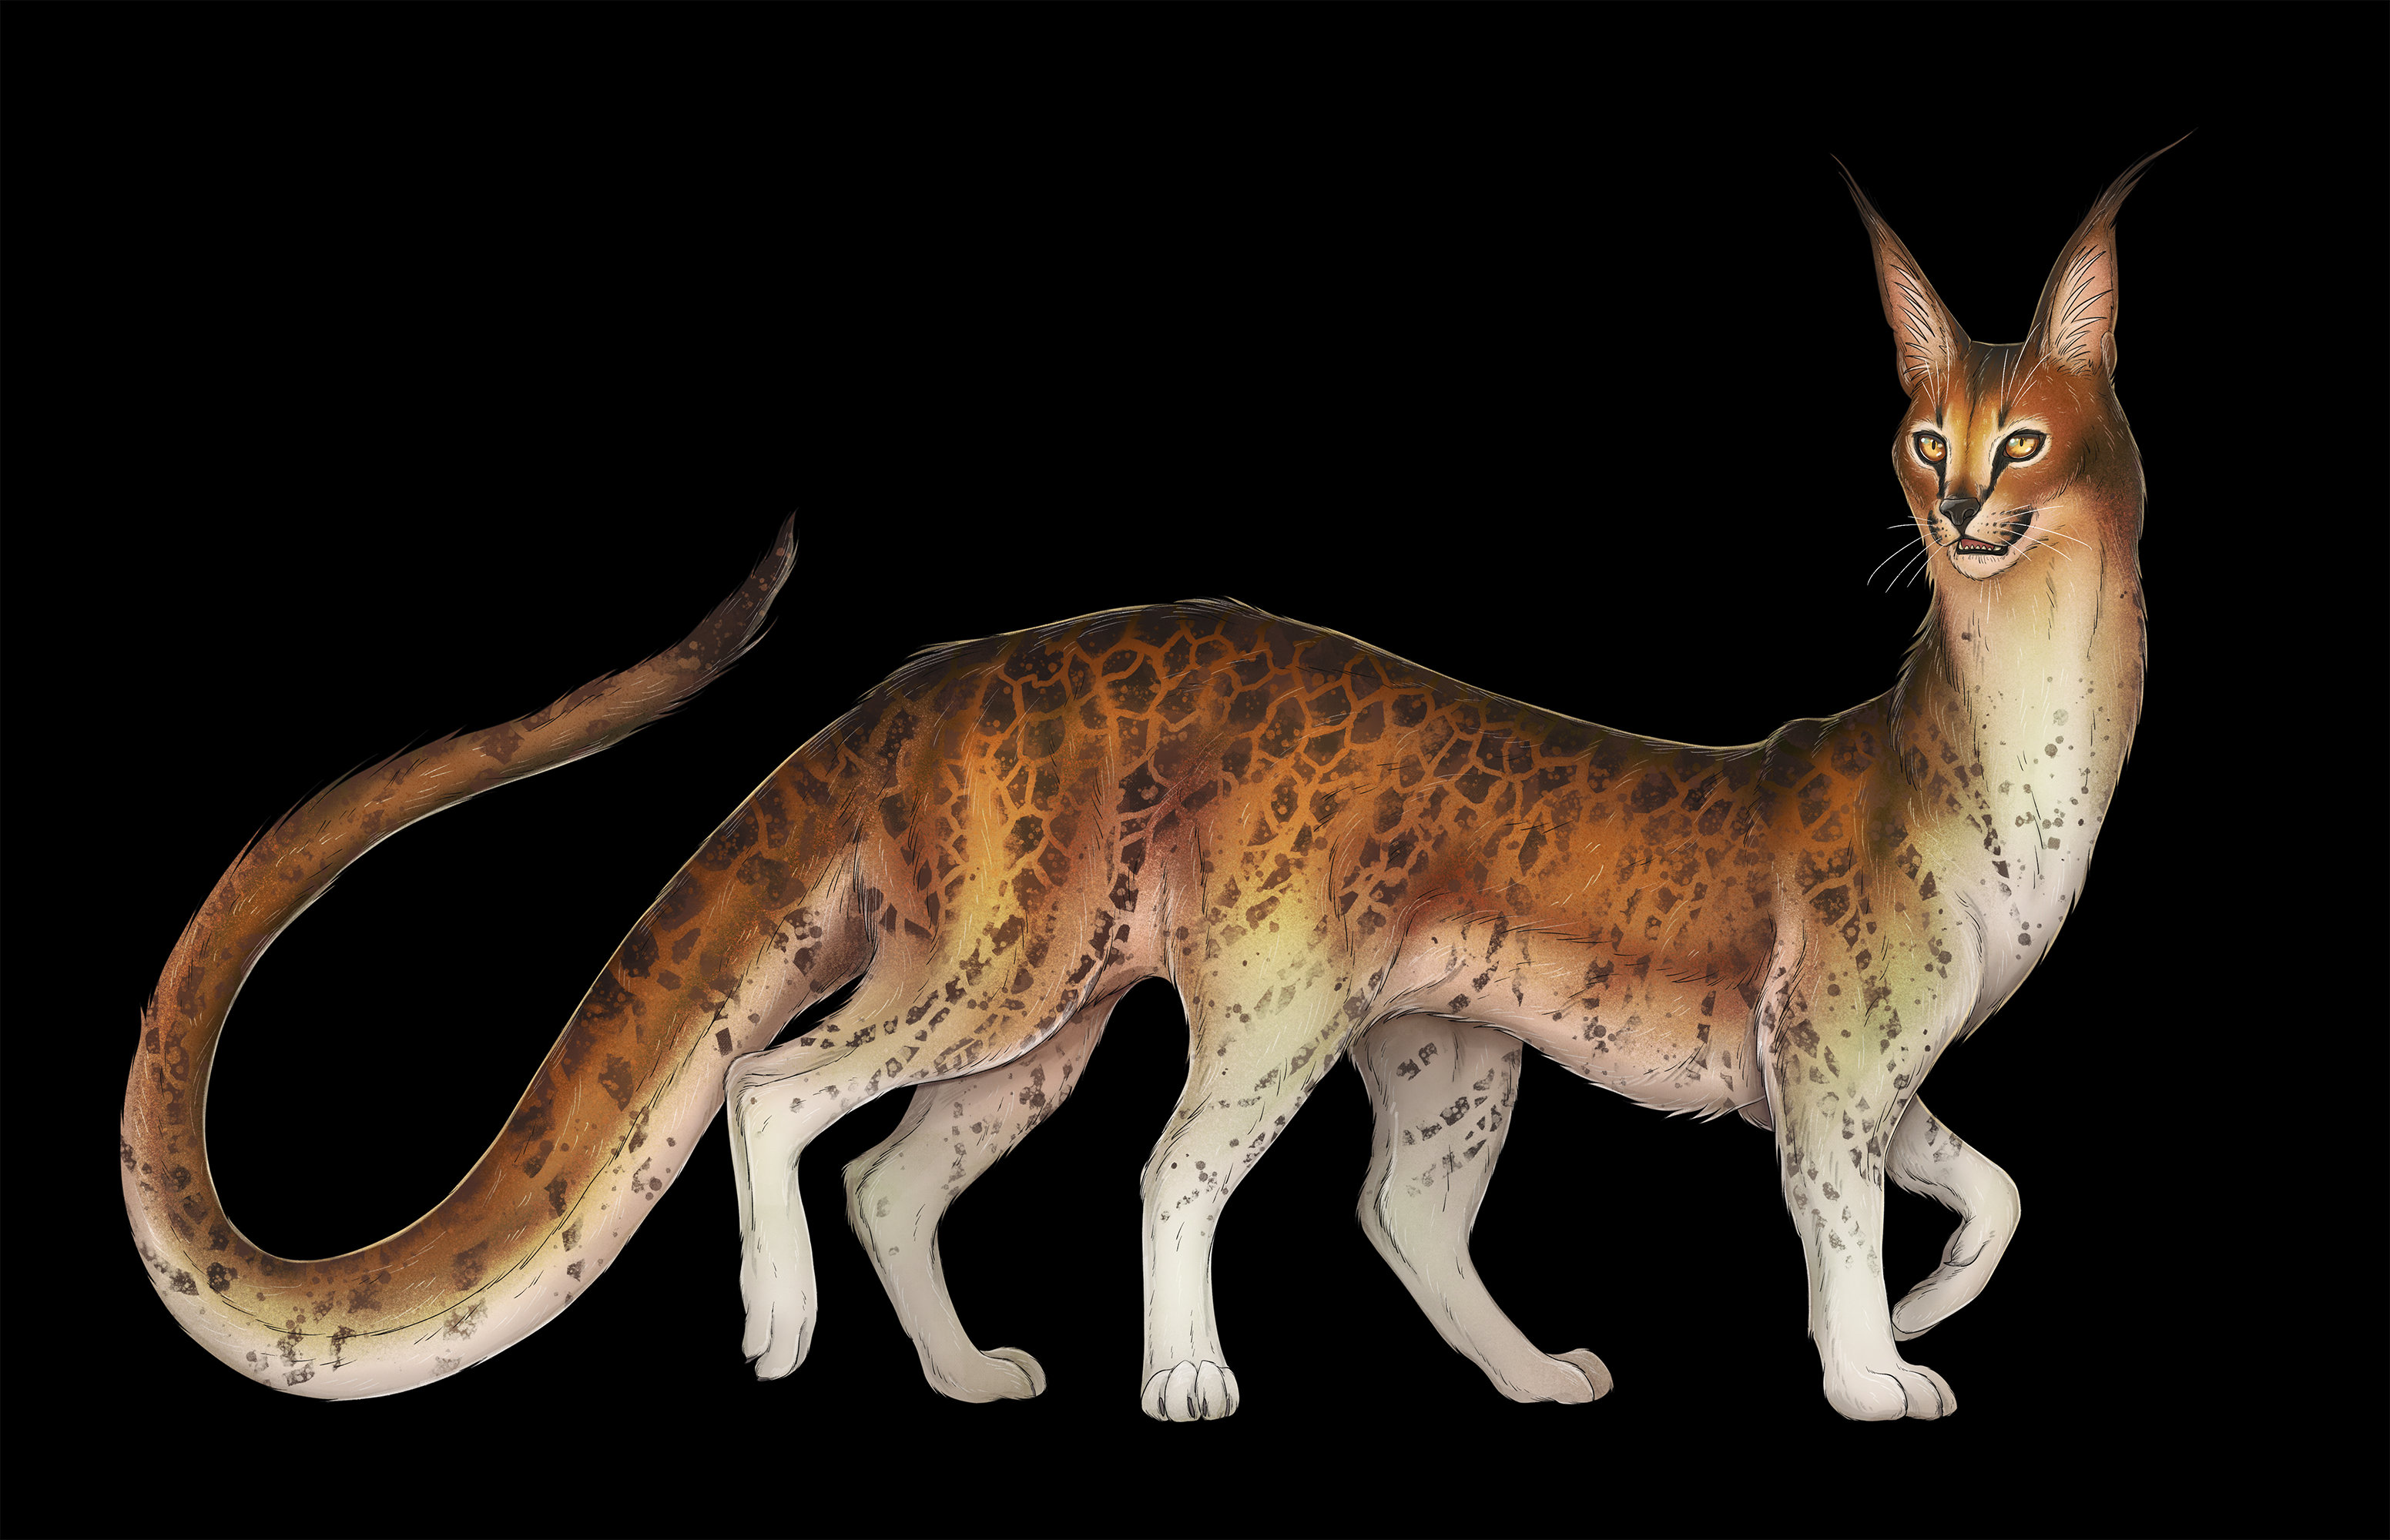
A Medium to Large Feline like creature with a face similar to the Caracal with six limbs and an elongated neck with a speckled fur ideal for life in the trees.
Their four hind legs are designed to give them higher agility when climbing although they do not improve the feline’s overall speed on flat terrain. Balancing using their four hind quarters while grasping with their front paws is a common practice for the Viscan as their preferred prey are birds like the Ibias that tend to hide in the shrubs, and lower branches of trees, requiring a slower and more stealthy approach to catch as the birds have great speed on flat open spaces.
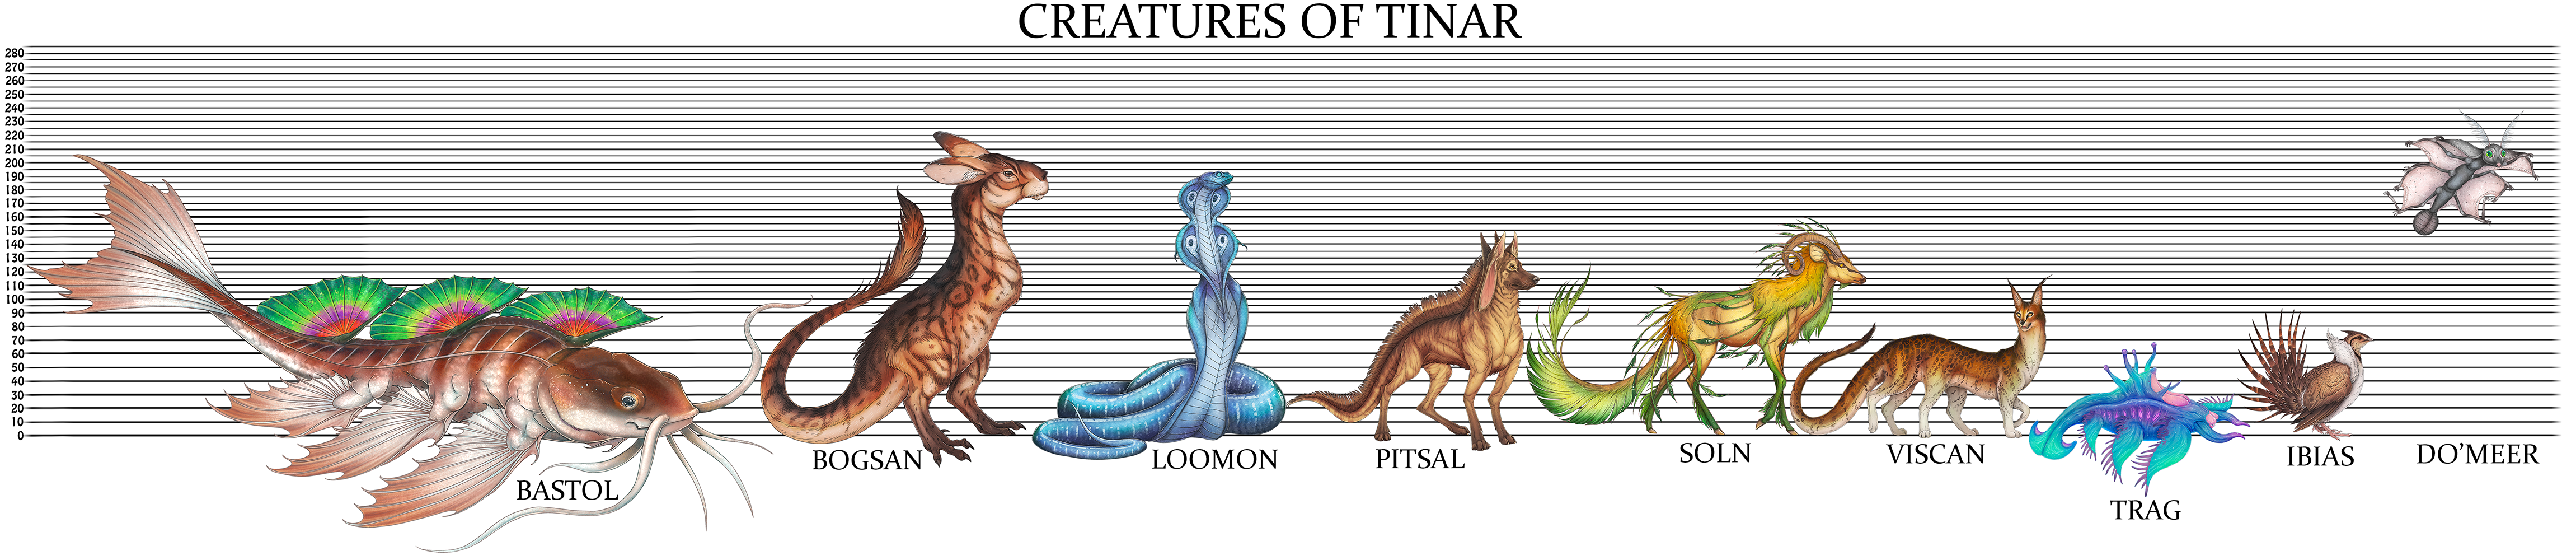
The Residents of the Island of Tinar consider the Viscan to be a good omen as they do not tend to attack people unless provoked and keep true dangers away from their territories. Viscan and Loomon are well known to hunt one another and never share the same territory. As a result the presence of a Viscan pride is a good indicator that there are no reptiles around. Additionally Viscan can be familiarized with people, although they have a tendency to take up residency in structures without invitation when people feed or make them feel comfortable which can be quite inconvenient should the resident not wish to accommodate the Viscan claiming their home or structure.
3D printing settings
For the Anycubic M5s:
Tough UV Resin: Print Time 2 Hours 47 Min
Layer Thickness: 0.03
Normal Exposure Time: 2.55-3.45 (If it's over 25C / 77F aim for the shorter exposure time)
Off Time: 0.5
Bottom Exposure: 35
Bottom Layers: 5
Z Lift Distance: 8
Z lift Speed/ Z Retract Speed: 6mm/s
Standard Resin:
Layer Thickness: 0.05
Normal Exposure Time: 2.25-3 (If it's over 25C / 77F aim for the shorter exposure time)
Off Time: 0.5
Bottom Exposure: 35
Bottom Layers: 5
Z Lift Distance: 8
Z lift Speed/ Z Retract Speed: 6mm/s
Due to environmental factors, vat release film type, and other variables you may need to adjust the exposure time and lift distance to give the resin time to fill the void. Keep the lift Speed/Retract Speeds under 8mm/s unless you are using a low viscosity/fast print resin. The supports are delicate and the risk of them failing increases as the lift speed increases past 6mm/s
For best results use the following guide:
Tools Required”
- Craft Knife (AKA Hobby Knife, Exacto Blade, Surgical Blade or Scalpel) – narrow tipped works best; my personal favourites are called Surgical Blades #11 (narrow straight edge) and #12 (the Hook).
Flush Shears (AKA Wire Cutter, Diagonal Wire Pliers, Precision Side Cutter) or alternatively very narrow but strong tipped scissors - I’m partial to the HTS 144S7 4.5" Straight Stainless Steel Squeeze Scissors.
Mini Hand Saw (AKA Model Craft Saw, Hobby Hacksaw) or 120 sanding paper – I prefer the fine Precision tooth Ultra-Thin Stainless steel blade since it fits in my craft knife and is interchangeable with craft blades meaning I only have to buy
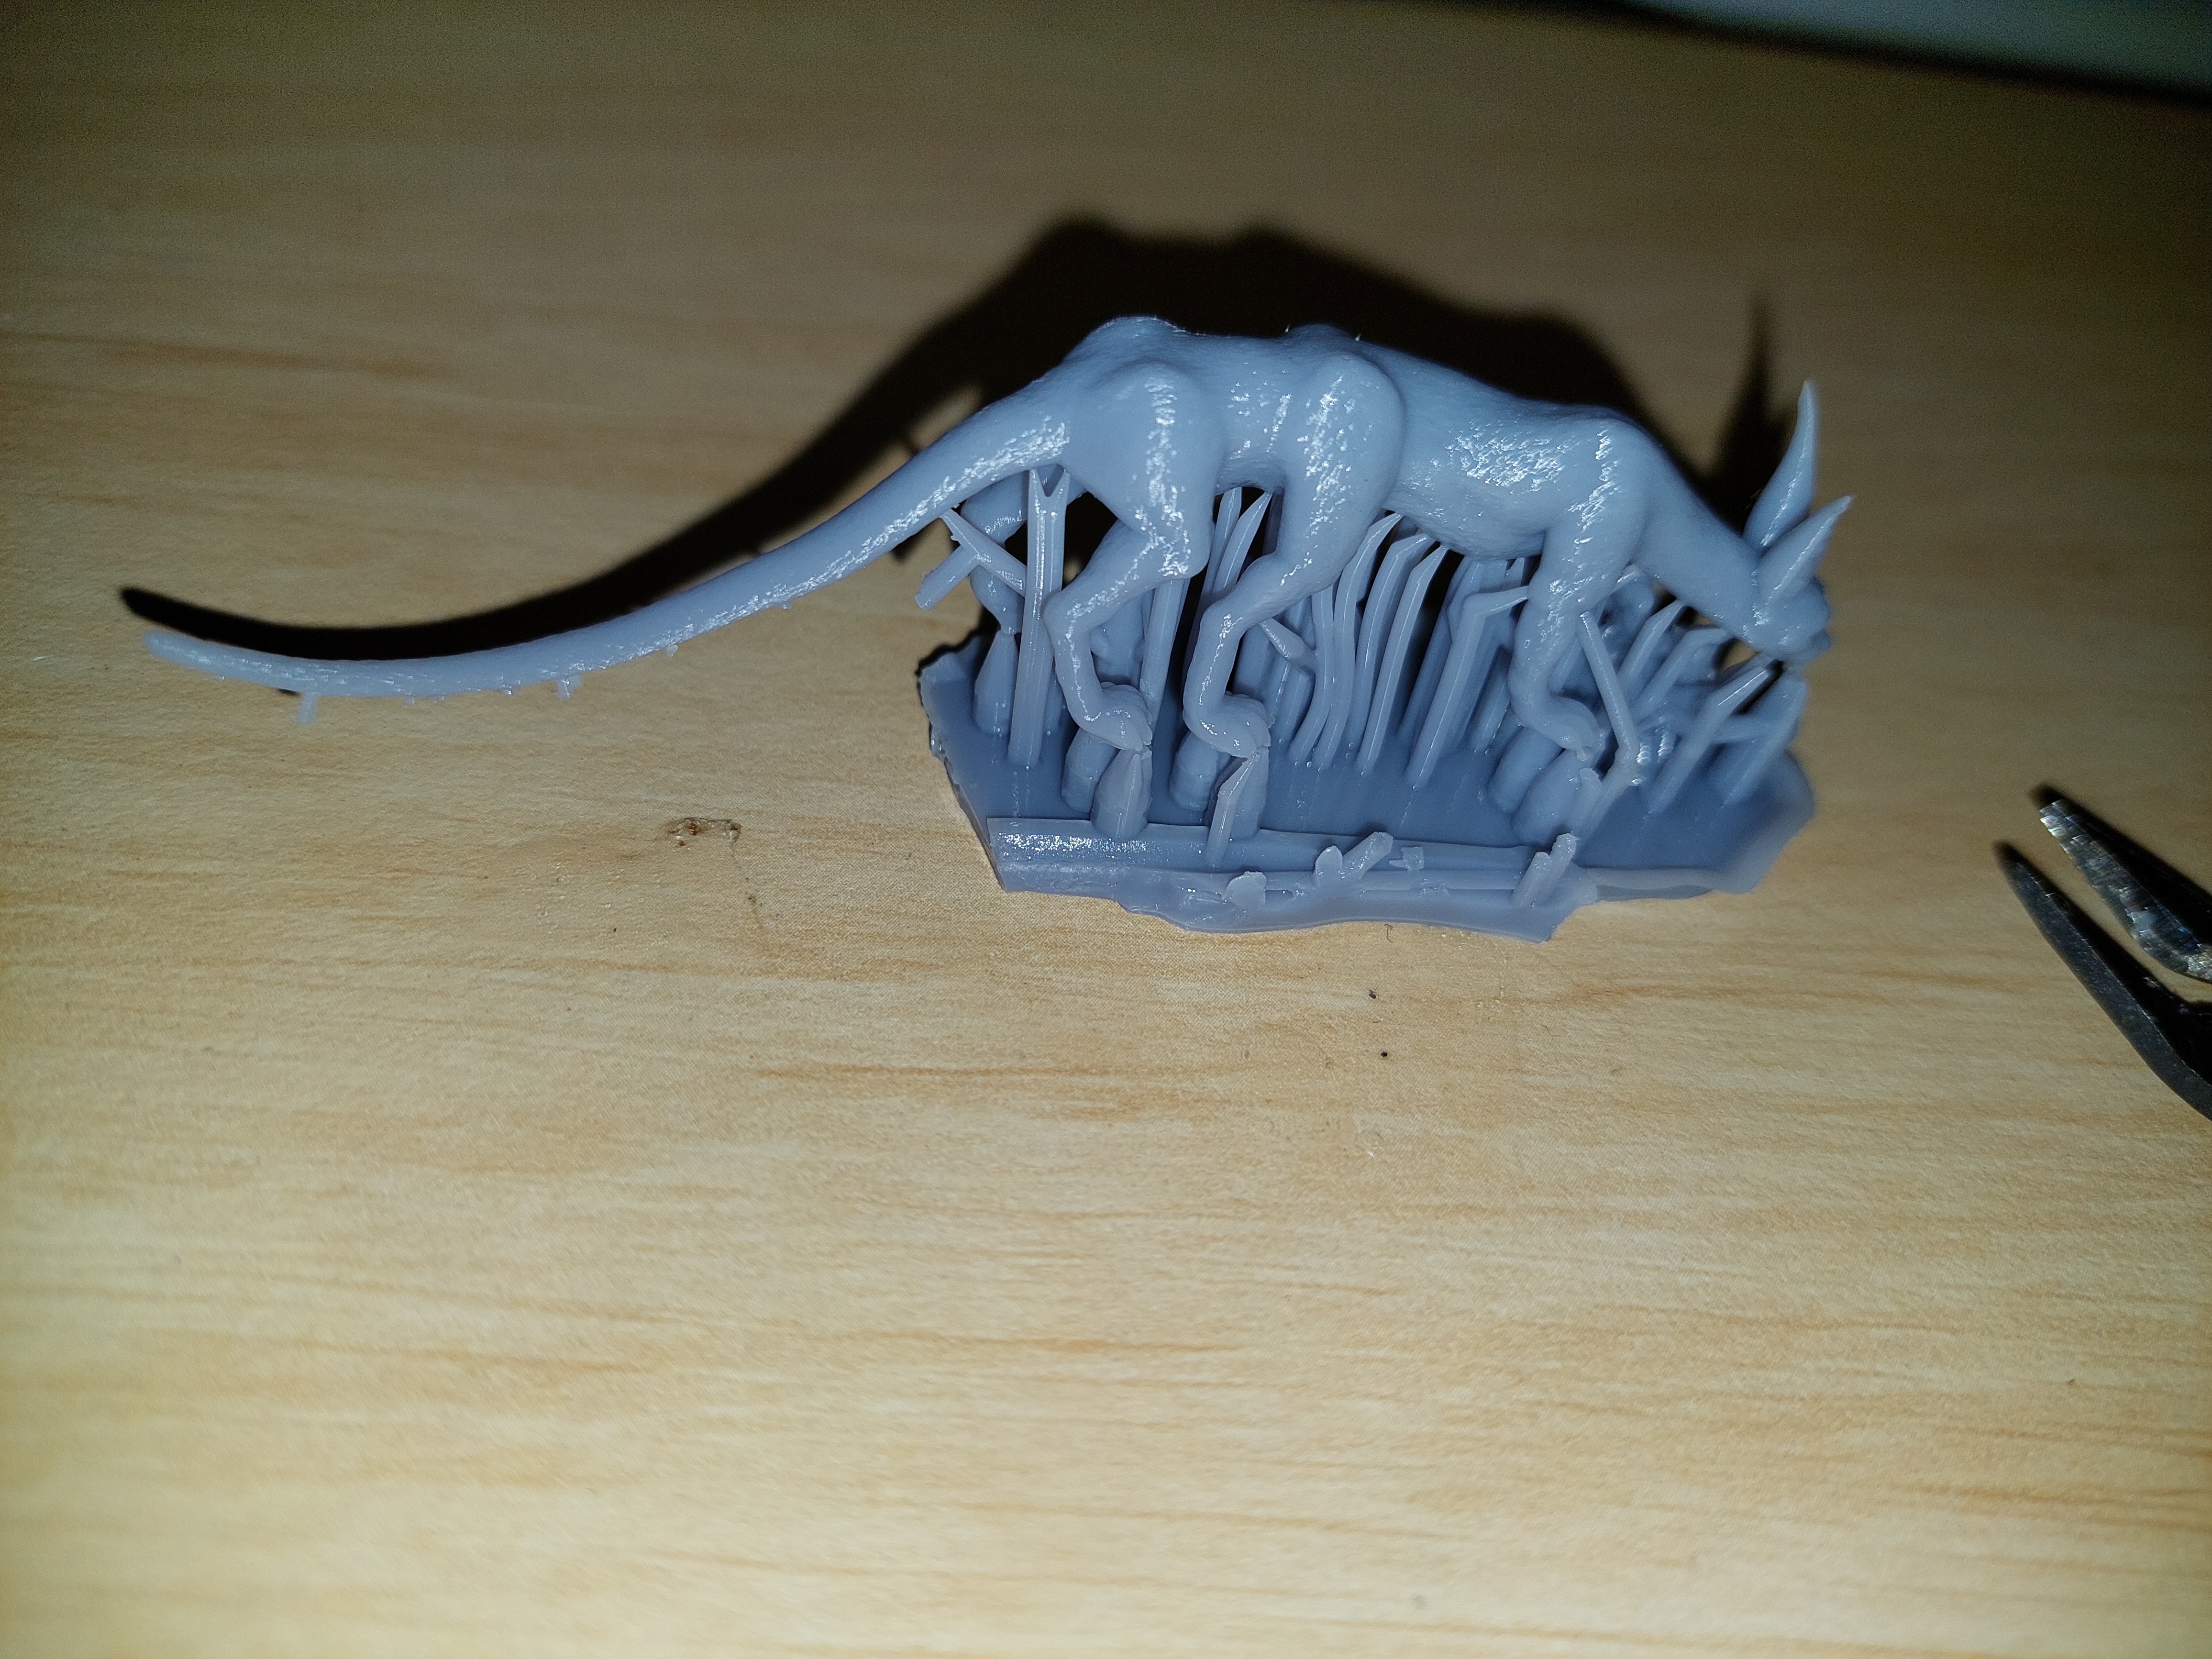
Support Removal Process:
(Assuming you have removed the model from the build plate and washed it, do not cure it any further before removing the supports)
(Your nails or Craft Knife) Using your hands pinch your nails against the supports on the ear of the Viscan gently to ensure the supports separate from the ears without gently. You can do the same with the Craft knife by gently placing the blade with the sharp end facing up, below the support connection to the ear in the space between the ear and the support. Then gently raise the blade to leverage the support free from the ear, move steadily to avoid cutting off the tip of the Viscan’s ear once the support comes free.
(Craft Knife) Use the blade to cut the supports off the Viscan’s tail, begin at the base of the tail and run it down along the tail removing supports all the way to the tip or the tail. The thicker supports a third of the way to the tip of the tail will only cut if the curing settings are correct, if you feel any resistance skip them and simply cut the rest of the smaller supports.
(Flush Shears/Scissors) Starting at the face keep the flatter side of the Sheers/Scissors facing up then cutting close to the model remove the thicker supports as found under the chin, five feet that are level with the ground, the one on the elbow of the foot raised slightly up, and if you did not manage to remove the thicker supports on the tail in step 2 remove them using the Flush Shears/Scissors. Note that you do not remove the thick supports under the raised hand or belly of the Viscan just yet.
(Flush Shears/Scissors) Cut horizontal support directly below the Viscan’s rail connecting all the tail supports to the body supports then cut the raft into two sections, one end with the body, one end with the tail. Remove the piece below the tail if it does not fall free naturally by checking and cutting any supports you may have missed.
(Hands) Pick the model up by holding the remaining piece of raft, hold the end below the Viscan’s head with one hand and the end below its hind legs in your other hand. Flex the raft by bending the ends down and pushing your thumbs in the middle of the raft. Be gentle and flex it three times while listening for supports breaking free, pay attention to the slightly raised paw, it should not come free just yet, this step is to free the Viscan’s belly of most of the supports below there.
(Hands) Hold the raft with one hand and the shoulders of the mid pair of legs of the Viscan then wiggle it by rolling the model from its right side to its left side (assuming the head is the front and tail the back), move steadily favouring the raised paw as a pivot point until all the remaining supports break free. Ideally the raised paw will be the last part of the model to come free. If any supports broke free of the raft to remain with the model just pluck them free by hand they should not cause any damage to the model as long as you pinch them where they touch the model before pulling them free.
(Mini Hand Saw/Sanding Paper) Take the model and hold it with your thumb and middle finger with the model’s feet facing you and it’s back/ears facing down away from you. As a result your index finger can rest on the Viscan’s head so be careful not to break the ears while holding it like that. Tilt the model so the tail rests over the curve of your palm where your thumb meets your palm (also known as the Abductor pollicis brevis muscle). This will allow your palm to support the tail. Use the Mini Hand Saw/Sanding Paper in your free hand to run over the tail where the supports used to be, a few gentle brushes over the area will create a texture similar to the natural model texture where the supports may have caused deformation.
You can now allow the model to cure fully before painting if you so desire.
Painting Suggestion:
For painting the recommended method is to base coat the model using an orange. Follow this with a yellow coat blending with the orange at the midline down to the belly then a white coat following the neckline, belly and lower parts of the limbs. Once that dries paint the top a reddish orange or non-metallic copper before adding brown spots, paint details of the ears, nose and eyes last. An airbrush for the base coat and to apply the top red/copper followed by the lower yellow and then white can speed the process up significantly. This specific model and pose was designed with fast painting in mind so the top and belly is easy to get to with an airbrush.
These are the steps that have worked best for me. You can try whatever method works for you, at times I have managed to simply pull the model free but the risk of the supports damaging the model’s tail, ears, or raised paw needs to be considered as those points can fail when treated roughly.
:format(webp)/https://fbi.cults3d.com/uploaders/14468091/illustration-file/f945c9ad-5e76-46c3-b7b2-b88fa7edce01/Viscan-Gif.gif)


/https://preview3d-images.cults3d.com/osqkxtwngovckct3v5vdsbxiug1b)
/https://preview3d-images.cults3d.com/2n42nj2qkpmwqdzxr5detyogkz4r)


