Skip to content

Airsoft Needler conversion

πŸ”« 3D models of guns or weapons are dummy objects or prop toys and have no real functionality as weapons. They are intended for entertainment or decorative purposes only. For any design violating our T&Cs, please report them.

Advertising
Advertising
?
Creation quality: 5.0/5 (1 vote)
Evaluation of members on the printability, utility, level of detail, etc.

  • 4.3k views
  • 24 likes
  • 68 downloads
  • 2 collections

License
3D design format
STL Folder details Close
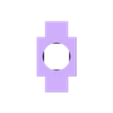
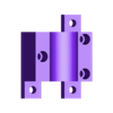
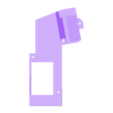
  • HiCapAdapter.stl
  • HopAdapter.stl
  • HopClampLower.stl
  • HopClampUpper.stl
  • LowerMagBrace.stl
  • MagBulge.stl
  • MagPort.stl
  • MagStbd.stl
  • Muzzle.stl
  • UpperMagBrace.stl

Learn more about the formats

Publication date 2024-01-13 at 21:36
Design number 1710082

3D printer file info

3D model description

The following is a written overview of how to assemble the Needler conversion. A video going over the Needler conversion will be uploaded shortly and this description will be modified to include it when it is posted.
Using a Nerf needler as a starting platform these parts will allow you to convert the Needler over for use in airsoft. The conversion utilizes the PolarStar F2 engine with Bullgear hopup attachment that replaces the front half of the F2 engine.
The two part Hop Up clamp requires the use of 3 heat set m3 inserts into the bottom half before the top half can be attached with matching M3 hardware. The base of the Hop Up clamp screws directly into the inner side of the needler. Use the Hop Up base as a drill guide and drill undersides holes so the screws have plenty of material to bite into.
The routing for the air line can be handled any way you like. I choose a large loop with the QD fitting sticking out of a hole in the bottom of the gun. To give it a solid mount I used some simple 1/8NPT HAP fittings and 2 part epoxy to adhere it to the battery tray of the original gun. This tray will also be sued to hold the 7.4V lipo that powers the FCU and the needlers lights.
Wiring the gun is fairly straight forward. I ran the FCU and its harness down into the battery box and extended the trigger, fire select and solenoid wires to reach the engine and controls in the upper portion of the gun. Wire color coding is at the bottom of this page.
You can keep the original circuitry in the gun to power the lights but I chose to run them off of the FCU's 7.4V battery to do this use a small voltage regulator to step down the voltage to appropriate level. I rewired the LEDs to all be in parallel and wired each of the gun halves into banks that connect together through a single connector to make disassembling the gun in the future easier. This extra work is not necessary to make the LEDs function, but it will make maintenance easier in the future.
To make the magazine take apart any standard M4 flash mag and cut off the lower portion (the half with the gears and winding mechanism). The Magazine halves (with side extensions glued in will clamp over the winding porting of the flash mag. The top portion of the mag (the part with the loading door) will need to be trimmed down in order to fit into the printed magazine halves. The two mag braces do not need to be glued into the top and bottom slots on the magazine, when the Nerf needler shell halves are closed over the gun they will be held in place. If you are having trouble getting them to stay put, a little bit of glue wouldn't hurt it. The Hop up and HiCap adapters allow you to use a small length of bb feed too to connect the two, the exact length of this tube will be dependent on where the engine is mounted as there is no correct fixed location and can be mounted in slightly different spots between guns with affecting its function. Lastly, cut a small notch in the bottom of the Needler shell halve and pull the flash mag winding cord so it sticks out of the bottom of the gun. This cord will allow you wind the internal HiCap mag when the gun is closed up.
Before closing up the gun it is necessary to drill a hole in the left half of the Needler shell so you can access the hop wheel. The exact location of this hole will depend on where you mounted the engine and hopup and the size of the hole is up to the user. A larger hole will make it easier to adjust the hop up but make look unsightly while the opposite is true for a smaller hole. Start small and gradually increase its size until you are satisfied.
Parts Required:
Nerf Needler
PolarStar F2
Bullgear F2 hopup
Barrel and bucking of your choice
7.4V lipo battery
Small voltage regulator
M4 Flash magazine
Assorted HPA fittings
Assorted M3 hardware and three M3 heat set inserts
Any switches you want to control the safety, fire selector and LEDs

Cable color code is as follows:

Black - Top Solenoid
White - Bottom Solenoid
Red - Fire Selector
Blue - Trigger
Brown - Ground (common)
Enjoy your new gun and paint it up any color scheme you like!

3D printing settings

Default Dremel 3D20

Advertising


Issue with this design? Report a problem.

Would you like to support Cults?

You like Cults and you want to help us continue the adventure independently? Please note that we are a small team of 3 people, therefore it is very simple to support us to maintain the activity and create future developments. Here are 4 solutions accessible to all:

  • ADVERTISING: Disable your banner blocker (AdBlock, …) and click on our banner ads.

  • AFFILIATION: Make your purchases online by clicking on our affiliate links here Amazon.

  • DONATE: If you want, you can make a donation via Ko-Fi πŸ’œ.

  • WORD OF MOUTH: Invite your friends to come, discover the platform and the magnificent 3D files shared by the community!


Sharing and downloading on Cults3D guarantees that designs remain in makers community hands! And not in the hands of the 3D printing or software giants who own the competing platforms and exploit the designs for their own commercial interests.

Cults3D is an independent, self-financed site that is not accountable to any investor or brand. Almost all of the site's revenues are paid back to the platform's makers. The content published on the site serves only the interests of its authors and not those of 3D printer brands who also wish to control the 3D modeling market.

100% secure payment by credit card, PayPal, Apple Pay, Google Pay, etc.
View all payment options.