Skip to content

EnderXY - Bed Wobble Begone

Advertising
Advertising
?
Creation quality: 5.0/5 (1 vote)
Evaluation of members on the printability, utility, level of detail, etc.

  • 511 views
  • 6 downloads

License
3D design format
Folder details Close
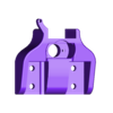
  • 2040_Linear_Rail_Guide.STL
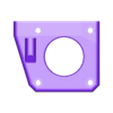
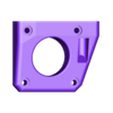
  • Left_Arm.STL
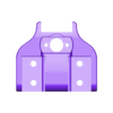
  • Left_Motor_Mount.STL
  • Limit_Switch_Mount.STL
  • Right_Arm.STL
  • Right_Motor_Mount.STL

Learn more about the formats

Publication date 2024-01-16 at 00:05
?
Published to Thingiverse on: 2024-01-15 at 20:41
Design number 1715394

3D printer file info

3D model description

Join the EnderXY community on Reddit:
https://www.reddit.com/r/EnderXY/

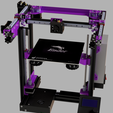
I've made this as I've received a few messages on here asking if there was a way to fix the bed wobble without using triple-z. This is untested as I use triple-z, but it should work and fix the issue completely.

Remember to print 2040 linear rail guides before dissasembly to make the installation easier, I've included some to print (atleast 2).

You will lose 10mm on X as the motor had to be shifted, effectively moving the bed back 10mm so that the linear rail and lead screw are parallel, though this also depends on the thickness of the toolhead you are using.

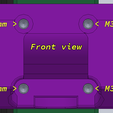
Note: If you are using the printed bracket and location designed by belt3dprinterkit then you will have to flip the bracket (check pictures).

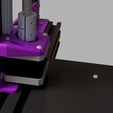
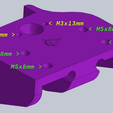
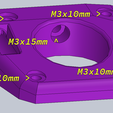
Motor mount (Pic 7):
- 4x M3x15mm (Socket or Pan head)
- 4x M3x10mm (Socket or Pan head)
- 4x M3x13mm (Socket or Pan head)
- 4x M3 spring nuts (Re-use stock)

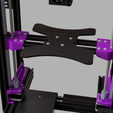
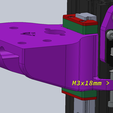
Arm (Pic 4, 5, 6):
- 8x M3x8mm (Socket or Pan head)
- 8x M5x8mm (Re-use stock)
- 4x M3x13 or 15mm (Socket or Pan head)

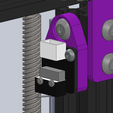
Z-endstop mount (Pic 8):
- 1x M5x8mm (Pan head)
- 1x M5 spring nut (Re-use stock)
- 2x M3x6mm
- 1x M3x18mm (Adjustment)

Dissassembly:
1. Remove heated bed from bed carriage.
2. Remove stock arms (P4L/P4R in the manual) and 1020 extrusions.
3. Remove 1020 extrusions from stock arms (P4L/P4R in the manual).
4. Remove linear rails and carriage
5. Remove motor.
6. Remove Z nut from lead screw.
7. Remove lead screw from coupler.
8. Remove coupler from motor.

As screws cross paths there is a very specific order that has to be followed for installation.

Linear rail and carriage installation:
1. Use 2040 linear rail guides to align the rails.
2. The rail should touch the lower brackets (P3L/P3R in the manual).

Motor installation:
Connect mount to 2040.
Connect motor to mount.
Add Z rod coupler.

Arm installation:
1. Connect arm to MGN12H (top bolts ONLY).
2. Connect Z nut to arm.
3. Connect arm to MGN12H (bottom bolts ONLY).
4. Connect 1020 extrusions to arm.
5. Connect lead screw.

Z-endstop mount:
1. Follow the picture.

Remember this is untested until I get confirmation but I'm pretty sure there won't be any issues.

If you'd like to support my work you can here https://ko-fi.com/supavitax

Original model at thangs.com: https://social.thangs.com/m/992921

Advertising


Issue with this design? Report a problem.

Would you like to support Cults?

You like Cults and you want to help us continue the adventure independently? Please note that we are a small team of 3 people, therefore it is very simple to support us to maintain the activity and create future developments. Here are 4 solutions accessible to all:

  • ADVERTISING: Disable your banner blocker (AdBlock, …) and click on our banner ads.

  • AFFILIATION: Make your purchases online by clicking on our affiliate links here Amazon.

  • DONATE: If you want, you can make a donation via Ko-Fi πŸ’œ.

  • WORD OF MOUTH: Invite your friends to come, discover the platform and the magnificent 3D files shared by the community!


Sharing and downloading on Cults3D guarantees that designs remain in makers community hands! And not in the hands of the 3D printing or software giants who own the competing platforms and exploit the designs for their own commercial interests.

Cults3D is an independent, self-financed site that is not accountable to any investor or brand. Almost all of the site's revenues are paid back to the platform's makers. The content published on the site serves only the interests of its authors and not those of 3D printer brands who also wish to control the 3D modeling market.

100% secure payment by credit card, PayPal, Apple Pay, Google Pay, etc.
View all payment options.