Jaded: An old-fashioned pixelated easter egg
Remixed by
Copyright Claim
Jaded: An old-fashioned pixelated easter egg
Remixed by
Boost
6
7
0


Print Profile(1)

0.2mm layer, 2 walls, 10% infill
2 h
1 plate
Boost
6
7
0
0
9
1
Released
Description
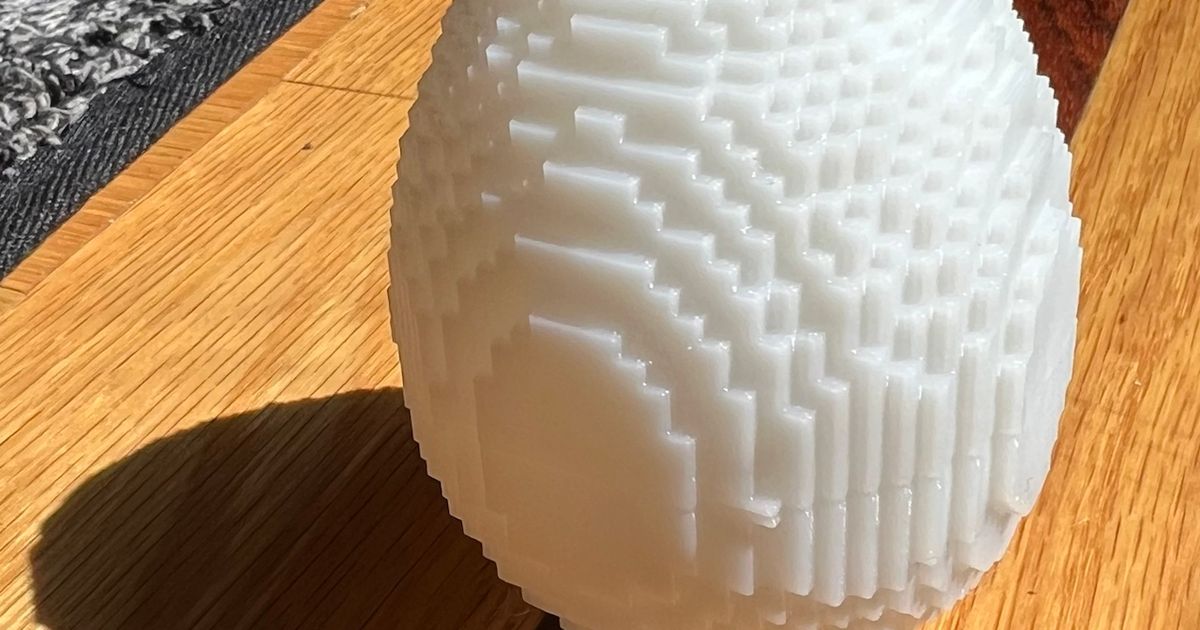
After designing a trick easter egg (see remix link below), I decided to make a version that's simpler to open. In order to get this to look nice, I had to figure out a way to lock the two halves together nicely but reversibly. As it turns out, this is a little harder than it looks…. especially with typical FDM tolerances.
After a good deal of testing, I settled on an insert model that requires a little super glue, but works quite well with a little squeeze of the egg. I hope this is a useful result for people to make good looking Easter eggs from!
Printing Notes
- This is probably obvious: print the two egg halves with widest parts shells facing down.
- Use supports (organic/tree preferably) to support the inside domes of the egg halves.
- If you can get away without brims for the main parts, the result will be better. I was able to print fine without brims on everything but the little pins.
- I printed in cloudy white PETG at 0.16 mm layer height with 3 walls at 10% infill. A small layer height is particularly important in this print around the detail of the latch mechanism and insert areas (if you want to use adjustable layer height, apply the detail in this area!).
- PLA may work fine, but haven't tested it. PETG confers a little flexibility to the egg body to allow it to be squeezed to release the catch, like those cheap Easter eggs at the store. if you print with PLA, consider printing with 2 (or maybe 1?) walls & low infill to allow for a little flex to release the two halves.
- Print the clip lip side down (the protruding part on the bed). If you have issues with elephant's foot, you might have to size it down a little for a good fit. If you try to print it thin-side down, you'll likely have adhesion and other fit issues.
Assembly Notes
- The clip insert has a taper to it on the thin side, designed to seat into the taper on the bottom part of the egg (see pic). Once in place, you'll want to use a little super-glue in the gap and let it cure before testing the two pieces together (otherwise you might glue the egg shut… ).
- Before gluing the clip into the bottom, verify that your printed clip's lip (see cross-section picture) fits snugly into the top half of the egg, and comes out with a bit of effort. If it's too tight and requires lots of effort, try scaling the clip down by 1%. Glue after you get a good fit. For me, with a well-tuned printer using PETG, this works without scaling, your results may require a tiny bit of experimentation… but the clip is quick and cheap to reprint :).
- If you've already assemble it and it's a little tight/tough to get apart, simply rub a little sandpaper on the lip, and this should help loosen it up.
Design Notes
- I experimented with various different attachment mechanisms and ways to make the catch print reliably. This is the best I came up with, but i'm sure someone can out-design me here.
- I tapered the fit of the clip in the bottom part to hopefully give people a little wiggle room to resize the clip and still get a good glue-up on that part. In the worst case, it's possible to take the STEP file below and edit the clip for better fitment, if needed.
- Fusion360 and STEP files included, because I hope it helps people learn.
Comment & Rating (0)
All
No more
Related Models


© 2024 MakerWorld