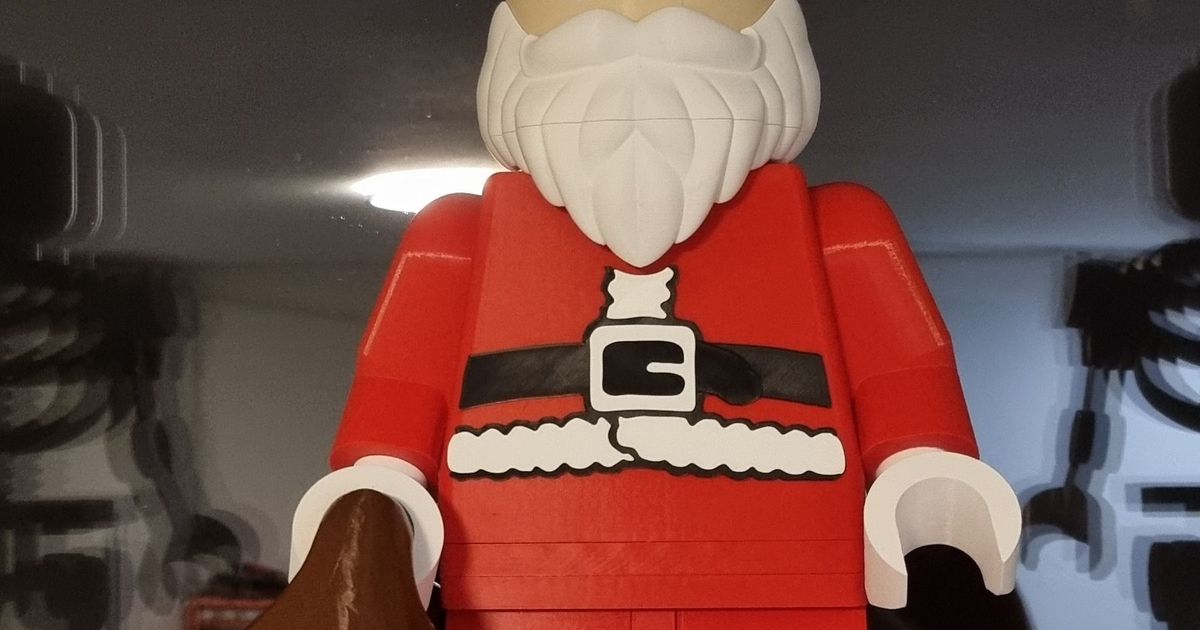
Inspired By Lego Mega Santa

Copyright Claim

Inspired By Lego Mega Santa

Boost
104
143
38

Print Profile(3)

All
P1P
P1S
X1
X1 Carbon
X1E
A1

0.2mm layer, 2 walls, 10% infill, pins downsized .01 for easier fit .01- 5hr faster print
Designer
46 h
7 plates
4.6(16)

0.2mm layer, 3 walls, 10% infill
Designer
49.8 h
7 plates
4.7(3)

(FAST) 100% Scale, less time and Filament
33 h
9 plates
5.0(1)

Boost
104
143
38
0
270
786
Released

Description

This is a significant remix of the “Big Santa Lego Inspired ” Files by Quist on Printables (https://www.printables.com/model/329527-big-santa-lego-inspired) (who was inspired by others as well)


This guys is about 20 Inches tall ( 19.5 inches give or take your measuring tape


These were actual individual files without a print profile. I arranged for the optimum
print bed size to avoid height issues with bumping prints as well as maximizing print space and time.
Also played with and tested infill/ walls to ensure good structural integrity and ease of removing
supports.


I pre-painted plate 2, 4 & 6 items as well to save others time (you can always change those colors easily)
About 38 pieces to include extra connecting pins JIC

Total time for all pieces: approx 47 hours and 40 min
Plt 1- 10 hrs 58 min
Plt 2- 8 hrs 16 min
Plt 3- 10 hrs 32 min
Plt 4- 4 hrs 52 min
Plt 5- 7 hrs 2 min
Plt 6- 10 hrs 48 min
Plt 7- 4 hrs 9 min

P1P/ Bambu Basic PLA
(I turn off Aux fan but the file profile has it on at 20%)


P1P / .04 / Textured PEI

.2mm
Iron topmost surface
Classic walls
3 wall loops
3 top shell
3 bottom shell
10% Gyroid infill
Prime tower enabled : Normal /Snug Threshold 5
Brim/Bed Adhesioin: Outer Brim Only /Brim width 4/Brim object gap .35
flush into infill/object turned on for Pegs on plate 6 (that can be unchecked if you want)

First layer filament seq.Profile is set to Auto but can be
changed to whatever as plate 6 is the only multicolored print and print seq is not likely to
cause issues

Comment & Rating (38)

Please fill in your opinion
(0/5000)

Print Profile
0.2mm layer, 2 walls, 10% infill, pins downsized .01 for easier fit .01- 5hr faster print
Yeah! It come out great! 48cm in height. I used Sunlu filament for the whole body except militairy beige from Extrudr for the face parts. I love their matte NX2 PLA.
The designer has replied
2
Reply
looks great!!
0
Reply
Print Profile
0.2mm layer, 2 walls, 10% infill, pins downsized .01 for easier fit .01- 5hr faster print
I Remix it for my husband. He love it. All Parts are easy toprint and look very smooth.
The designer has replied
1
Reply
wow that is awesome!!!!
0
Reply
Print Profile
0.2mm layer, 2 walls, 10% infill, pins downsized .01 for easier fit .01- 5hr faster print
I really like how this came out. I printed this straight from my phone off MakerWorld and while it printed great do feel some of the brims are unnecessary. Fit was okay I had to use my deburring tool on all the pegs to get them to fit in to the holes. The upper body is very loose with the lower body. Be extra careful with the arm joint peg. Both of mine broke while inserting them into the shoulder. Possibly change the infill to a greater density on those. Over it looks great and we get asked about it a lot.
1
Reply
Print Profile
0.2mm layer, 2 walls, 10% infill, pins downsized .01 for easier fit .01- 5hr faster print
The designer has replied
1
Reply
that looks SO kewl
0
Reply
Hi everyone 😉 I'm probably asking a stupid question, but how are the hands attached? Did you glue them? They don't hold on their own, at least not for me.
The designer has replied
2
Reply
yes- i glued mine
3
Reply
also i have made other super large Lego inspired items and i place a strip of duct tape (not wrap-just a piece on about 1/3rd of the joint in question and iit allows me to pose the arms AND also holds the and on if you do not want to glue it..it gives a tighter joint without having to glue or force it like you would if printed tighter
4
Reply
Print Profile
0.2mm layer, 3 walls, 10% infill
Looks good but could be tweaked a little better
The designer has replied
1
Reply
how so? I'm about to tackle this!
(Edited)
1
Reply
Suggestions welcomed as to where in the profile it could be tweaked better...
(Edited)
1
Reply
Print Profile
0.2mm layer, 2 walls, 10% infill, pins downsized .01 for easier fit .01- 5hr faster print
Love it! People keep threatening to steal it on me.
The designer has replied
1
Reply
we thought mine were going to grow legs and walk off...lol
0
Reply
Hey :) Isn´t it better to tile plate 6 in each color? Red an extra plate, white an extra plate etc.... Better for the time I mean
The designer has replied
1
Reply
you could customize by adding more plates if you wanted to-i'm not sure that the time savings would be all that much (maybe 30 min?) try it and find out-let us know
1
Reply
Has anyone put the decal inside the torso?
The designer has replied
1
Reply
I glued it on mine- i would think printing separately and gluing is better-takes less time and also wastes less filament
1
Reply
Print Profile
0.2mm layer, 2 walls, 10% infill, pins downsized .01 for easier fit .01- 5hr faster print
This is excellent
The designer has replied
0
Reply
thank you for the review!!!
0
Reply