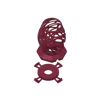
Lithophane Art lamp
Lithophane Art lamp
Print Profile(4)


Description
EDIT: I had this posted on that other site and imported it here. This was originally created in July of 2019
--------------------------------------------------------------------------------------------------------------
I had successfully printed a couple lithophane lamps and bases but wanted to make a different lamp base. I fell in love with the art vase 3 created by Edmund Keefe and figured "Why not combine them and make a couple changes to the mechanism?"
In addition to remixing the lamp, I wanted to add a little more stability and make it so the light socket and cord sets I bought off Amazon screwed directly into the top that supports the shade. My other goals were to need no supports and print easily. Oh, and in the spirit of full disclosure, I had never modeled anything before and had only been 3D printing for a few months.
Should print fine without supports
How I Designed This ===================
Making the base
I downloaded the art_vase_3.stl and attempted to import it into Tinkercad. This immediately resulted in an error because Tinkercad has a 25mb file limit and the stl was close to 40mb. A quick google search resulted in a suggestion to use Meshmixer to shrink the file, so here is what I did.
- Download and install Meshmixer from the link.
- Open Meshmixer
- Import the art\_vase\_3.stil file.
- Select all, (ctrl-A)
- Edit > Reduce
- I accepted the defaults of Reduce Target: Percentage, Reduce type: Shape Preserving, and Percentage of 50% and clicked "Accept"
- Once it was done, I went to File > Export and exported as .stl
Back to Tinkercad and a quick attempt to import the file again, which resulted in a new error that there were too many triangles as Tinkercad can only import files with a max of 300,000 triangles. Grrrrr
- Open Meshmixer, (again)
- Import the art_vase_3.stil file, (again).
- Select all, (again).
- Edit > Reduce, (again).
- This time I change Reduce Target to Triangle Budget, set it to around 280,000 and clicked “Accept”
- Once it was done, I went to File > Export and exported as .stl, (again)
Now it would import into Tinkercad, yay! Once imported, I used the polygon tool to model a base, aligned the vase and the base to each other, sunk the vase into the base, and then used some cylinders to punch out a hole in the bottom and a channel for the cord. Since the current size of the vase doesn't look right with the lampshade, I lowered the overall height to 150mm and grouped everything together. A quick export to .stl and rename and that became art_lamp_base.stl
Making the top
Because I wanted the socket to screw into the top and still support the lampshade, I knew I needed to combine some more files. I had no idea how to model threads, so I searched Thingiverse for the keyword e26 hoping someone had already done it. Bingo! Raul Machado had posted Lamp Nut which was exactly what I needed for the threads.
I imported lamp_nut.stl from there and lampshade-support2.stl from Julian's LED Lamp make and then aligned and centered them.
I then used the cylinder tool to fill in the open space between them and grouped them together into one object. Since I wanted this to sit firmly on top of the base, I used the torus tool to make a channel in the underside of the object so it could sit on the top of the base. One more grouping and export and art_lamp_top.stl was born!
Designing the Lampshade
- I went into Photoshop and created a new file that was 4000 pixels x 1335 pixels.
- I then added each of the photos I wanted to make the shade as layers and sized/moved them around until they covered the canvas.
- Next up I made them a bit more "lithophane friendly" by converting them to black & white and adjusting the exposure, contrast, and clarity.
- Next I went to http://3dp.rocks/lithophane and uploaded my composite image.
- I chose the "Outer Curve" type and set the following values:
- Model Settings- Set Max Size to 400 and Curve to 360
- Image Settings- Select Positive Image
- After changing the settings, I clicked refresh and, once it finished rendering, I downloaded the .stl
Slicing
I used Cura 4.0 and printed on an Ender 3 so my settings are pretty basic.
Lamp bottom and top were both sliced to print at 210 with a bed temp of 60. 5% infill, no supports, full cooling fan, 60mms print speed, and a skirt.


