FOR AIRSOFT USE ONLY (Not For Resale)
IF YOU HAVE ANY ISSUES PLEASE CONTACT ME!
Message me on Cults3D or u/Arcticghost27 on Reddit (Preferred)
If you would like a YouTube video assembly guide that covers from print to function test please leave a comment.
This airsoft grenade has a lot of threaded components, please make sure your printer is capable of printing accurate threads before downloading. This will ensure success when making your own. If the threads are tight during initial assembly I find that using silicone grease on the threads makes it significantly easier to screw the components together.
Tools I Use for Assembly
Triangular File (Used to clean up the hole and threads on the Fuse_Body_High_Sensitivity.stl)
Flat File (I often use this for leverage on the Fuse_Body_High_Sensitivity.stl when threading it into Combustion_Chamber_Top_v4.stl. Place the flat file where the spoon goes to get the best leverage on the part and allow you to not damage the print)
Bench Belt Sander (I use this to sharpen the tip of the carriage bolt, this makes it easier to ensure the point is in the middle of the bolt for proper contact with the ramset cartridge. A bench grinder or flat file can also be used)
Patience (Arguably the most important when assembling your first one, if you get stuck please contact me. I have made over 20 now and they come out perfect every time, I would love to share my knowledge with you so that your build is successful)
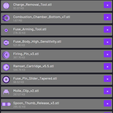
Fusion 360 Files Included
List of included files shown in images
Video
https://www.reddit.com/r/airsoft/comments/19bt7ll/airsoft_impact_grenade_using_022_powder_loads/?utm_source=share&utm_medium=web2x&context=3
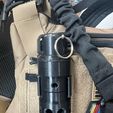
Airsoft impact grenade that uses 0.22 Ramset powder loads. This was designed using the yellow tipped dewalt powder loads, I would not recommend using the more powerful loads. Please be safe and responsible when using these airsoft grenades, always eye and ear protection.
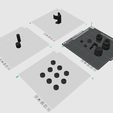
For Bambu Labs users there is a .3mf file with the proper settings already configured for PETG all you need to do is load filament and click print.
Additional Parts Required
1x - Compression Spring 1.6x18mm OD,100mm (One 100mm spring will make 2 airsoft grenades)
https://www.amazon.com/dp/B0B6J1LLRQ?ref=ppx_yo2ov_dt_b_product_details&th=1
1x - 1/4 in.-20 x 2 in. Carriage Bolt (Only 1 needed per airsoft grenade)
https://www.homedepot.com/p/Prime-Line-1-4-20-Carriage-Bolts-and-Nuts-with-Smooth-Domed-Heads-12-pack-GD-52103/202633663
1x - Ramset compatible .22 Caliber powder loads, green strength or less
https://www.lowes.com/pd/DEWALT-100-Count-0-22-Caliber-Powder-Actuated-Load/5014009225
2x - M3x16mm or 20mm screws for the charge removal tool
https://www.homedepot.com/p/Everbilt-M3-0-5-x-20-mm-Zinc-Plated-Steel-Socket-Cap-Recessed-Hex-Screw-3-per-Bag-803208/204281930
1x - 3mmx40mm or 45mm split cotter pin and a key ring.
https://www.amazon.com/uxcell-Stainless-Fastener-Automotive-Mechanics/dp/B0B2S3B9JZ/ref=sr_1_4?crid=4PSEEVS1HEX9&dib=eyJ2IjoiMSJ9.SFoN1hUdN1LTY5dEFoc0d0FAs1gzEh9seMG-hSVdxPVoSZDwozQQAdbyIip_ZznozFsbCZjzRtM4CuqJvTTtIFJ-4Fr3wzAZAF0Nm94zm0syZCrSO6kJ2_GPxnqjJg42sqOXbV3GMcxJO2lOyCSdVgEE95PIROlaSqDrWhNPq6_-umgGmZuS0AdubSfz8diqXsvkuQ39yMpC8TtRrtTFZveCLqkrk-ju2Lekp92N-5Xv4EeL_GpQP1aUJy7Tff6NUMO-LIzt1-RrNJw7S8-yXe9SQgl2WgQ85YwlrqqUwc8.pKQ6sycJRqnjIERftlZts67T7QR3MjuZqTgWibmL0pY&dib_tag=se&keywords=3mm%2Bsplit%2Bcotter%2Bpin&qid=1705801782&s=hi&sprefix=3mm%2Bspl%2Ctools%2C133&sr=1-4&th=1
Written Instructions
Firing Pin
* Grind the end of the 1/4 in.-20 x 2 in. carriage bolt into a point (Refer to photos)
- Thread the fuse_pin_slider_tapered.stl fire onto the carriage bolt so the square portion is completely covered and the top of the fuse pin slider touches the bottom of the bolt head.
Fuse Body Assembly
* Insert the firing pin into the top of the fuse_body_high_sensitivity.stl.
Cut the compression spring 1.6x18mm OD,100mm down to 34mm in length.
Slide the spring over the firing pin so the cut end touched the bottom of the fuse body, then thread the firing_pin_v3.stl onto the end of the firing pin so the point is fully exposed. (Refer to photos)
Airsoft Grenade Body
* Thread the completed fuse body onto the combustion_chamber_top_v4 you may need to clean up the threads with a file. A flat file also works well to give you leverage on the fuse body while threading it in for the first time, I used a little grease on the threads to make it easier.
Thread the ramset_cartridge_v5.5.stl into the combustion_chamber_bottom_v7.stl.
Arm the airsoft grenade body by using the fuse_arming_tool to push the firing pin up and into the angled pocket so it holds there on it own.
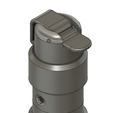
Stretch the spoon_thumb_release_v3.stl over the top of the firing pin and lock it in place with a 3mm split pin (cotter pin).
Now a ramset powder load can be inserted into the ramset_cartridge_v5.5 and then thread the top and bottom of the combustion chamber together.
Pull the pin, remove the spoon, and throw the airsoft grenade. (Please note that performance is more reliable on hard ground e.g. concrete, wood, etc.)
FOR AIRSOFT USE ONLY (Not For Resale)

/https://fbi.cults3d.com/uploaders/16114427/illustration-file/41ad704f-e459-43d0-b925-8cba5379b21c/IMG_4858.jpeg)
