Raspberry Pi 5 Case
Raspberry Pi 5 Case


Print Profile(2)


Description
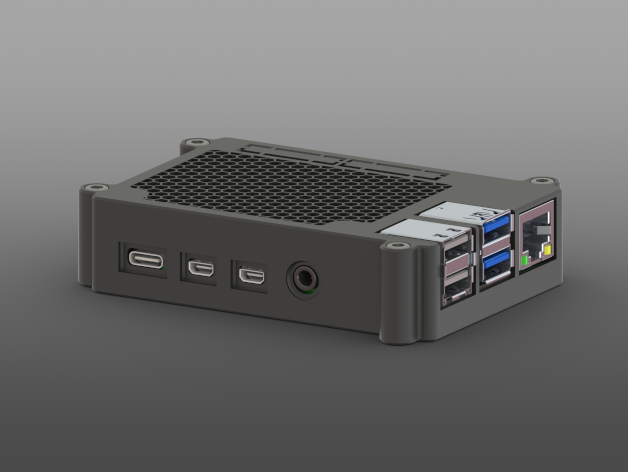
A Raspberry Pi 5 Case inspired by @mkellsy's 4B case using M3x16 socket head screws. This project does not contain nearly as many variations as they have in their 4B project but includes a “Blank” top/bottom case to customize.
This package contains several options to customize the look and feel. The main project 3mf file contains the All Holes Honeycomb with a colorable Raspberry Pi Logo for AMS.
Variants:
Bottom:
- Blank - meant to be remixed
- Honeycomb - has a honeycomb vent
Top:
- Blank - meant to be remixed
- Detachable GPIO - has small tabs you can cut to open up the GPIO port only
- Detachable GPIO + PoE - has small tabs you can cut to open up the GPIO/PoE ports
- All Holes - Contains all the slots for external connections
- All Holes Honeycomb - Contains all the slots for external connections with a honeycomb vent
Materials:
- 4x - M3x16 socket head screws
- I used McMaster-Carr https://www.mcmaster.com/catalog/129/3508/91292A115
- I didn't need to use a tap to assemble
- I used McMaster-Carr https://www.mcmaster.com/catalog/129/3508/91292A115
Slicer Settings:
I suggest using glue to help with the honeycomb pattern variants first layer. If it isn't sticking please try to slow down the print and increase temps.
- 0.2mm Layer Height
- 20% infill - You can increase this if you wish
- 4 Wall Loops - This helps not need support on the inside of the fasteners holes
- Detect thin walls - Some slicers (Bambu) show a single line that isn't right. This fixes that.
- Supports - Maybe only needed if you are having trouble with cleaning out the screw heads ends. I haven't needed this.
Assembly:
- Clean out the screw head ends of any material blocking the screw holes of the Top print
- Place RPI board into Bottom print
- Fit the Top case over the Bottom assembly by lining up the guide holes
- Use some light force to screw in the fasteners through the Top and into the holes aligned in the Bottom
- It shouldn't require a tap but if you run into trouble use one.
Customization:
For AMS - This project already includes a Top All Holes & Top All Holes Honeycomb with the Raspberry Pi logo in the “RPI5 Case Project.3mf” file. You can just customize the colors for that.
For AMS - If you wish to customize the case with you own logos/text you can follow this tutorial using Bambu Studio and an .svg file.
There should be included both STEP and STL files that you are free to remix and make your own.
References:
These are some references I used to help me make this that might be useful.
- Raspberry Pi 5 STEP https://datasheets.raspberrypi.com/rpi5/RaspberryPi5-step.zip
- Mechanical Drawing https://datasheets.raspberrypi.com/rpi5/raspberry-pi-5-mechanical-drawing.pdf