Bambu Lab X1 Y-Splitter with inlet for pneumatic connector G1/8" (M10).
Bambu Lab X1 Y-Splitter with inlet for pneumatic connector G1/8" (M10).


Print Profile(1)

Description
Update 10/27/22:
Some user has asked me for a version to fix on the machine and here you have it to test.
Attached is a "beta" version
of the divider to fix in the corner of the machine with double-sided tape.
I emphasize beta. It would help me and the community to leave a comment on how this version works to decide whether to release it or not.
The file is recommended to print vertically with a layer height of 0.12mm and a 25% infill.
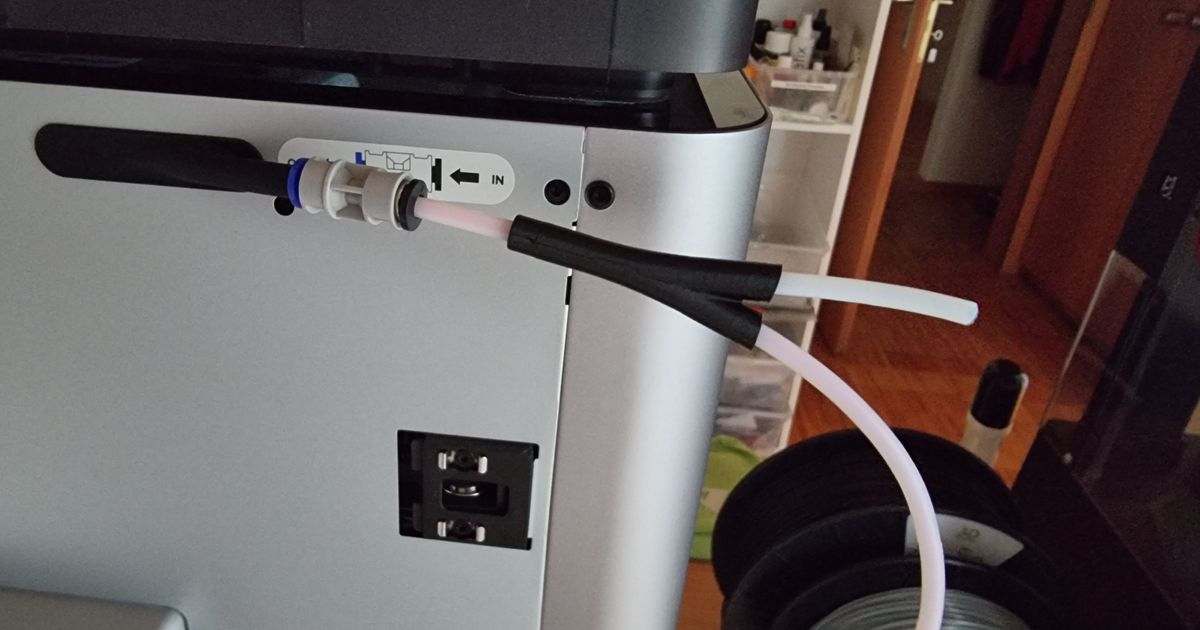
It is necessary to cut the ptfe tube that goes from the splitter to the extruder to a certain size. Because each machine is different in its construction there is no standard measurement so you have to measure yourself, the splitter has a mark to use as a reference for the measurement. Attached are pictures of how to do it.

The idea is that the ptfe tube is as straight as possible occupying all the useful space of both connectors. Leaving spaces unoccupied by the ptfe tube can cause a malfunction in the filament loading.
Optional:
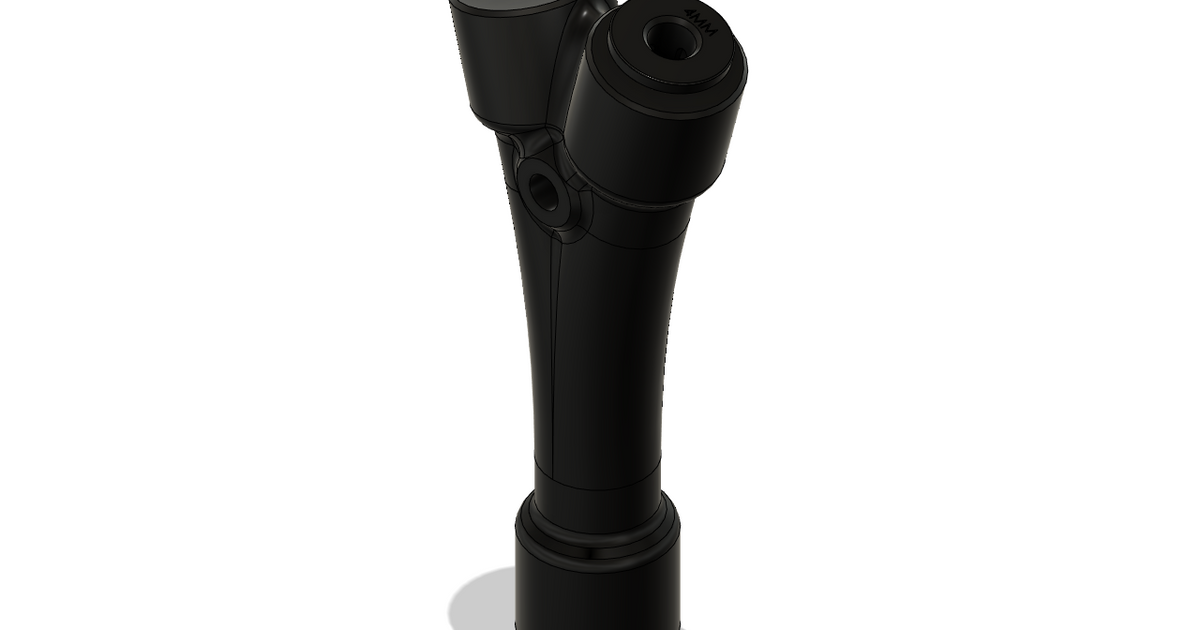
You will see that the single connector has a cutout that reveals the ptfe tube. This is to use the ptfe tube without using the connector. It has been tested with success, but I decided to leave the thread for the M10 connector and let everyone choose what to use. Needless to say that to use this option it is necessary that the splitter is attached to the machine, otherwise it will not work.
Attached a video example of its operation without connector:
The rubbing sound when loading the filament is only noticeable during filament loading. Perhaps printing the design from the side will reduce it, but the threads and holes may not come out correctly.
Optional 2:
If you want to eliminate problematic elements like the coupler, I think it is possible. You would have to put a new ptfe tube from the extruder to the splitter and connect it to the pneumatic connector of the splitter. Fewer elements, fewer possible problems.
Thanks to all.
ESPAÑOL
Actualización 27/10/22:
Algún usuario me a pedido una versión para fijar en la maquina y aquí lo tenéis para probar.
Se adjunta una versión "beta"
del divisor para fijar en la esquina de la maquina con cinta de doble cara.
Recalco lo de beta. Me ayudaría a mi y a la comunidad dejar un comentario de que tal funciona esta versión para decidir si lanzarla o no.
El archivo se recomienda imprimir en vertical con una altura de capa de 0,12mm y un relleno al 25%.
Es necesario corta el tubo ptfe que va del divisor al extrusor a una medida determinada. Debido a que cada maquina es distinta en su construcción no hay una medida estándar por lo que tienes que medir tu mismo, el divisor cuenta con una marca para usar como referencia para la medición. Adjunto fotos del como hacerlo.

La idea es la de que el tubo ptfe quede lo mas recto posible ocupando todo el espacio útil de ambos conectores. Dejar espacios sin ocupar por el tubo ptfe puede provocar un mal funcionamiento en la carga del filamento.
Opcional:
Veras que el conector único tiene un corte que deja ver el tubo ptfe. Esto es para usar el tubo ptfe sin necesidad de usar conector. Se a probado con éxito, pero decidí dejar la rosca para el conector M10 y que cada uno elija que usar. Sobra decir que para usar esta opción es necesario que el divisor se encuentre fijado en la maquina, en caso contrario no funcionará.
Adjunto un vídeo de ejemplo sin el conector:
El sonido de roce al cargar el filamento solo es apreciable durante la carga del filamento. Quizá imprimiendo el diseño de costado se reduzca, por contra las roscas y orificios pueden no salir correctamente.
Opcional 2:
Si se quieren eliminar elementos problemáticos como el acoplador, creo que es posible. Se tendría que poner un nuevo tubo ptfe del extrusor al divisor y conectarlo al conector neumático del divisor. Menos elementos menos posibles problemas.
Gracias a todos.
-------------------------------------------------------------------------------
This is a remix of a remix, this time with inputs for G1/8" pneumatic connectors similar to the M10.
I thank its original designer and the remix I used as a base to do it.
Original design:
https://www.printables.com/es/model/254250-bowden-y-splitter-for-bambu-lab-x1
Remix I used as a base:
https://www.printables.com/es/model/298958-bambu-lab-x1-overengineered-y-splitter
As it was impossible to find a splitter compatible with the pneumatic connectors I had at home, I made the one I needed.
You need:
-G1/8" (M10) pneumatic connectors. I will attach pictures and links of them .
I attach an example of two pneumatic connectors from different manufacturers with their external thread size. Both worked well.


The ptfe tube has to pass completely through the pneumatic connector to make it ideal for this project.

- Ptfe tube with 2mm inside diameter and 4mm outside diameter.
Print with layer height 0,12mm and 25% fill. No supports needed, recommended outline of 5mm

Once printed check that the holes are completely clean. Check that the ptfe tube goes all the way through.
Cut the ends of the ptfe tube at right angles and make sure the holes are clean.
The ptfe tube has to enter about 28mm approximately, mark it with a marker pen. Now screw the pneumatic connector all the way in and insert the ptfe tube. Make sure it has reached the mark you made before. Repeat this process with the rest of the splitter inlets.
If you like my designs give me like and share. If you like them a lot invite me to a coffee.
https://www.buymeacoffee.com/kjbturok
https://www.paypal.com/paypalme/ChinadlaConchinchina
ESPAÑOL
Esta es una remezcla de una remezcla, esta vez con entradas para conectores neumáticos G1/8" similar al M10.
Doy las gracias a su diseñador original y en la remezcla que usé de base para hacerlo.
Archivos originales:
https://www.printables.com/es/model/254250-bowden-y-splitter-for-bambu-lab-x1
Remezcla que usé de base:
https://www.printables.com/es/model/298958-bambu-lab-x1-overengineered-y-splitter
Ante la imposibilidad de encontrar un divisor compatible con los conectores neumáticos que tenia por casa, hice el que necesitaba.
Necesitas:
-Conectores neumáticos G1/8" (M10). Adjuntare fotos y enlaces de los mismos.
Adjunto un ejemplo de dos conectores neumáticos de distinto fabricante con su medida exterior de la rosca. Ambos funcionaron bien.


El tubo ptfe tiene que pasar completamente por el conector neumatico para que este sea ideal para este proyecto.

-Tubo ptfe con 2mm de diámetro interior y 4mm diámetro exterior.
Imprimir con altura de capa 0,12mm y 25% de relleno. No necesita soportes, se recomienda contorno de falda de 5mm.

Una vez impreso revisar que los orificios quedan completamente limpios. Comprueba que el tubo ptfe entra hasta el fondo.
Corta los extremos del tubo ptfe en ángulo recto y asegúrate de que sus orificios se encuentran limpios.
El tubo ptfe tiene que entrar unos 28mm aproximadamente, márcalo con un rotulador. Ahora enrosca el conector neumático hasta el fondo he introduce el tubo ptfe. Asegúrate que a llegado a la marca que hiciste antes. Repite este proceso con el resto de entradas del divisor.
Si te gusta mis diseños dale me gusta y comparte. Si te gustan mucho invítame a un café.
https://www.buymeacoffee.com/kjbturok
https://www.paypal.com/paypalme/ChinadlaConchinchina