Drone - FireFlo v3
Remixed by
Copyright Claim
Drone - FireFlo v3
Remixed by
Boost
2
8
3


Print Profile(2)

7mm Version - Strong - 0.2mm layer, 6 walls, 25% infill
Designer
39 min
1 plate

8mm Version - Strong - 0.2mm layer, 6 walls, 25% infill
Designer
40 min
1 plate
Boost
2
8
3
0
14
7
Released
Description
Warning:
This is a very old model I created in 2015 and imported from my Thingyverse profile (https://www.thingiverse.com/TheZerschmetterling). Maybe some links are broken or not up to date. If you have any questions do not hesistate to ask.
Summary
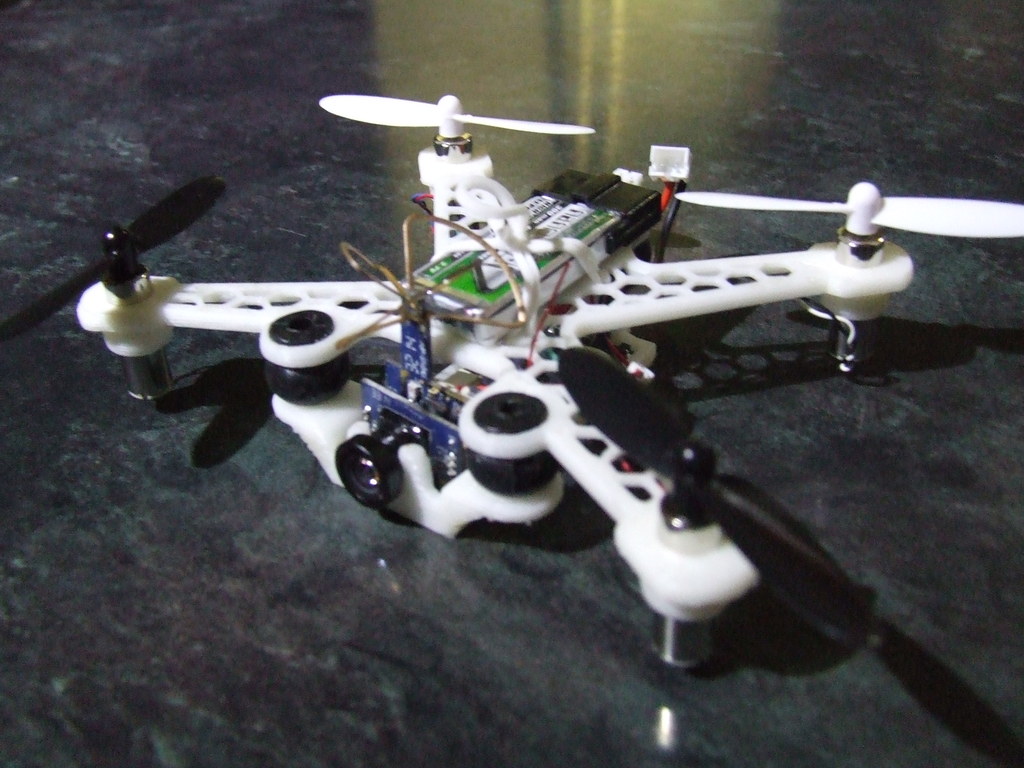
This is a update of the "FireFlo v2" and a remix of the "DragonFli" frame (yes... with "i"!) and an alternative frame for the Blade NanoQX (also FPV).
Some general details:
- It consists of a topplate and a lowerdeck connected with shock absorbers to undock the flight control + cam and reduce motor vibrations.
- It has higher stiffness then the v2
- There are different options and predefined strapholders to attach the lipo (on the topdeck or under the lowerdeck)
- Antenna protection predrills
- More free space to add your own vTx and cam and enough space to place different flight controls (from NanoQx original board to SciSky).
- And because it consists of two parts, you can now mix colors yeyyyy!! :D
Some more detailed details:
- It fits the original NQX Cam or the additional Spektrum Micro Cam or selfmade cams.
- Its available for 7mm and 8.5mm Motors.
- You can bend the camera holder up to 20° if you heat it up a bit, but be careful.
- Frame size is at ~110 mm diagonal (m2m) and about 9 x 9 cm in length and width.
- Frame weighs ~7.3g (depending on the material used).
- You will need 3x shock absorbers
Example Setups that will fit and are tested:
Shock Absorbers:
- 50g camera gimbal damper rubber anti-vibration shock absorber
Motormounts:
- Motor holders for this frame can be found here: https://makerworld.com/de/models/108888
Antenna Protection:
- Just use two cable ties and put them in the provided holes in the lower deck (see screenshots)
Motors 7mm:
- micro-motor-warehouse.com: CL-0720-12, CL-0720-14
- Standard Hubsan x4 H107L
Motors 8.5mm:
- micro-motor-warehouse.com: CL-0820-15, CL-0820-17 Dark Edition
- Standard Hubsan x4 H107D, H107C
Flight Control:
(for a proper fit, you should remove the motor plugs and solder the motors directly to the board):
- NanoQx Board (MOSFETs need to be replaced when using 8.5mm motors)
- NanoQx FPV Board
- MicroMWC (MOSFETs need to be replaced when using 8.5mm motors)
- SciSky
Cam and vTx:
- NanoQx FPV Cam
- Spektrum Ultra Micro FPV CAM SPMVA1100
- Selfmade like this: http://flitetest.com/articles/diy-micro-5-8ghz-fpv
(but if you get this to fit, its more like a bumblebee then a firefly ;) )
Get the "Bumblebee Backpack" here: https://www.thingiverse.com/thing:1134205
Rotors:
- Standard Hubsan x4
- Standard Revell Atomium
Energy:
- I recommend these for a flight duration of about 5-7min depending on your style and motors: 1s 3,7V 500mAh
- Velcro to strap it (10mm)
If you have questions, don't be shy. :)
Comment & Rating (3)
All

I printed the drone frame with my DIY MK2 printer in PLA+, It looks great, but unfortunately, I don't have the electronics, so I couldn't test the drone. the frame weight is 10 gm, it was a great print and fast.


1
Reply

Print Profile
7mm Version - Strong - 0.2mm layer, 6 walls, 25% infill
I loved being able to revive a long-dead drone. Everything fit together perfectly. The first one I printed was in PLA, but that didn't survive a hard landing. I printed this again in PETG and, man it it tough.
The designer has replied
1
Reply

Ohhh man thank you very much for that comment. That made me really smile cause it is a long time I ago I created this :) Thanks mate! Have a nice weekend :)
0
Reply
No more
This remix is based on


License
This work is licensed under a
Creative Commons Attribution-NoncommercialRelated Models


© 2024 MakerWorld