Skip to content

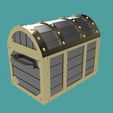
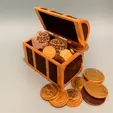
Treasure Chest Secret Stasher (Double Bottom Gift Box)

Advertising
Advertising
?
Creation quality: 5.0/5 (1 vote)
Evaluation of members on the printability, utility, level of detail, etc.

  • 857 views
  • 6 likes
  • 2 collections

License
3D design format
PDF and ZIP Folder details Close
  • Magnets.zip
    • Chest.stl
    • Flap.stl
    • Front Bracket.stl
    • Handle.stl
    • Lid Bracket 1.stl
    • Lid Bracket 2.stl
    • Lid Bracket 3.stl
    • Lid Bracket 4.stl
    • Lid.stl
    • Pin.stl
    • Rear Bracket.stl
    • Side Bracket.stl
  • No Magnets.zip
    • Chest.stl
    • Flap.stl
    • Front Bracket.stl
    • Handle.stl
    • Lid Bracket 1.stl
    • Lid Bracket 2.stl
    • Lid Bracket 3.stl
    • Lid Bracket 4.stl
    • Lid.stl
    • Pin.stl
    • Rear Bracket.stl
    • Side Bracket.stl
  • Treasure Chest Secret Stasher Advanced Guide.pdf

Learn more about the formats

Publication date 2024-01-26 at 01:06
Design number 1739716

3D printer file info

3D model description

Overview
I challenged myself to design a fun container to keep gift-cards safe. This is what I came up with; the third instalment of my Secret Stasher series.

Noteworthy features include a hinged lid, detailed rivets, and a secret compartment designed for up to five gift-cards, though other small items such as monetary notes, or SD cards can also be secretly stashed away. Two versions are provided: with or without magnets.

The PDF provided with the model files gives detailed printing and assembly instructions. It is also available to view upon request by emailing createtdesigns@outlook.com or contacting me on my Cults3D message board.

Non-printed parts list:

  • 16x 2x2mm cylindrical magnets (optional)

  • 108x63mm piece of felt/foam (or similar material) (optional)

  • 1x tube of superglue (or similar adhesive)

Warning: Some parts may pose a choking hazard. Not suitable for young children.

Assembly

  1. Glue the magnets into the two flaps. Leave to dry and set to the side for now.

  2. Glue magnets into the bottom of the chest, taking care to insert them in the correct orientation so as to be attracted to those in the two flaps.

  3. Glue both the handles into the chest. Leave to dry and set to the side for now.

  4. Glue Lid Bracket 1 onto the lid. Then glue Lid Bracket 2 in place by sliding it along the lid to meet Lid Bracket 1. Repeat for Lid Bracket 3 and Lid Bracket 4.

  5. Once the glue holding the lid and its brackets in place has dried, glue in the magnets.

  6. Retrieve the two flaps and the chest from Step 1 and Step 2. Ensure that the magnets cannot come loose, if the glue hasn't dried adequately then wait a few moments before continuing. Place the flaps in their position in the chest and secure them in place using four pins (be careful not to glue the flaps in place). Continue to hold the pins in position for a few moments while the glue sets. The flaps should now be able to pivot freely about the pins.

  7. Glue the remaining brackets to the chest. While the Front Bracket can be added in any orientation, the hinges on the Rear Bracket should be at the top of the chest. The two Side Brackets should have their magnet holes at the top of the chest.

  8. Wait until all remaining unset glue has set. Then, glue the two remaining pins in place through the lids' hinges. Once the glue has dried, the lid should be able to freely pivot about the hinge.

  9. Cut a piece of felt approximately 108x63mm and place it in the bottom of the chest.

  10. Congratulations! You have built your very own Treasure Chest Secret Stasher, give yourself and your printer a pat on the back and check out my other designs: https://cults3d.com/@createt.

3D printing settings

More detailed information is available in the PDF document.

Chest.stl

  • Supports: Yes

  • Quantity: 1

Lid.stl

  • Supports: Yes

  • Quantity: 1

Handle.stl

  • Supports: Yes

  • Quantity: 2

Flap.stl

  • Supports: Yes

  • Quantity: 2

Side Bracket.stl

  • Supports: Yes

  • Quantity: 2

Front Bracket.stl

  • Supports: Yes

  • Quantity: 1

Rear Bracket.stl

  • Supports: Yes

  • Quantity: 1

Lid Bracket 1.stl

  • Supports: No

  • Quantity: 1

Lid Bracket 2.stl

  • Supports: No

  • Quantity: 1

Lid Bracket 3.stl

  • Supports: No

  • Quantity: 1

Lid Bracket 4.stl

  • Supports: No

  • Quantity: 1

Pin.stl

  • Supports: No

  • Quantity: 6

More Secret Stasher designs: https://cults3d.com/en/design-collections/createt/secret-stashers

Follow for more designs like this.

Happy printing
-createt

Advertising


Issue with this design? Report a problem.

Would you like to support Cults?

You like Cults and you want to help us continue the adventure independently? Please note that we are a small team of 3 people, therefore it is very simple to support us to maintain the activity and create future developments. Here are 4 solutions accessible to all:

  • ADVERTISING: Disable your banner blocker (AdBlock, …) and click on our banner ads.

  • AFFILIATION: Make your purchases online by clicking on our affiliate links here Amazon.

  • DONATE: If you want, you can make a donation via Ko-Fi πŸ’œ.

  • WORD OF MOUTH: Invite your friends to come, discover the platform and the magnificent 3D files shared by the community!


Sharing and downloading on Cults3D guarantees that designs remain in makers community hands! And not in the hands of the 3D printing or software giants who own the competing platforms and exploit the designs for their own commercial interests.

Cults3D is an independent, self-financed site that is not accountable to any investor or brand. Almost all of the site's revenues are paid back to the platform's makers. The content published on the site serves only the interests of its authors and not those of 3D printer brands who also wish to control the 3D modeling market.
100% secure payment by credit card, PayPal, Apple Pay, Google Pay, etc.
View all payment options.