Bambu Lab PTFE Minimum Radius Feed Guide
Bambu Lab PTFE Minimum Radius Feed Guide


Print Profile(4)


Description
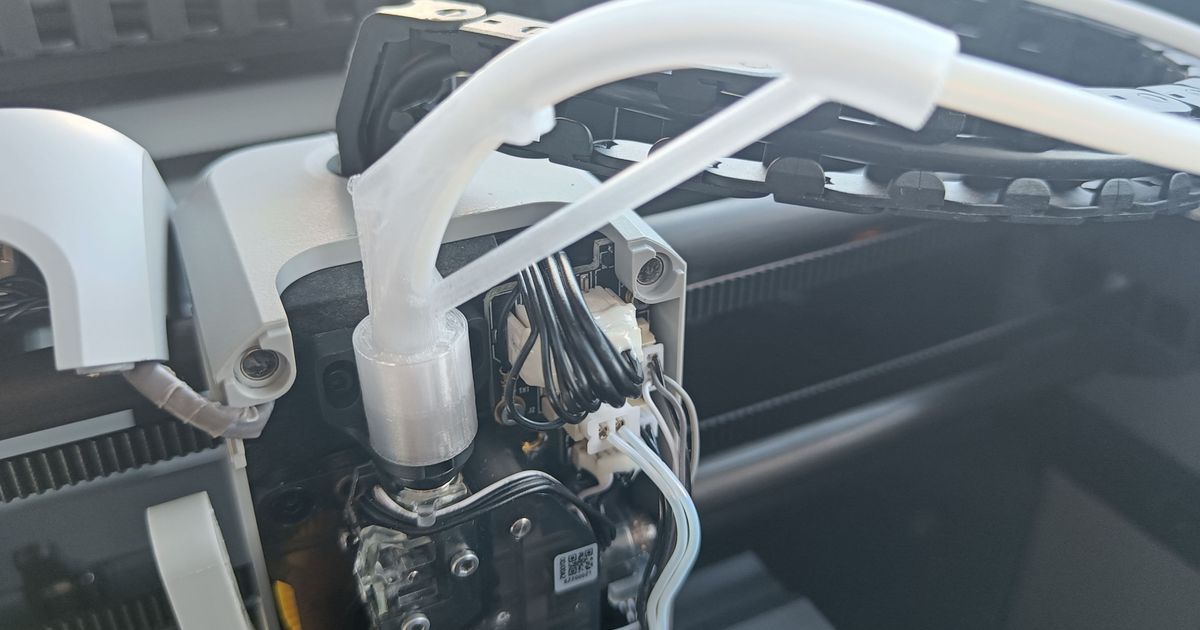
Bambu Lab X1/X1C PTFE Minimum Radius Feed Guide
This model is a remix of mowcius's design (https://www.printables.com/model/309088-bambu-lab-x1-ptfe-minimum-radius-guide) for smoother feeding of filament from the AMS to the extruder. The remix is based on mowcius's 11/11/22 Version 2 (V2).
I experienced AMS snags as the filament was fed into the extruder. I printed and used mowcius's design above and it solved the problem I was having elegantly (thank you mowcius!). The only issue I had with the original model was that the support brace was too thin and prone to bending or breaking. The first time I used it, the support broke as I was press-fitting the cylinder adapter onto the radius tube.
I address both of those issues in this remix. Specifically:
- I have thickened the support brace so now it is much stronger
- I have included a PETG and ASA version with slight dimension changes to address ASA shrinkage
- I have updated the PETG dimension slightly so that one doesn't have to press so hard to assemble the cylinder adapter
- The ASA plate contains the model designed to print in ASA and includes a slightly larger dimensional update because ASA shrinks more than PETG, and the ASA model is updated allow a much smoother press-fit of the cylinder adapter when assembling
I am currently using the ASA version, because ASA prints better for me, and also has the benefit of higher heat tolerance than PETG which may be important inside the enclosure above the toolhead where it can get hot.
The single print profile in the 3MF file works well for me for printing both Bambu Labs PETG Basic and Bambu Labs ASA using their stock filament profiles (no filament profile changes).
I printed both on the Bambu Smooth PEI Plate / High Temperature Plate. No glue required, just a clean surface for either PETG or ASA. I did use a brim, though, and if you use the profile in the 3MF file, it will bet set accordingly.
NOTE: When printing using ASA, I have great results by placing some insulation on top of the glass top of the printer, setting the bed to 90C, and waiting until the internal chamber temperature reaches 40-43C before starting the print. If the temperature reaches around 55C, I will slide the insulation over a little bit to expose an inch or so of the glass top so that it doesn't get too hot. But this is a quick print in ASA (only 30 minutes), so it mostly likely not reach that high. When the print is completed, remove the insulation and let the chamber cool down naturally.
Comment & Rating (225)