PRUSA MINI BEAR - TUTORIAL
PRUSA MINI BEAR - TUTORIAL


Print Profile(1)

Description
The content is too long and has been truncated
PRUSA MINI BEAR
________________________________
I am French, my English is very average, I did better, I apologize in advance for any translation errors.
A French version of this tutorial exists here / Version française ici: HERE
What's this ?
This involves taking an original Prusa Mini (or a clone), keeping the main components of the machine and offering an alternative based on aluminum profiles, in order to increase performance, functionality and stability. and print quality.
Why ?
At first, for fun!
Building a machine from almost zero is great, it's exhilarating to come to the end of your project and say to yourself "Yes, I made it!"
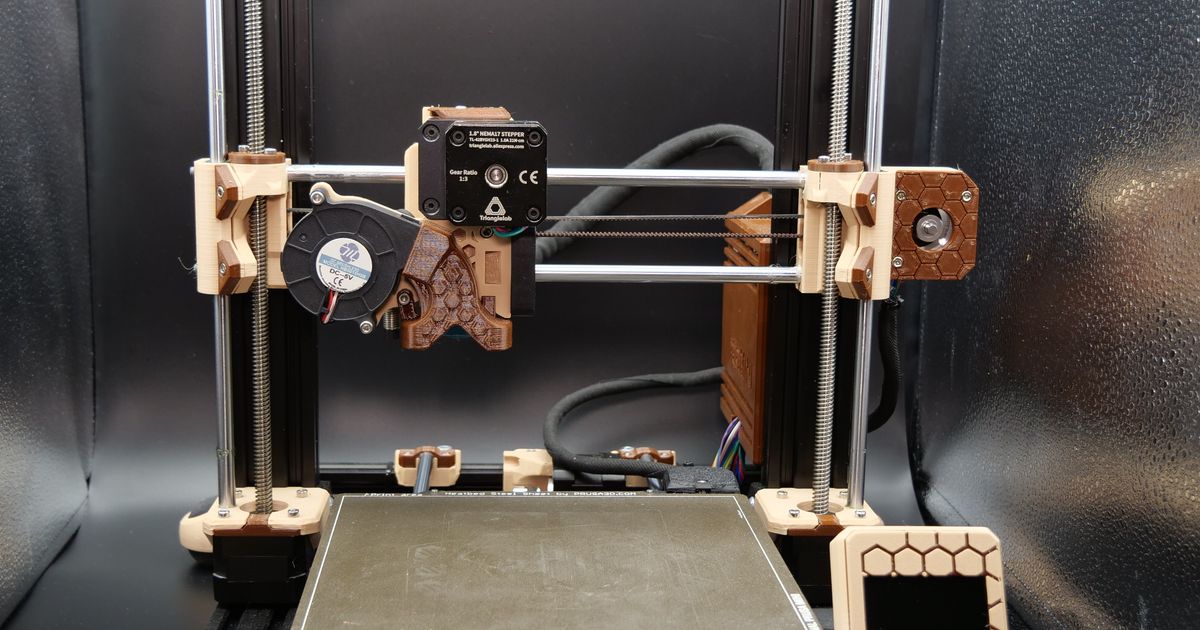
In the end, we don't have a Prusa Mini, but rather a Prusa MK3S Mini I would say!
Why this tutorial?
More and more people are embarking on the Prusa Mini Bear project, there are already a lot of publications, but it is difficult to navigate because there are very wide customization choices, and often we need help for this or that subject, I tried to bring together the questions and problems that I encountered in order to help the next ones.
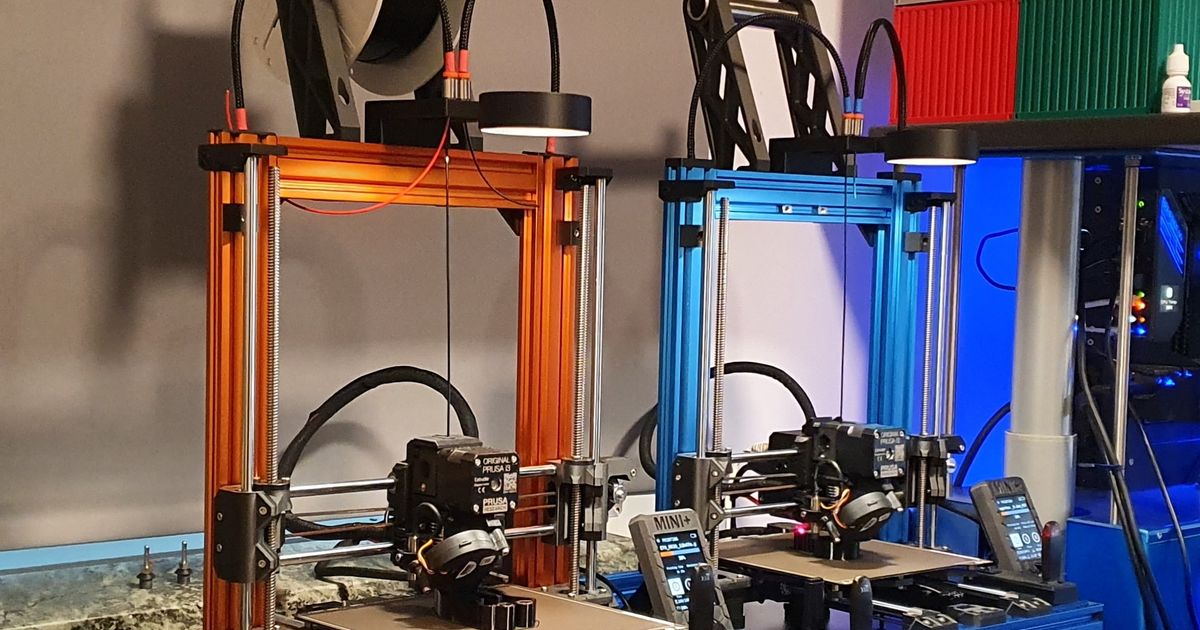
Here is what it gives in the end (note, on the photo of the Prusa mini on the left, I had mounted a base that is not original, available HERE.)

MATERIAL PART
____________________________
First of all, you will need to buy some essential products to convert your Prusa mini to the Mini Bear, here is what you will need:
• 1x Prusa Mini (Original or clone)
• 1x E3DV6 Hot End (you can also use the original one)
• 1x prusa MINI z stepper motors (type TR8*4 310mm)
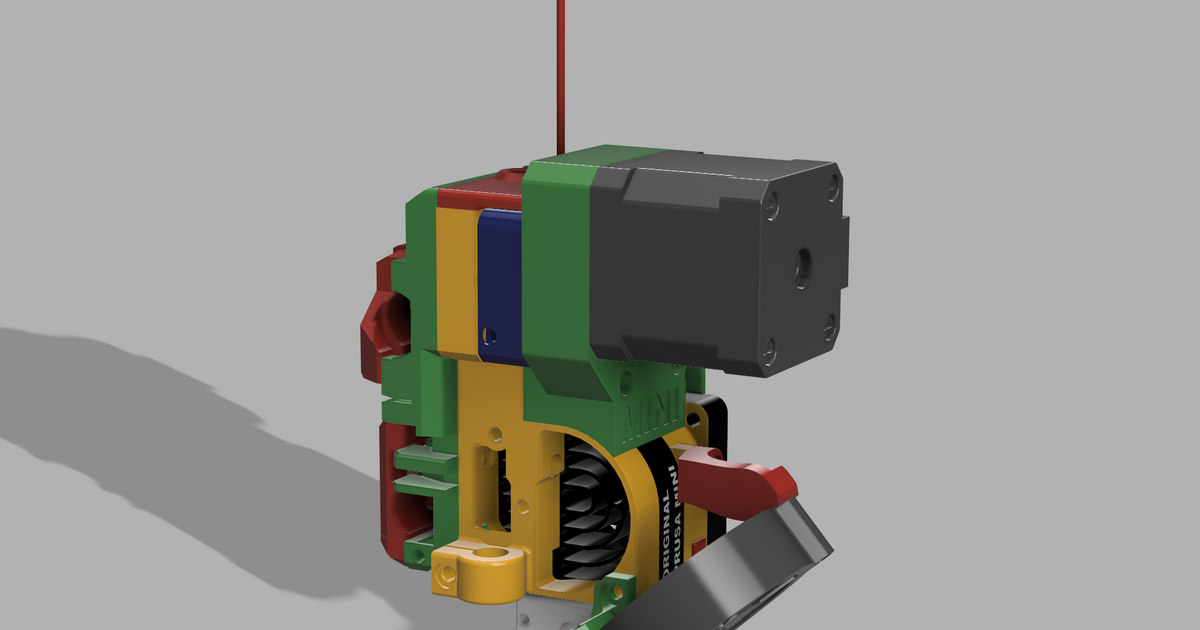
• 1x Dual Drive Extruder Kit
• 1x linear bearing LMU8 LMU8 (Misumi brand of preference)
• 100x T-nuts (M4 ou M5)
• 100x Hexagonal head screw (generally black, I used M5 stainless steel)
• 2m Belt GT2 6mm
• Aluminum extrusion profiles (2040 v-slot)
• 1x PETG filament to print the parts (2 filament spool if 2 colors)
• 1x Piece of PTFE to 44.3 mm for the Hot End
• 1x Filament sensor kit
Let's detail all this:
• For the extruder, personally, I took an E3DV6, ATTENTION, you need a 24V (24v / all metal), you need Bowden style in order to fit a piece of PTFE (44.3 mm) inside.
You can also use the original extruder (this avoids additional costs), for this I invite you to visit Tomson's post HERE.
Purchases (advice):
• E3DV6: HERE
• PTFE: HERE
___________________________________
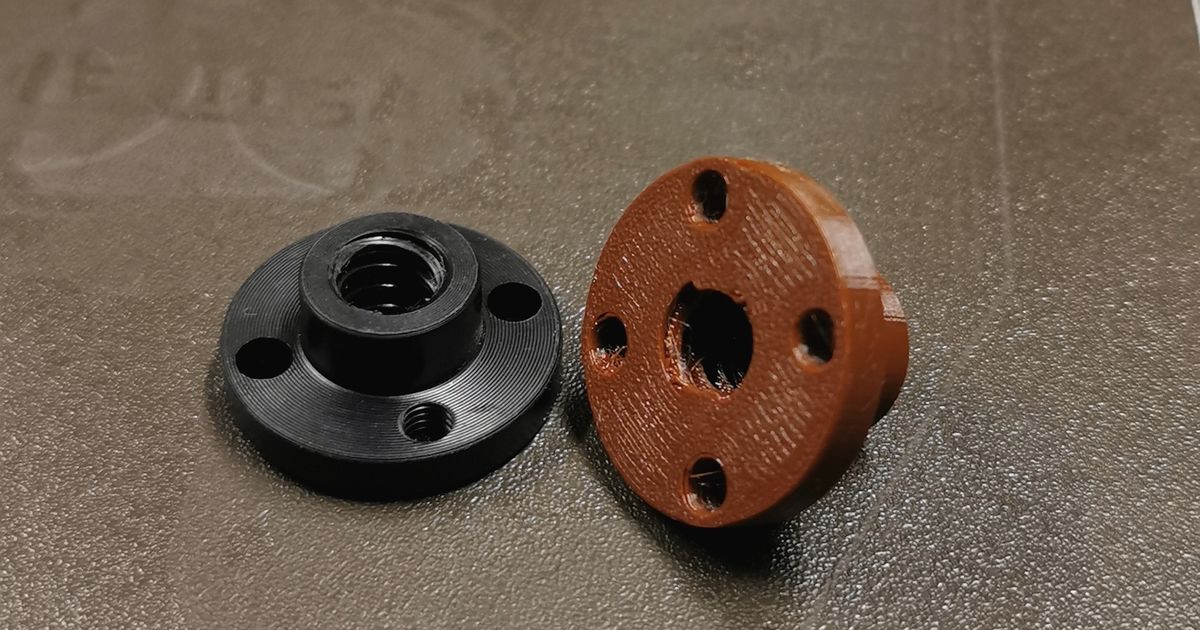
Z motor with trapezoidal rod (type TR8 * 4 310mm), very important, it must be compatible with the original one.
Purchases (3 models available, compatible and tested):
• Original Prusa: HERE
• Blurolls version: HERE (it seems supplied with the trapezoidal nut)
• Hanpose version (the one I bought, but trapezoidal nut not supplied): HERE
If you need to print a trapezoidal nut compatible with the trapezoidal shank of the Mini: HERE
___________________________________
Dual drive extruder kit, in order to make a Prusa MK3S style direct drive, you will need a dual drive (take the version with nut, bearing and smooth rod, you will need it).
Purchase:
• Original: HERE
• Aliexpress: (The one I bought) HERE
___________________________________
Linear bearing LMU8 (Misumi brand preferably), so, the bearings (at the time of this writing) seem unavailable, we find very good at aliexpress
Purchase:
• LMU8 linear bearing: HERE
Advice:
• Clean the bearings with isopropyl alcohol (30min soaking, stir from time to time) and grease them with for example Super Lube grease: HERE
Tip that fits well: HERE
CAUTION: If you keep the original Ø10mm smooth rods, you will indeed need only one additional bearing, but if you decide to buy Ø8mm smooth rods, then you will have to buy 5 bearings in total ( 4 for the Z axis and 1 for the X axis).
___________________________________
T-Nuts (M4 or M5), I advise you to buy a bag of 100 pieces, because the brackets of the brackets (5 to each bracket, there are 10 brackets + the rest to fix) use a lot of connectors.
For the screws, there are complete boxes like this: HERE, it's not bad, but in my case, I almost only used M5x8 mm (the 12mm are too long and touch the bottom of the aluminum profile), why M5 and not M4? because the M5 have bigger heads and allow a more powerful tightening), you will need at least 50, I advise you to take 100 lol, it goes quickly!
In the end, I advise you to buy, a complete box of screws of different dimensions to have a lot of choice, a bag of 100 pieces of M5x8 mm and a bag of 100 pieces of M5 connector.
Purchase:
• T-nuts (x100): HERE
• Box of 500 screws, different dimensions: HERE
• Hexagon head screw M5x8 mm (x100): HERE
___________________________________
Belt GT2 6mm, the original ones are too short, so you will have to buy new ones, 2m should be enough!
Purchase:
•Belt GT2 6mm (2m): HERE
___________________________________
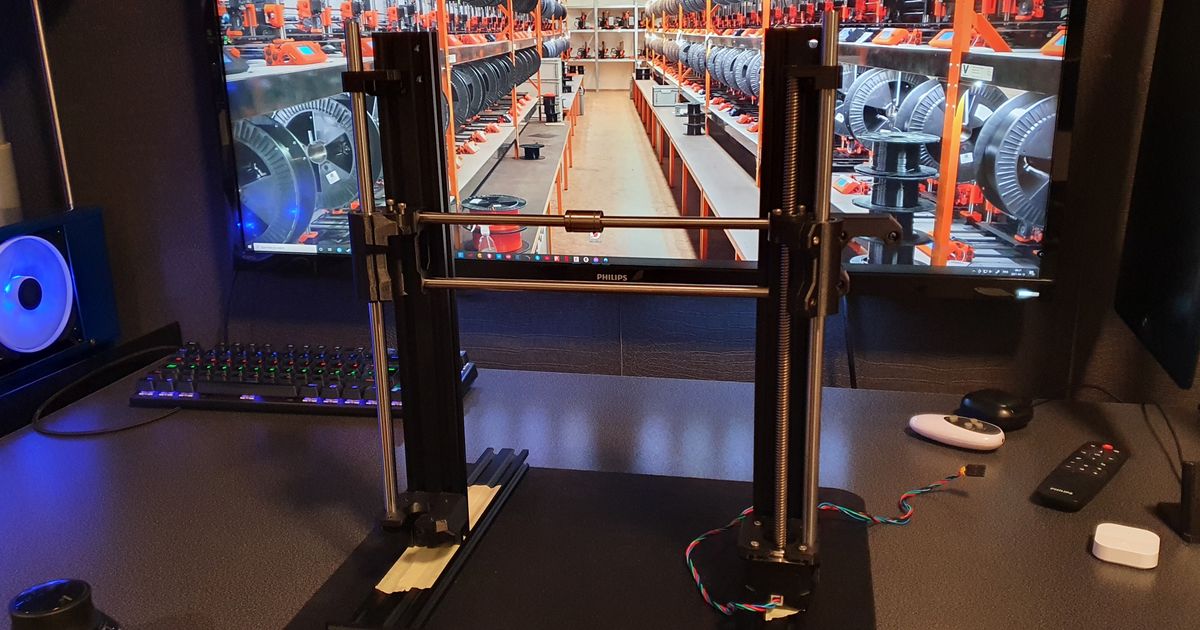
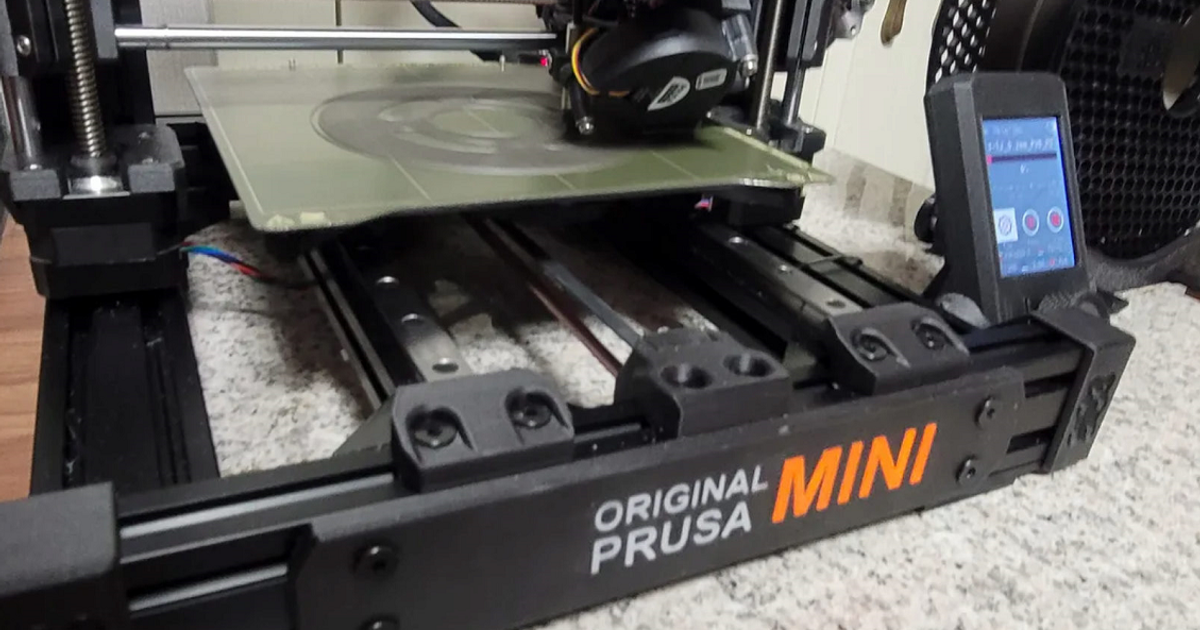
Aluminum extrusion profiles (2040 v-slot), BE CAREFUL, take 2040 v-slot, you will need 7 songs in total:
• 2 pieces of 300 mm (Front and rear)
• 2 pieces of 285 mm (right and left side of the Y axis)
• 2 pieces of 350 mm (right and left side of the Z axis)
• 1 piece of 220 mm (Top)
Purchase:
• Aluminum extrusion profiles: HERE
• Openbuild: HERE
Here is an illustration:

_______________________________
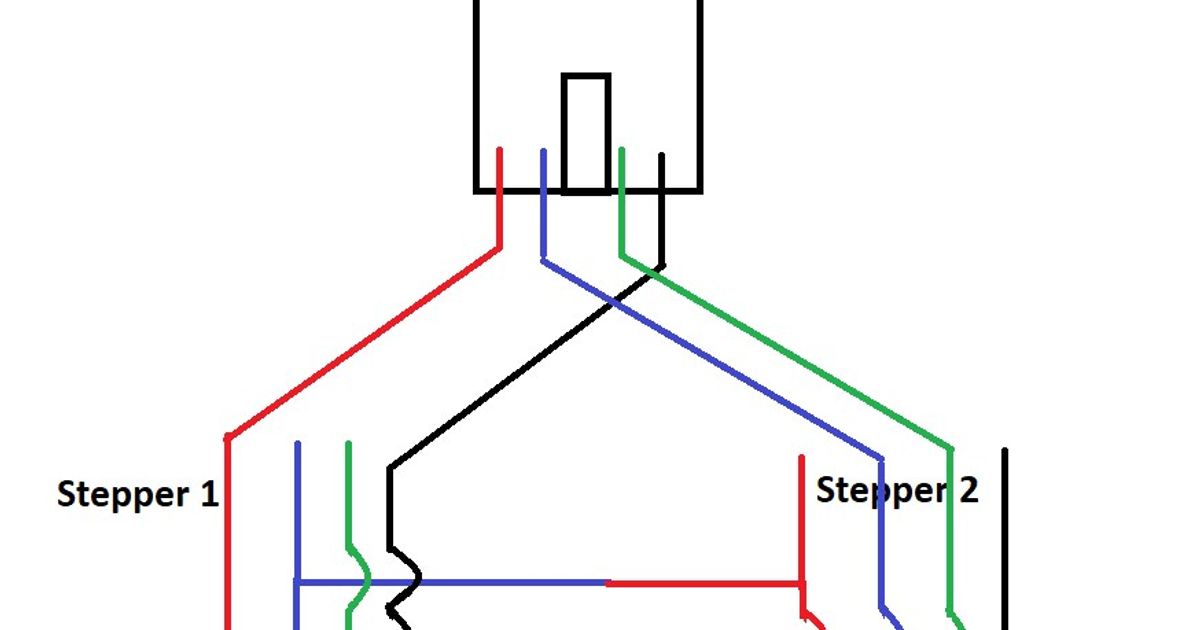
Filament sensor kit, then there is one that comes with the Prusa mini, it will do just fine, but for the extruder part you will need the ball and the magnets.
Purchase:
• Filament sensor kit: HERE
PRINTING PART (STL)
_______________________________________
For printing parts, there are many publications on prusaprinters.org, but depending on what type of machine you want to use and what version (R4, R6 R7 etc ...), it will be necessary to sort it out, hence the interest of this tutorial!
You also have two possibilities for the Z axis:
• Keep the original Ø10mm smooth rods (they will have to be cut to 300mm, they are a little too long)
• Buy Ø8mm smooth rods as on th
Comment & Rating (0)
This remix is based on