Vented Glass and AMS Riser

Vented Glass and AMS Riser

Boost
102
212
74

Print Profile(1)

All
X1 Carbon
P1S
P1P
X1
X1E
A1

0.2mm layer, 2 walls, 15% infill
Designer
23.6 h
9 plates
4.9(31)

Boost
102
212
74
6
496
1.1 k
Released

Description

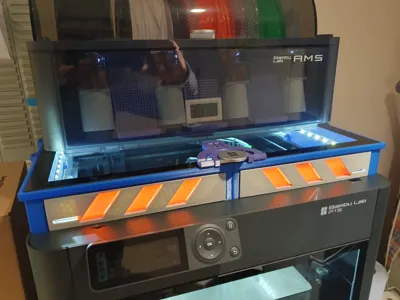
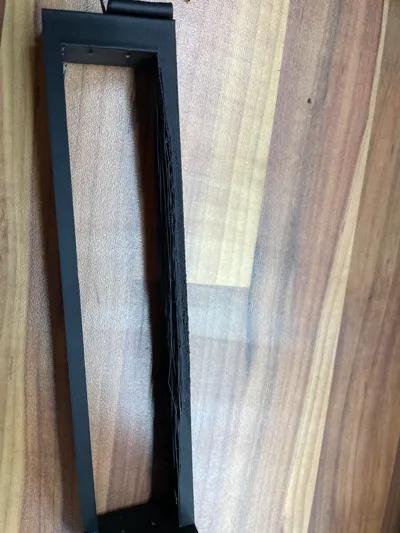
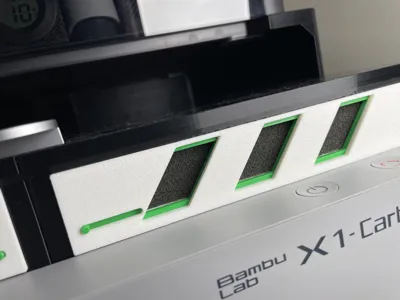
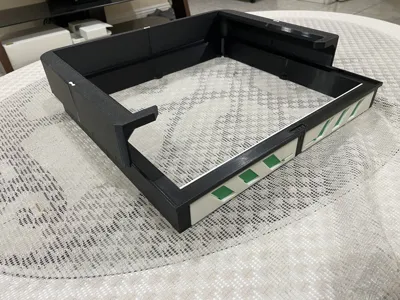
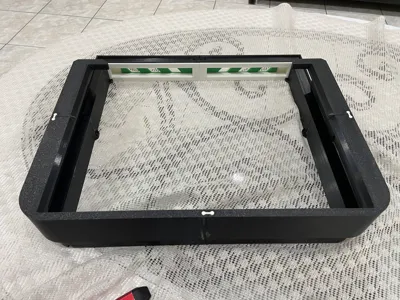
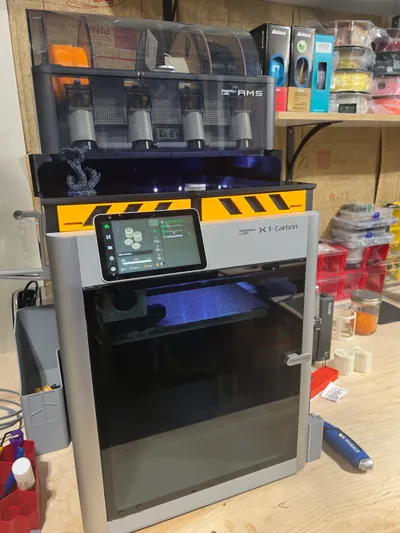
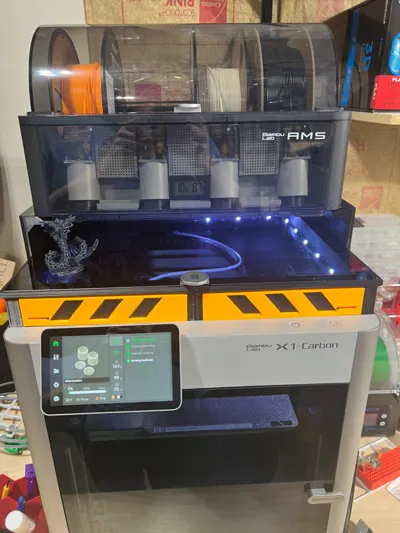
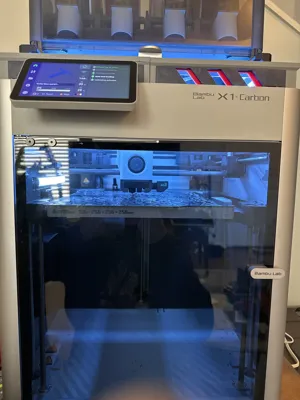
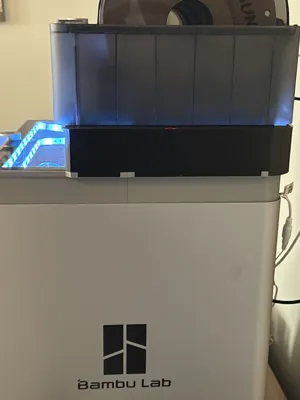
I've seen a lot of great vented glass risers and a lot of great AMS risers but I have yet to see anything that does both. I guess you could say I'm lazy and don't want to move the top glass panel to vent for PLA but I also want to be able to see through the top while I'm printing so here it is: the first vented glass AND AMS riser with built in provisions for 5mm FCOB lights. This design is highly modular so using different colors or adding other attachments to the points where the AMS riser attaches should be very easy. The philosophy behind the design was simple: keep it easy to print in any material (I used ABS) and not use an insane amount of filament. The entire thing uses less than 650g of filament and is still strong enough for 4 full spools of filament. Assembly is easy too, just assemble the front section, then back section and slide them together. The vents are numbered so it's easy to match the front and back half of both and use a friction fit but also have holes for using filament to secure them to the body of the glass riser if you so choose. The AMS riser is secured to the glass riser with a series of built in pins and holes as well as geometry that helps hold it together. The AMS riser itself assembles in any order with 3 dog bone pins to keep it together. I also designed the AMS to sit in the riser without any pins or slots so it should work for early version AMS as well as current version. One note, the glass is meant to fit snug so it may take a little force to get it in so as to keep a good seal. Tested temp retention shows that, with a 90C build plate and the vents closed, the chamber will maintain 45-47C with the chamber fan at 70% and, with a 55C build plate and the vents open, will maintain 35-37C with a 50% chamber fan. Everything has been carefully measured and adjusted to fit perfectly on an X1C but should probably work for the P1S as well.


Update 1-23-24: noticed the support settings got wiped out for plates 1 and 2 when opening from MakerWorld so I fixed that and locked those changes in the 3mf


Update 2-24-24: Added a front stop for the AMS.  Because of the modular design you can just print those 2 parts and replace them if you already printed the entire project.  Also, I finally fixed the crashing issue with the invisible object when using Orca slicer.  With Orca you will need to use the auto arrange button on each plate because of the way 3mf works but everything slices just fine when using Orca 1.9.1


Filaments used in picture are Bambu Black ABS, Bambu Silver ABS and Bambu Grey ABS-GF for the glass riser and Bambu Black ABS-GF for the AMS riser.

Comment & Rating (74)

Please fill in your opinion
(0/5000)

just finished printing, assembling, and installing. very tight on some parts but I was able to squeeze it all together. I’m dreading if I need to take the glass off since it’s so snug. overall came out great. the model is much appreciated. does anyone have recommendations on lights ?
The designer has replied
0
Reply
Which parts were tight for you?
0
Reply
Replying to @minist3r :
fitting together all the bottom pieces were tight, but some of that may have been due to a rough support removal. the real challenge was the pieces for the vents, and fitting the glass in. I also had to shave off a few mm and reprint one of the pieces that holds the LEDs
1
Reply
Replying to @user_1262795559 :
I might change the tolerances to be a little bit looser since this seems to be a common problem when printing on the P1S. I suspect it has to do with the lack of flow calibration that the X1C has because mine slid together perfectly.
0
Reply
Print Profile
0.2mm layer, 2 walls, 15% infill
Superb Riser, perfect for my needs, very strong when put together, used PETG throughout, my only issue after using for a week was i decided to remove the upper section that the AMS was on, after some vibration the AMS looked a bit fragile, and i felt it could fall off or dislodge, now very happy with the AMS sitting on the glass top, have added LEDS to finish, thank you for the great work on the files.
The designer has replied
1
Reply
That was the whole point if making it modular. Well that and if someone wanted to design other attachments or a different design for any part of it.
0
Reply
what LED light did you use? Can you share a link?
0
Reply
I have a question There seems to be a gap between the supports and the upper part. Am I doing something wrong?
The designer has replied
0
Reply
Did you modify the print settings? There should be a 1 layer gap between the support interface and the model but it looks like the support interface didn't print at all on that pic.
0
Reply
Replying to @minist3r :
I didn't change anything, I even reloaded the model. I print it with P1s. can I remove the hatch?
0
Reply
Replying to @minist3r :
I found it. I use Esun ABS+ maybe that is the problem thank you for the quick answer
0
Reply
Just finished mine last night! I was uncertain of the integrity of everything at first but once everything was clicked into place and the dog-bone pegs were pushed in I was much more confident. I love the design, thank you!!
The designer has replied
1
Reply
Thanks for sharing your print. It looks awesome. Any issues with fit or finish?
1
Reply
Replying to @minist3r :
Not any more than expected. It's a snug enough fit that I had to use a cloth and tap some pieces into place with a hammer, but that just makes me feel better about the sturdiness. (Printed in Bambu PETG)
0
Reply
Print Profile
0.2mm layer, 2 walls, 15% infill
With PLA connexions are to tight and hard to assemble(using hammer for some parts).
The designer has replied
1
Reply
There is an option called X-Y Hole Compensation that I use sometimes when I find things don't quite fit right. Tuning your filament might help as well since the tolerances are tight and any over extrusion will cause the holes to be tighter and pegs to be bigger.
0
Reply
Replying to @minist3r :
Thanks for the tip, I will made some test to adjust this correctly
0
Reply
Printed on X1C; 0.4 nozzle. .2 layer, 6 walls (extra vertical strength; 20% gyroid infell. +0.05 X-Y hole compensation. main shell printed with bambu PETG-basic (black). front grill in bambu PLA-basic white and green. fitment is very tight on the main frame, and required a rubber mallet and wood block for persuasion. otherwise everything fit really well. there is ZERO play in this frame and entire thing is VERY stiff with PETG. this is very well designed and the AMS nests on top without any movement. I did superglue the main frame and the AMS frame together for extra security (it’s never coming apart). I also cut a rectangular piece of filter foam and put it in back of the grill so dust can’t get in. overall 100% satisfied and 100% worth it. much better design than many other risers.
The designer has replied
0
Reply
Looks great and I love the filter. I might have to do that to mine.
1
Reply
Replying to @minist3r :
thanks again for the STL. you’re the real MVP.
0
Reply
Print Profile
0.2mm layer, 2 walls, 15% infill
Amazing print -- didn't fit together like O.J. Simson's glove! haha.. Thanks so much for the great design. I am going add a couple pegs to lift the glass off the riser about an inch - like a shelf for when printing PLA. An improvement could be to build in the shelf to lift the glass for PLA printing. thanks again!
(Edited)
The designer has replied
0
Reply
There are already a bunch of good risers that you have to move the glass to vent. I wanted one that you didn't need to do that with.
0
Reply
Replying to @minist3r :
fair enough... thanks again.
0
Reply
Hi, I downloaded the project but orcaslicer crashes because there is an invisible object on first tray (body121), can you update it please? It can be printed if you don't touch it but is annoying. And how did you print bridges on tray 2 and 3?
The designer has replied
0
Reply
I can remove the hidden objects when I get home and look at what you're talking about with the bridging.
0
Reply
I just updated the print profile with that object removed from the model and Orca slicer is still placing it on the print project. Bambu Slicer is loading it just fine so I don't know what else to tell you. I would suggest downloading the model and not the project file if you are dead set on using Orca. As far as the plates with the vents goes, just use support with a 10 degree threshold and it should avoid adding support to the holes which isn't needed anyway.
0
Reply
Boosted
Print Profile
0.2mm layer, 2 walls, 15% infill
printed using Bamboo PLA Matte. fit and finish was fantastic, joints are tight but not overly so. I haven’t added lights yet, but it’s in the works. Thank you so much for designing such a great riser !
1
Reply
Printed with esun PLA +. the fit and finish is second to none. this is by far the best AMS riser on this site; thank you for sharing!
(Edited)
1
Reply