Lockspool V3 remix to replace California Filament cardboard edges
Lockspool V3 remix to replace California Filament cardboard edges


Print Profile(0)
No Print Profile yet. Add one to earn points.
Description
This .stl was generated by https://www.printables.com/model/129989-lockspool-v3-parametric-reusable-1-part-printed-tw, that makes it a remix of that most excellent design and attribution is both deserved and necessary.
I recently received my first order of California Filament and was horrified to discover most of the cardboard spools were damaged—to the point where the spool rings wouldn't even work. Further looking at the cardboard, it was very very dusty—it was not something I wanted in my AMS. I really wasn't looking forward to a couple-three days melting nearly 3 kg of filament to print replacement spools.
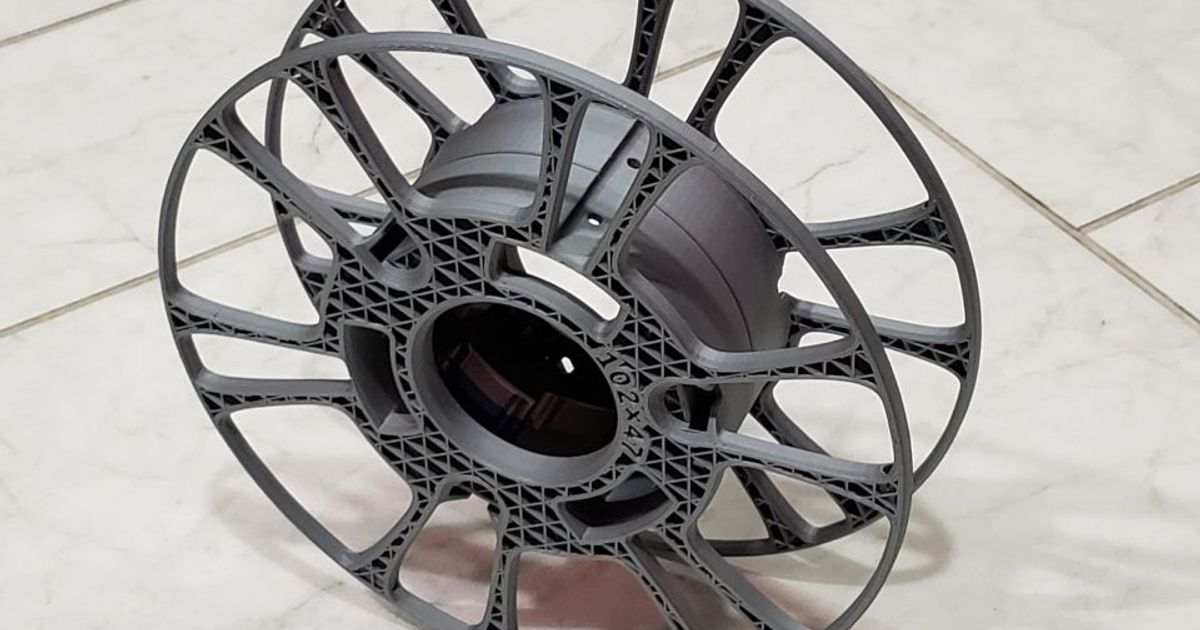
Lockspool to the rescue! First off, this is a quick print: about 3:20 for both sides on an X1C. Second, it uses very little filament: 87 g or so for a complete spool. And best, the cardboard spool sides come off very easily so that this .stl can slide (tightly) into the remaining hub.
You do have to print this twice, but it's the same thing twice and to me that's fantastic. I've included pictures of how I ‘processed’ the spools…
- Tightly tape the loose end, you don't want the filament unwinding or getting loose at all
- In the next steps do be very careful not to disturb the filament in order to reduce the potential for tangles, it takes very little force to crack the sides all the way around and then the cardboard lifts right off (these are not made with very good cardboard).
- Place the cardboard spool on a flat surface and slowly lift the edge of the spool up—it'll crack. Rotate the spool a bit and lift, crack, rotate a bit and lift, crack. The spool should lift off as shown (maybe a little bit of tearing)
- Push one half of the lockspool into the cardboard hub—you want it ‘quite’ snug so it doesn't slip when the AMS rewinds, I shimmed it with the prime lines the X1C lays down on every print. When the first side is in place and pushed all the way down (all the way down), carefully flip it over and repeat on the other side
- The final step is locking the second spool in place.
Obviously, you can download Lockspool V3 from the above link and use SCAD and change the parameters of Lockspool yourself, and I do recommend that. I made this remix for those that “just want something that works” without having to download another CAD app and try to figure out how to make it work. SCAD has a lot going for it and the Lockspool creator made it easy enough for me to figure out (it's really easy), but it's not for everyone.
Printing notes: I included my settings in the .3mf, they work ok-enough for CalFil black PETG (0.4 nozzle, 0.2 layers). This isn't a presentation print, it's quick and functional… so a bit of trimming around the zip tie area is recommended, and at least on my prints interior of the zip tie channels have stray ropettes that would be good to cut out if you want to store your filament without the spool. You probably have CalFil settings that'll work better, my settings are but a starting point for fast, less filament (no top/bottom shells for show), and works well enough.
Comment & Rating (0)
This remix is based on