BabyBjorn Bouncer Bar: For hanging baby toys
Remixed by
Copyright Claim
BabyBjorn Bouncer Bar: For hanging baby toys
Remixed by
Boost
6
6
0


Print Profile(0)
No Print Profile yet. Add one to earn points.
+ Add Print Profile
Boost
6
6
0
0
4
0
Released
Description
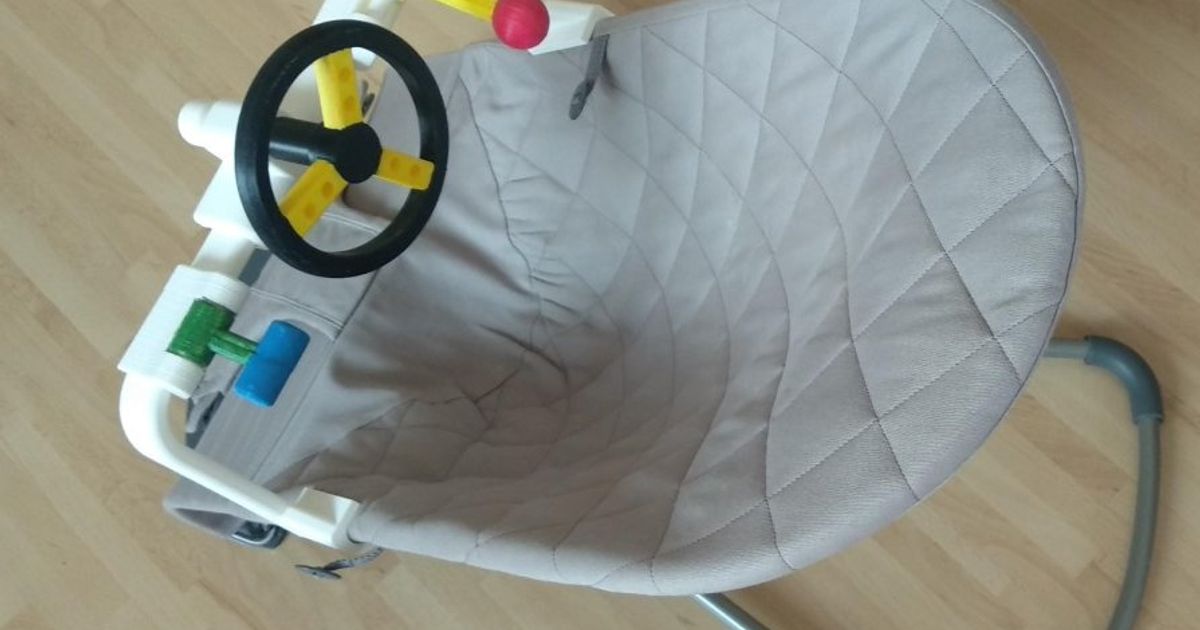
Someone bought my new little girl a BabyBjorn bouncer, which is great. However it needed a toy bar. The company sells some pre-made ones with fixed toys for $60, but that seemed like a lot… and it didn't let me hang whatever I wanted easily.
I remixed another design here to allow for a simple construction with a common 1" wooden dowel and some M5 screws.
Model Options
- Option 1: Thinner design, easier to get the dowel in, but potentially a little more wobble. This is the one I show in my pictures, and works fine for me.
- Option 2: Thicker design around the dowel, more stable against racking if your dowel is undersized, but uses more filament and might be harder to get the dowel into. I have not tested this one, but it should work the same.
- Drill Guide: Useful for drilling holes in the wooden dowel.
Print Instructions
- Filament: PLA/PETG should be fine, PLA/PLA+ might produce the best overhangs.
- Supports?: No. However if you're nervous about the large dowel holes, you can use organic type supports there near the top of the circle.
- Layer height: 0.20 mm should be fine. I printed mine in 0.16 mm, but that was probably overkill.
Hardware Required
- Wooden dowel : 1" diameter, ~ 14.5" long (cut to size during assembly, see below)
- M5 bolts & Nuts: 2x M5 bolts 45-50 mm long. 2 M5 nuts.
Assembly instructions
- First, test fit the dowel, and sand it slightly if it doesn't quite fit. The fit should be as snug as possible to minimize any racking of the assembled project on the bouncer.
- Drill 1 side of the dowel (see notes below) and assemble the dowel onto one arm with the bolt and nut, test fit this onto the bouncer.
- Slide the other arm on after fitting the first one. Slide it tight so that the whole assembly is suitably tight on the bouncer. Mark the position for the other hole, and where to cut the dowel off on the other side.
- Drill the second hole, cut the dowel off, and then put the final bolt+nut in place.
Assembly Notes:
- The hardest part of this assembly is just drilling through the dowel straight with an appropriate bit, so that the holes line up. I recommend using a slightly oversized drill bit (I used a 13/64 imperial bit, ~5.16 mm dia.), along with the included drill template to get good holes.
3MF + STEP files included.
Comment & Rating (0)
All
No more
Related Models

![[Toucan v2] Flying Bird String Hanging Decoration](https://makerworld.bblmw.com/makerworld/model/USf6c4127967a2c0/design/2024-04-24_2d778d8e481ec.jpg?image_process=resize,w_400/format,webp)


© 2024 MakerWorld