V2 out now - PTFE Quick-Connector to Drybox - Bayonet-Lock
V2 out now - PTFE Quick-Connector to Drybox - Bayonet-Lock


Print Profile(1)

Description
Update 22.10.2023: V2 is here.
V2 is an updated version with a little more diameter on all parts. This gives the screws a little more walls which, in the end, looks nicer and prints better.
The screw type is still M3, the o-ring dimensions are unchanged at 18 OD, 14 ID, 2mm thickness, the fitting hole dimensions are also unchanged - so all critical “extra parts” dimensions are unchanged for convenience.
Unfortunately the 3mf is still V1, I haven't found where to replace it.
------------------------
little update 21.10.23 :
1: added 3 new files: M3-hexnut versions of the backplates
2: replaced 2 files: the “printed pegs” versions of Plug and Fitting Plate not have fillets for stronger pegs.
------------------------
Printing out of a regular old drybox without an AMS or maybe even with a printer that doesn't support an AMS?
You got a PTFE-tube right up to your printer, to feed the filament?
Always switching around spools inside your dryboxes, because the PTFE-tube only runs to one single spot or do you have multiple PTFE tubes dangling around?
No more…
This is a PTFE Tube quick-connector. One tube-end is connected to your printer (check my other models for a spool-holder-PTFE-Fitting-mount) and the other end should be connected to your drybox, but HOW do you ask? Let me explain :)
What you'll need:
- 4x M3 screw, minimum 6mm long if the material of your drybox is 1mm thick, can be longer
- 1x PC4-M6 Fitting (ideally with a small hex slot inside the fitting)
- 18mm OD, 14mm ID, 2mm rubber o-rings (sort of optional but VERY recommended as this provides an airtight seal AND a little friction for a secure connection.
- depending on your “Fitting-Plate” pick: 2x more M3 screws for easier turning.
- no magnets, no glue
For example:
want to fit your drybox with 4 quick-connect-ports and connect 1 printer to it?
- 16x M3 screws, min 6mm long (if drybox wall is 1mm thick)
- 1x PC4-M6 Fitting
- 1x Fitting Plate, if your fitting has an internal hex use either variant, if not please use the “Fitting-Plate-screw” variant, if you use the screw variant you'll need 2 more M3 screws
- 3x Plug of your choosing, if you use the “plug-screws” variant you'll need 2 more M3 screws per plug
- 4x Receiver plate
- 4x Backplate of your choosing
- 4x 18 OD, 14ID, 2mm o-ring, one for each plug and the fitting plate
There's a couple variants, please continue reading for detailed info on how to use what when and all the things in general.
Do yourself a favor and don't use supports on any of these parts. All models are oriented in the STLs in the way they print best but it's obvious on all of them I'd say.
The Fitting-Plate, 2 variants
1: if your PTFE fitting has a hex inside you can use the Fitting plate that has the two printed pegs on the side - you won't need the additional 2 screws for this version. The hole for the PTFE-fitting is 5.8mm, the M6 fitting should cut it's own threads nicely without being too tight.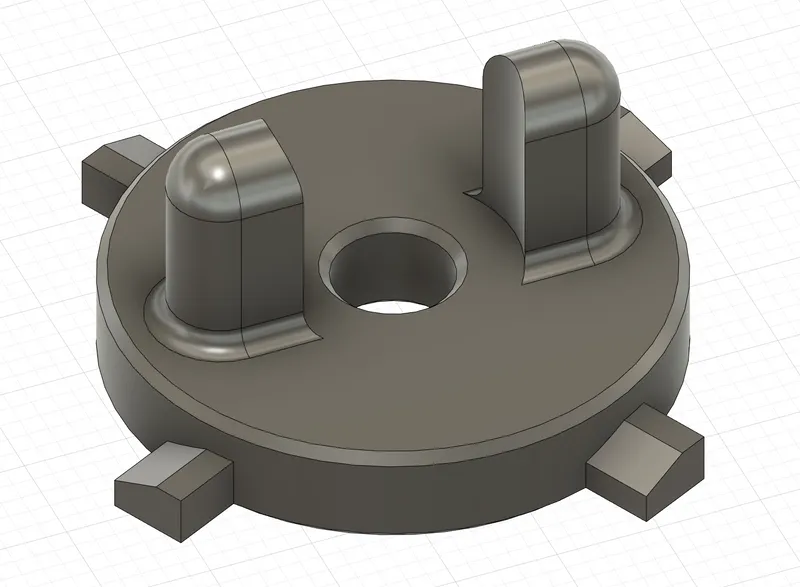
2: if your PFTE fitting does not have a hex inside you'll have to turn it with a wrench - can't have the printed pegs in the way then, can you ;)
For these fittings there's the Fitting Plate with 2 screw holes to fit 2x M3 screws, length of your choice, the ones in the photos are 10mm long- for better grip on the connector. The holes are 3mm diameter, the M3 screws will cut their own thread.
The hole for the PTFE-fitting is 5.8mm, the M6 fitting should cut it's own threads nicely without being too tight.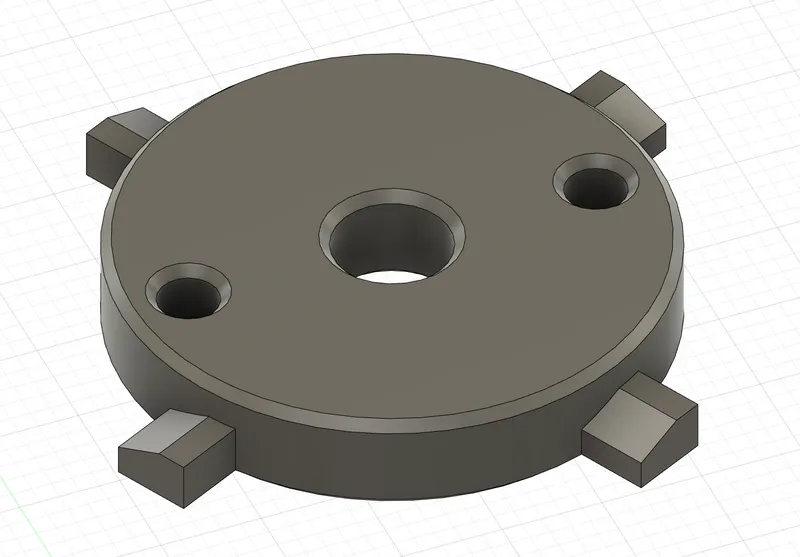
The O-Ring goes in the groove on the bottom of the Fitting Plate (there's also a groove on the plugs, also for O-rings). This groove does not have a chamfer on purpose, to grip the O-ring better. It's 1.5mm deep so a 2mm o-ring will stick out 0.5mm which provides a good seal and a tight but not too tight resistance for a snug fit.
You may have to work this in a little bit but it definitely fits. This tight fit is intentional, as you wouldn't want your o-ring to fall out each time you use the connector or a plug.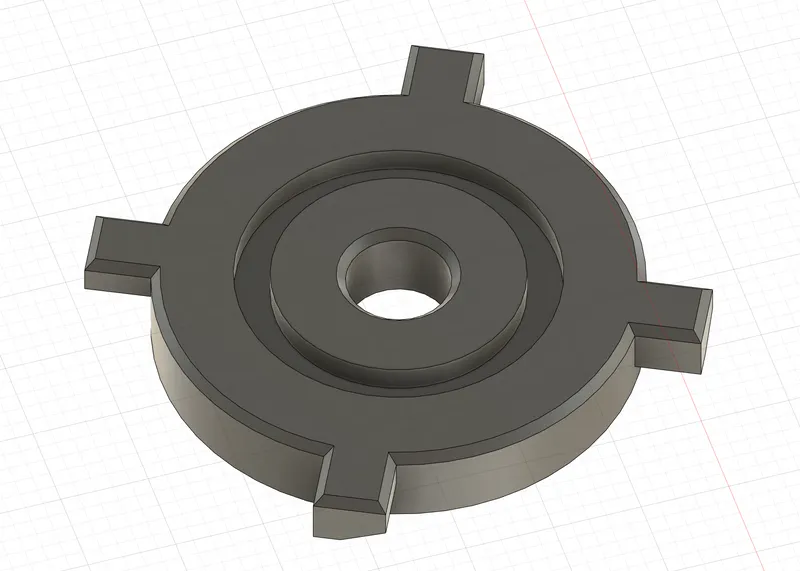
The Plugs, 2 variants
This is intended, as the name hints, to plug the ports you're not currently using. They work exactly the same as the Fitting Plate, just no hole for filament to feed through. I also recommend using o-rings on these.
There's two variants here, the screw-version is just available if you want to keep a consistent look with your fitting plate in use. Anyone can use the printed version if desired.
The Receiver Plate, no variants
This is always the same, for all models, no variants.
It goes on the outside of your drybox, sandwiching the drybox-wall (or lid) between itself and the backplate. M3 screws with max 5mm heads should fit flush. You could technically also use small wood screws if your Drybox is made of wood. You can ditch the backplate if that's the case.
Print this upside down, like shown in the pic below - that's also the orientation in the STL, you won't need supports. Should you experience some stringing in the screw holes just push the screws through, they will free things up. The holes are dimensioned to 3.5mm so M3 screws should slide right through without wiggling too much.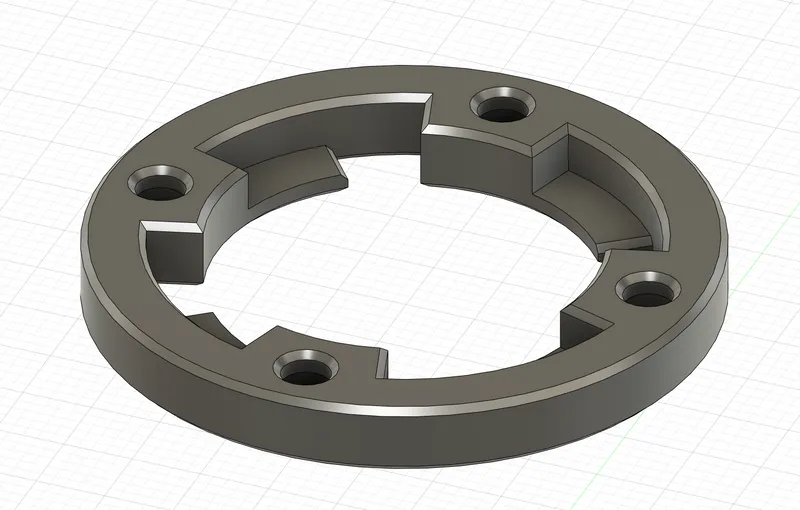
The Backplate, 3 variants
- 1: a simple plate with a little conical entry hole for the filament
- 2: a “PTFE-Plate”, it's a little thicker to provide more gripping surface for the PTFE tube (I don't know if glue would stick to PTFE?! If so you could of course also glue it in - it's a nice friction fit for me). This was designed for 4mm OD PTFE tubing, the hole is sized 4.2mm in the STL, your mileage may vary on how good your tolerances are.
- 3: the last one is a simple ring, this saves some filament but:
I do however recommend either option 1 or 2 because:
the rubber-o-ring in the Fitting plate or plug presses directly against the outside of your drybox. If it's made of some thin plasic, like most of us use I guess, it's beneficial to have it supported from the backside, so that the o-ring can form a nice seal and good friction for a snug fit and no loose bits.
Here's a little animation, this shows the following parts: ((all parts in this animation are V1 parts - everything has been updated since, the function stays the same))
Version 1 of Fitting Plate with printed pegs, receiver plate, Version 1 of backplate with conical entry hole
In the beginning the parts are oriented the way they should be printed - flip them for assembly


