CaliCross: A Handy Tool for 3D Printer Dimensional Accuracy
CaliCross: A Handy Tool for 3D Printer Dimensional Accuracy


Print Profile(1)

Description
What this does
- Helps you correct XY print scaling issues methodically and repeatably instead of guessing or coarse whole-object scaling. Works for Z too (though this tends to be less of a problem with FDM printers).
- Gives you an easy way to calculate the proper XY Shrinkage % in OrcaSlicer's per-filament settings:

- Or, equivalently Scale % in PrusaSlicer (per object):

Background
One of the most important aspects of calibration is the dimensional accuracy of your prints, which means that the dimensions of your printed objects match the dimensions of your 3D models. However, calibrating the dimensional accuracy can be tricky and calibration cubes are single coarse measurement tools that are subject to measurement error.
Thankfully, modern slicers like OrcaSlicer give us ways to fix common XY dimensional accuracy issues for a given filament (like ABS/ASA) and printer without having to mess with extrusion multiplier/flow (which can ruin surface finish) and without resorting to other tricks.
An included Excel worksheet takes the pain out of doing this. All you need are a printer and some digital calipers!
Why I made this
- I wanted a way to calibrate a filament (and print profile/printer) to help ensure that what I printed was as close to what I modeled as possible, mostly in the XY directions.
- After tuning my printer's flow (extrusion multiplier), temperature, and other factors, I was still having minor scaling issues with some filaments. This is mostly due to the characteristic plastic shrinkage that is different for every plastic.
Why this is more accurate than other XY(Z) calibration methods:
- The edges are chamfered to eliminate first/last layer effects.
- Round corners help avoid corner bulge effects from influencing measurements.
- Versus a calibration cube the included Excel sheet analyzes the difference in the length of the ideal vs printed measurements, instead of total length. This reduces the influence some effects which might distort the calibration like z-wobble and over-extrusion.
- It uses the whole range available for typical calipers (150mm), reducing the influence of random effects on small measurements.
How to use this
For a given combination of filament + printer + print process profile:
- First calibrate your filament's temperature, volumetric flow limit, flow (AKA extrusion multiplier), pressure advance values, and other similar tweaks. There are many guides and tools for doing this. It is important to do this first, as you don't want to have your calibration thrown off later when you change one of these.
- Print the appropriate calibration object (XY cross for XY, or Z-tower for Z). Wait for the part to cool fully before removing and measuring to get good measurements.
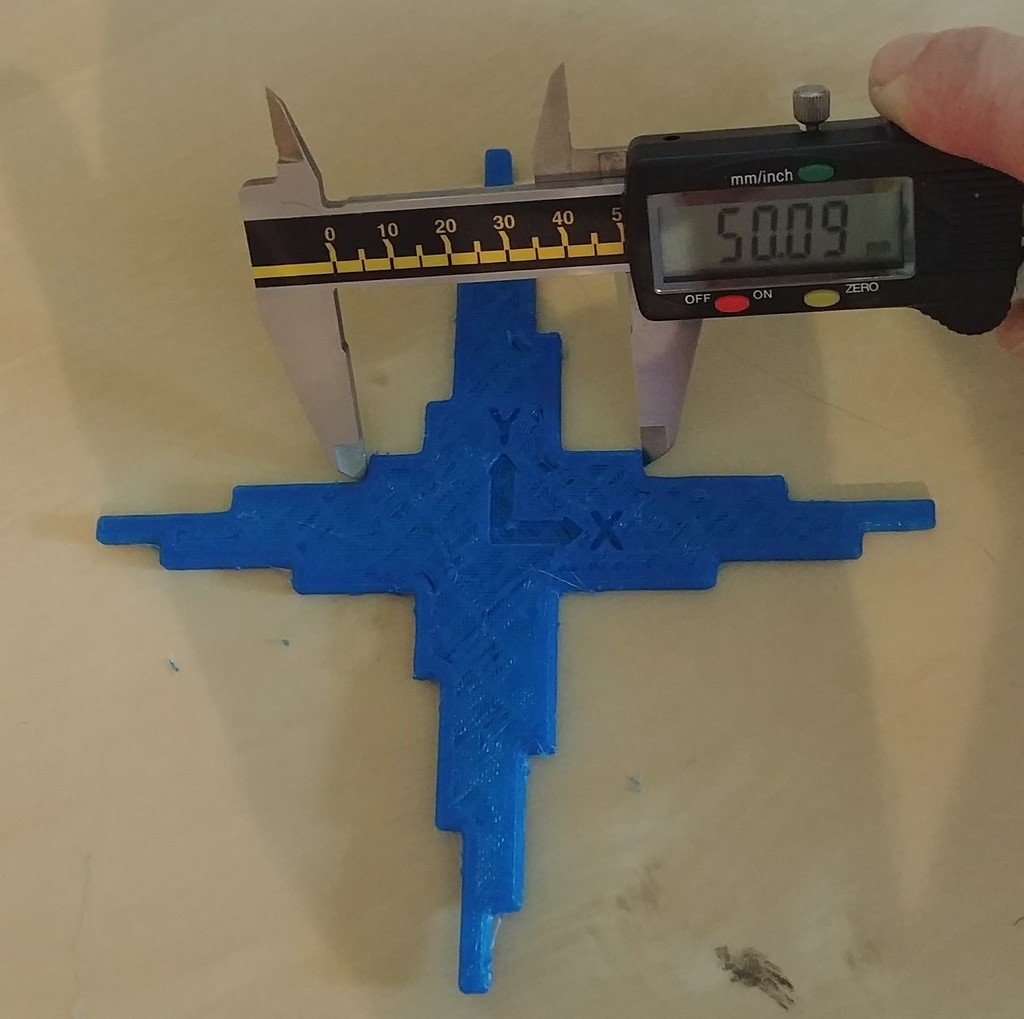
- Measure the flat-to-flat surfaces indicated in the included Excel sheet with digital calipers. Ideally use the wide thick parts of the calipers to measure and not the thin tips, as this will be more accurate. Try your best to have the object level and evenly perpendicular to the calipers as you measure.
- Input the values into the yellow spreadsheet rows for X+Y tabs (or just Z if Z). Note that X+Y are averaged together to get a single scaling value, which is usually appropriate. If you want, you can use the separate X & Y scaling values provided separately in your correction.
- Use the correction factor (Average %Shrinkage for OrcaSlicer, Scale factor for PrusaSlicer when scaling objects).
Notes
- Slicers differ in how they allow you to correct for this. OrcaSlicer lets you remember this setting per-filament, whereas Prusaslicer forces you to scale per-object in the Plater Tab (select object, use the scale tool and input the X/Y scale factors). OrcaSlicer assumes that the XY scale factor is the same for X and Y, which is usually ~true for modern printers.
- I used this on my Bambu X1C, but this should apply to any printer in theory.
- I do not generally use the Z calibration as most shrinkage issues come from XY rather than Z.. but if you're having problems with Z accuracy, this should help that too.
- I made an Open Document Spreadsheet version for anyone who wants to use OpenOffice/LibreOffice type apps instead of Excel.
What this does not do
- Correct for small perimeter variations that may be due to separate effects. If you still have hole size issues after this, you may wish to additionally calibrate for X-Y hole compensation. I may publish a separate tool for that in the future.
- Correct for constant perimeter wall size issues, although it gives you a hint as to the offset required in the “mean wall thickness deviation”.
Credits
I remodeled/cloned this calibration cross from scratch based on the excellent design found on Thingiverse here by lukeskymuh. I included high resolution 3MF and STEP files here so that people can make modifications and print from the pure STEP source if desired. I reworked the spreadsheet significantly to be more approachable and to get rid of confusing step-calibration related fields that do not apply to most modern 3D printers and steppers. Additionally, I did away with the temperature correction intermediate steps, as what we really care about is the end product that needs scaling. Rather than guessing at what the per-filament correction would be based on rough expansion/contraction numbers for types of filament, I figure it's better to measure it, and apply the appropriate correction.