ELEGOO JUPITER VAT LATCH SYSTEM ( REMIX)
ELEGOO JUPITER VAT LATCH SYSTEM ( REMIX)


Print Profile(1)

Description
A remix of the original design by user RandomSpoon.
- The entrance of the screw has been modified to use metal screws of diameter 8 so that they are flush with the base.
- The entrance of the hinge screw has been modified to use m3 30 screws with rounded head so that it does not bother when placing the resin tank.
It is recommended to print in the position that appears in the .3mf file and 30% or more filling.
Printing in this position reinforces the part. On the other hand, it is necessary to remove supports.
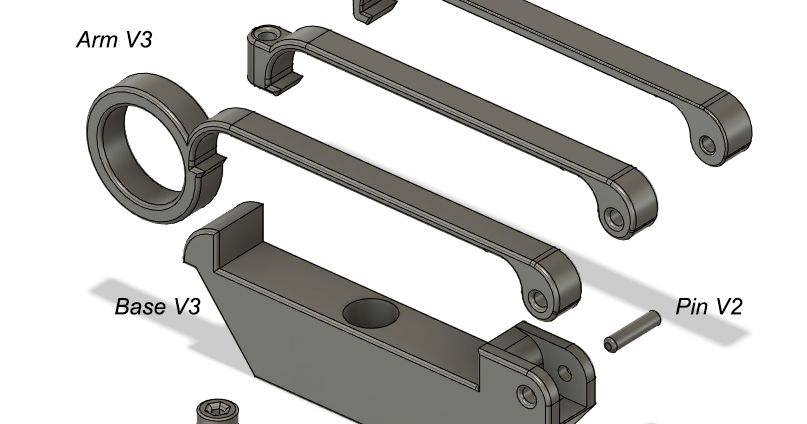
Print the following files:
-Jupiter Vat Latch Base (left-rigth)
You need (the pieces are only representations, do not buy these if you do not want):
-Screw diameter 8 of at least 30mm long.
-Button head screw m3x20mm and m3 nut (it is recommended to use nut with brake).
Mount the latch on the base in the correct position.
The right base with the m3 nut pointing to the right and vice versa.
Insert the screws diameter 8 in the base until it protrudes a few millimeters.
On the printer tighten the screw holding the latch base to prevent the latch base from turning. Tighten until the screw is flush with the part but not all the way in. Repeat the same with the other latch base.
Now place the resin tank and finish tightening the screws through the holes in the tank to secure it.
If you like my designs give me like and share. If you like them a lot invite me to a coffee.
https://www.buymeacoffee.com/kjbturok
https://www.paypal.com/paypalme/ChinadlaConchinchina
ESPAÑOL
Una remezcla del diseño original del usuario RandomSpoon
- Se an modificado la entrada del tornillo para usar tornillo de metal de diámetro 8 y que estos queden enrasados con la base.
- Se a modificado la entrada del tornillo que hace de bisagra para usar tornillos m3 30 de cabeza redondeada y que esta no moleste al colocar el tanque de resina.
Se recomienda imprimir en la posición que aparece en el archivo .3mf y relleno del 30% o mas.
Al imprimirse en esta posición se refuerza la pieza. Por contra hay que retirar soportes.
Necesario:
Imprime las siguiente piezas.
-Jupiter Vat Latch Base (left-rigth)
Además necesitas (las piezas son solo representaciones, no compres estas si no quieres):
-Tornillo diametro 8 de al menos 30mm de largo.
-Tornillo cabeza de boton m3x20mm y tuerca m3 ( se recomienda usar tuerca con freno )
Monta el pestillo en la base en la posición correcta.
La base derecha con la tuerca m3 apuntando hacia la derecha y viceversa.
Introduce los tornillos diámetro 8 en la base hasta que este asome unos milimetros.
En la impresora aprieta el tornillo sujetando la base del pestillo para evitar que esta gire. Aprieta hasta que el tornillo este enrasado con la pieza pero no hasta el fondo. Repite lo mismo con la otra base del pestillo.
Ahora coloca el tanque de resina y termina de apretar los tornillos a través de los agujeros del tanque para fijar del todo.
Si te gusta mis diseños dale me gusta y comparte. Si te gustan mucho invítame a un café.
https://www.buymeacoffee.com/kjbturok