HAND CLAMP FOR PAINTING MINIATURES, ELECTRONICS.
HAND CLAMP FOR PAINTING MINIATURES, ELECTRONICS.


Print Profile(2)


Description

12/11/2023
A new design has been added that does not require inserts, these are replaced by M4 nuts.
ES
Se agrego un nuevo diseño que no requiere insertos, estos se sustituyen por tuercas M4
This is a remix of the great design of the user Roger MrRogers. All thanks to him.
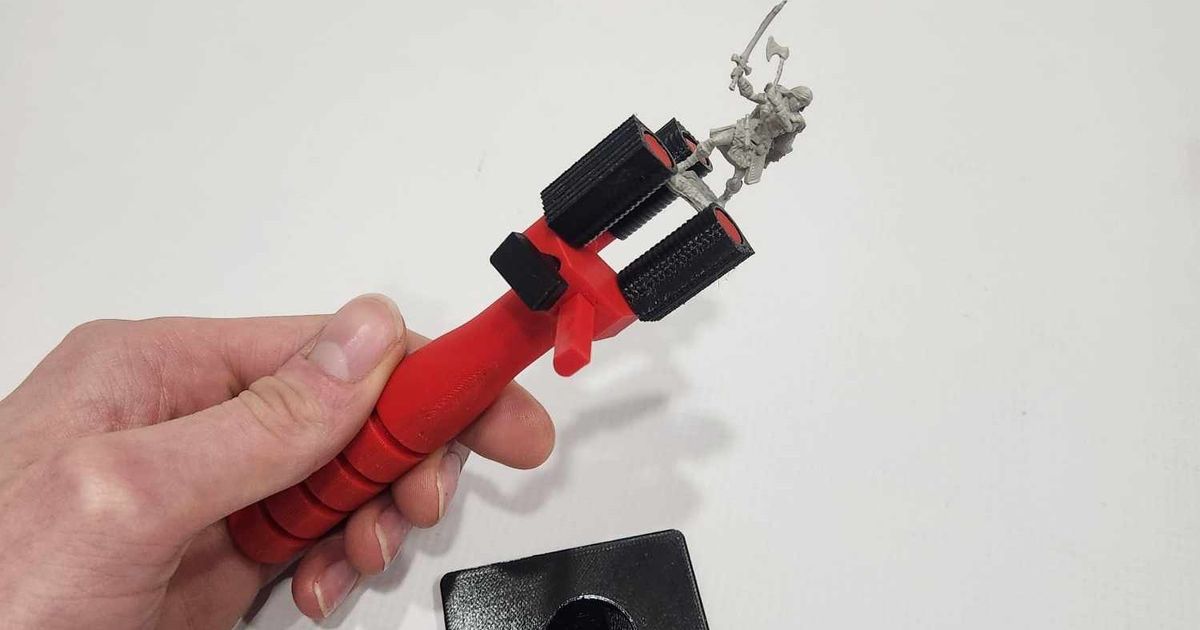
This is a clamp for fixing small items with a maximum size of 63mm.
- The clamp can be adjusted in angle and also in the width of the part to be clamped with a maximum of 63mm.
- The clamp can be rotated 360º or fixed with the adjustment knob on the base of the clamp.
- It is possible to fill the base of the clamp to make it heavier.
- It has an optional handle grip which is recommended to be printed in TPU.
What do I need for its assembly:
-You need to print all the elements in the material you want. I recommend PLA or PETG for everything except the grips which I would print in TPU.
Version with M4 nut:
- x3 hex head screws M4x20mm.
- x3 M4 nut.
Version whit M4 insert:
- x2 brass inserts for M4 screws.
- x3 M4x20mm hex head screws.
- x1 M4 nut.
Optional.
- Glue for gluing the base cap once it is filled.
Assembly:
- Insert the M4x20mm screws into the adjustment knobs all the way in, you can fix them or not with glue.
- Put the M4 brass inserts in the hole of the HANDLE 1 and in the BASE.
- Mount HANDLE 1 on HANDLE 2 and fix it with one of the adjusting knobs and a M4 nut.
- Mount the ARM on HANDLE 1, put one of the adjusting knobs on it and mount the grips as well.
- Finally mount the knob on the BASE.
ES
Esto es un remix del diseño del usuario MrRogers. Todas las gracias a él.
Esto es una abrazadera para fijar elementos pequeños con un tamaño máximo de 63mm.
- La abrazadera se puede ajustar en ángulo y también en el ancho de la pieza que vayas a fijar con un máximo de 63mm.
- La abrazadera puede girar 360º o fijarse con la perilla de ajuste que se encuentra en su base.
- Es posible rellenar su base para que esta pese mas.
- Cuenta con un agarre para el mango opcional que se recomienda imprimir en TPU
Que necesito para su montaje:
-Necesitas imprimir todos los elementos en el material que quieras. Yo recomiendo PLA o PETG para todo salvo los agarres que yo imprimiría en TPU.
Versión con tuerca M4:
- x3 tornillos de cabeza hexagonal M4x20mm.
- x3 tuerca M4.
Versión con insertos M4
- x2 insertos de latón para tornillos M4.
- x3 tornillos de cabeza hexagonal M4x20mm.
- x1 tuerca M4.
Opcional.
- Pegamento para pegar el tapón de la base una vez esta este rellena.
Montaje:
- Introduce los tornillos M4x20mm en las perillas de ajuste hasta el fondo, puedes fijarlos o no con pegamento.
- Pon los insertos de latón M4 en el agujero del MANGO 1 y en la BASE
- Monta el MANGO 1 en el MANGO 2 y fíjalo con una de las perillas de ajuste y una tuerca M4.
- Monta el BRAZO en el MANGO 1, ponle una de las perillas de ajuste y monta también los agarres.
- Para terminar monta la perilla en la BASE.
Comment & Rating (1)


This remix is based on
License
Related Models


