BirdBrain: Smart Bird Feeder - DIY Bird Buddy
Print Profile(1)

Description
Edit: As seen on Tom's Hardware!
NOTE: I DID NOT CREATE ANY OF THESE PIECES OF SOFTWARE. Please use the accompanying GitHub's for issues. I offer NO support for the software. This is also a work in progress and may change.
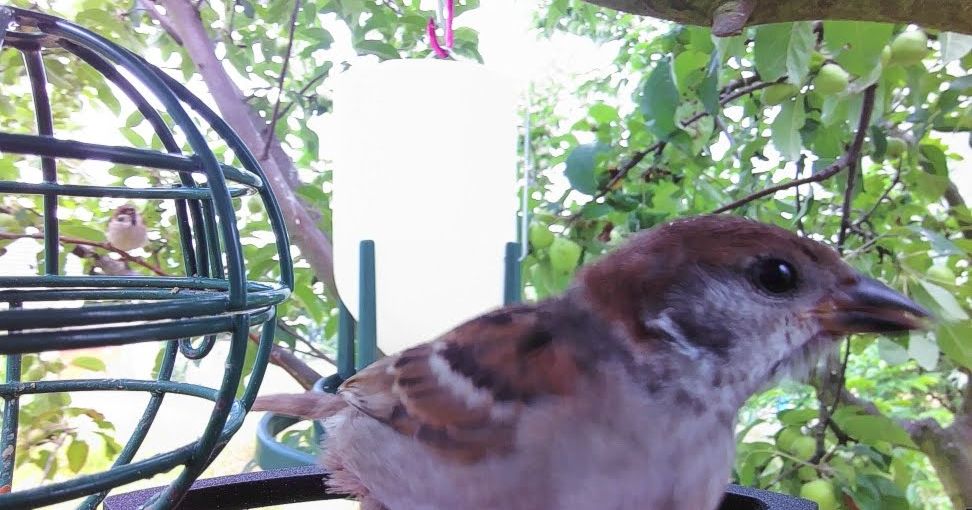
BirdBrain is a Smart Bird Feeder with species recognition. It leverages multiple open-source solutions together to detect birds and identify their species. Note that since i did not develop the software used in this project, things may change/break as the respective developers update their code.
You need to print 1 of each part except the windows, you need 2 of these. The front plate is made specifically for this camera, others may work but this is the one I had on hand so its sized to it.
The following pieces of software are used in the project:
- Frigate - Open-Source video NVR with object detection
- WhosAtMyFeeder - Species recognition from Frigate data
- MediaMTX - Simple RTSP streaming server to stream to Frigate
- Docker/Home Assistant
- MQTT Server
The following hardware is used in the project:
- Raspberry Pi, tested with a Pi 3B as its what i had on hand, may work with a Pi Zero W as well
- Raspberry Pi Camera with FishEye lens
- Power Source - I have power near the bird feeder so I'm using a standard AC adapter. The original model does have parts for a solar panel mounted on the roof. I did not test it so i do not know if it works or not nor do i know if the panel itself can be sourced locally for you. I have included the files for the solar roof and here is the link for the panel it was modeled around. The original model also used a pi hat and a battery but the parts were not readily available here in the USA so i also did not test them.
- Cover for the lens
Note: the box for the pi doesn't really have a lot of room in it so i soldered the power adapter to the GPIO pins. If you use a pi hat and a battery then you should have ample room.
Instructions: These instructions assume you know that standard process for getting an OS running on a Pi and updating/installing software
Raspberry Pi
- Install Raspberry Pi OS Lite for your Pi
- Update installed packages
- Install MediaMTX and configure it according to the GitHub page linked above, make sure to install the service and set it to run on startup - This is a good step-by-step but you will need to update all references to rtsp-simple-server to mediamtx as they changed the name
- Test the RTSP stream using VLC or similar app.
- Install pi into pi-box and mount the camera into the front plate.
- I placed one of these on the outside of the front plate and hot glued it in place to protect the lens/camera from the elements.
WhosAtMyFeeder
- Install WhosAtMyFeeder in Docker or there is also a Home Assistant Add-On for this that you could try running (it is brand new and may have issues)
- Copy the frigate config, update the data to reflect your camera, mqtt server, hardware acceleration solution, detectors, etc. Place this config in your Frigate config directory in the next section
- Update the WhosAtMyFeeder config with the required data
Frigate
- On a separate device(docker, nas, homeassistant, other) install Frigate according to the GitHub linked above or the official documentation. I would recommend you investigate the recommended hardware section of the documentation. I am personally using the TensorRT option as i have a Nvidia graphics card in my NAS that i use for processing, etc. CPU processing is NOT recommended.
- Start Frigate (make sure you have completed the config step in the WhosAtMyFeeder section above before starting Frigate)
- Verify that your camera is displaying in Frigate
If all of your software is working as intended, assemble your new bird feeder and find an awesome place to mount it. I ended up having to glue the roof to the hanger because squirrels kept knocking it off my tree but if you do not need to do that you can use the holes in the back of the feeder for refilling/overfilling.
There is an optional perch that can be glued onto the front of the feeder directly on the lip to hopefully allow birds to land on it for better identification of the birds prior to them eating the food.
I used 3dGloop to attach the perch to the lip, you could also use it to attach the roof to the main body but then you do not get access to the pi box after assembly.
Note: Im still testing different TensorRT yolo models to see what detects birds the best, my squirrels get detected as birds right now…
The original project appears to be abandoned as there is not complete documentation, no updates in almost a year, etc. I have taken the original files, modified them for my specific use case and used multiple pieces of open-source software to make this project work for me.
Comment & Rating (5)


