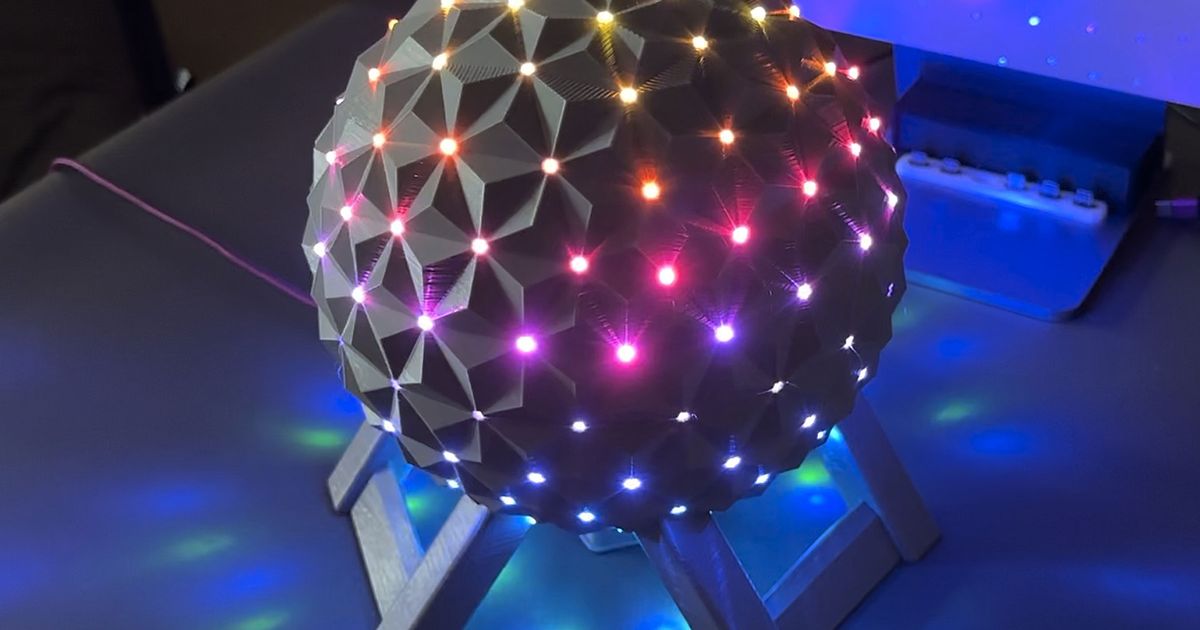
EPCOT Spaceship Earth with 3x6mm Magnet Holes


Print Profile(1)

Description
This version of Adafruit's Spaceship Earth accommodates common 6x3mm magnets and adds the proper depth to the tabs so you can press-fit them in with some needle nose pliers. If you prefer not using tools, there's an optional 6.2mm model you can print and use CA glue to secure the magnets.
Modified BoM to save cost and achieve the same result
- 1x Micro USB Breakout Board https://www.amazon.com/dp/B07X86YFFN
- 4x WS2812B LED wire strip https://www.amazon.com/gp/product/B0BVZLSDH6/
- 1x NodeMCU ESP8266 https://www.amazon.ca/dp/B0B49SZNKP
- 1x 6x3mm Magnets https://www.amazon.ca/dp/B0B5ZWJ1FV
There isn't really a need to use the more expensive USB type C breakout connector. All you're using it for is 5v power. I've added a modified bottom cover with a snap fit to save cost on screws if you use the one in the BoM above.
Optional Tips
- This model requires 156 LED's. Unfortunately they come in strips of 50. Leave 6 holes empty at the bottom if you only want to buy/use 3 full strips.
- Cut and re-solder the included connectors for the LED's after you finish gluing the led's around the middle where the two halves come apart. This makes it easy to disconnect the two halves if you ever need to in the future.
2023-06-14
Added two additional stl files with a 6.2mm magnet diameter for a looser fit in case your magnets were manufactured with a larger than 6.00mm diameter.
2023-06-15
Added a modification to the sphere cover to snap fit this micro USB breakout board in BoM above.
Here is a link to the original Adafruit model: https://www.printables.com/model/482760-epcot-spaceship-earth
Comment & Rating (11)