3D model description
Just to make things clear, my designs are protected by copyrights laws. It is not authorized to distribute or sell any of my designs without prior written authorization from myself. Even if you modified my original design. Thank you.
Join us on Facebook group D440RC and follow in Instagram d440_rc for special deals!
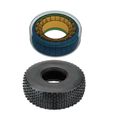
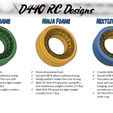
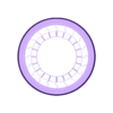
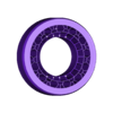
This is an Insert/Foam bundle dedicated to 2.2 Proline IBEX tires. Includes ZigZag, Ninja, and NextLevel foams.
These were designed to perfectly fit with 5.5" tall tires for comp crawling (Proline Ibex), like MOA, Sporty, Shafty, etc. There's also an alternative insert to fit Loaded Dice for NextLevel foam (77.5mm diameter, 22mm wide).
Check the video for a design explanation:
https://youtu.be/BvbvU8OZVoU
Read 3D printing settings carefully, as is critical to get the right outcome. The inner part will take ~4hrs and the outer part ~4hrs to print.
Join us on Facebook group "D440RC" for more info!
https://www.facebook.com/groups/d440rc
Check videos/pictures of my creations in action in my Instagram!
https://www.instagram.com/d440_rc/
Please do not send my messages through Cults, I barely see those. Instead, reach out on Facebook. Thanks!
3D printing settings
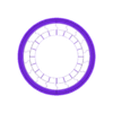
The model uses Ultimaker Cura slicer infill patterns to model the outer part, providing full flexibility to the user to configure the tire insert as they like. The download includes 3MF files to "Open As Project" in Cura, which includes the print settings (highly recommended to use project files).
This must be printed in TPU, wall line count 1, and 0.2~0.24 layer height. Make sure your TPU settings are performing well. Printing Gyroid usually needs good cooling and slow speed.
(Only for ZigZag or Ninja)Printing settings:
This must be printed in TPU (tested with Overture TPU 95A), 0.3mm nozzle, wall line count 1, NO Fill Gaps in Between Walls, No Top/Bottom layers, Support for the inner ring, and 0.2~0.24 layer height.
(Only for NextLevel)The inner part (main insert):
Print in TPU with hardness higher than 90A. Overture 95A works well. For normal rig weight, I like to print these with a 0.3mm nozzle at 100% Flow. They come out firm (they should be firm). Set "infill" setting to 0 (no infill). Use the Project file to get settings out of the box. If your rig is too heavy and you want a firm inner, print with a 0.4mm nozzle and/or get a harder TPU. This part should be ok to print fast if your printer is capable (30~40 mm/s).
(Only for NextLevel)The outer part (soft ring):
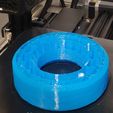
Print in very soft TPU, the softest you can get. Ninjatek 85A works well. 0.3mm nozzle exclusively and adjust FLOW to get a soft print. If you can't get Ninjatek, try Sainsmart 92A with 90% flow. This print needs Gyroid infill, 6% works well with Ninjatek 85A. Infill UP or DOWN if you want softer or stiffer ring. This part should be printed slow (20 mm/s). This part also needs "Setting Overlap" to add wall line count 2 at the base, since the angle is hard to print, it will make it stronger and add side support. Use project file!.
In my facebook group there's a lot more info on how to print these inserts and what to expect: https://www.facebook.com/groups/d440rc

/https://fbi.cults3d.com/uploaders/20401711/illustration-file/09851698-7e50-4ccf-9b09-c26483acba05/Next_level-comp.jpg)
