PLA Spring Motor Demonstrator 2
PLA Spring Motor Demonstrator 2


Print Profile(1)

Description
本模型来自其它作者,喜欢机械的朋友,可以打印玩玩,本模型经过本人实际打印测试,是可以正常工作的,唯一存在的问题仅仅只是四颗螺丝太粗了,和螺孔无法对接。你可以更换螺丝或和我一样采用热熔胶进行固定。打印配置可直接使用本人上传的配置!
以下内容是原模型相关说明:
Description
https://www.instructables.com/PLA-Spring-Motor-Demonstrator-2/
Beschreibung des 3D-Modells
https://www.youtube.com/watch?v=cxPHcMXsZno
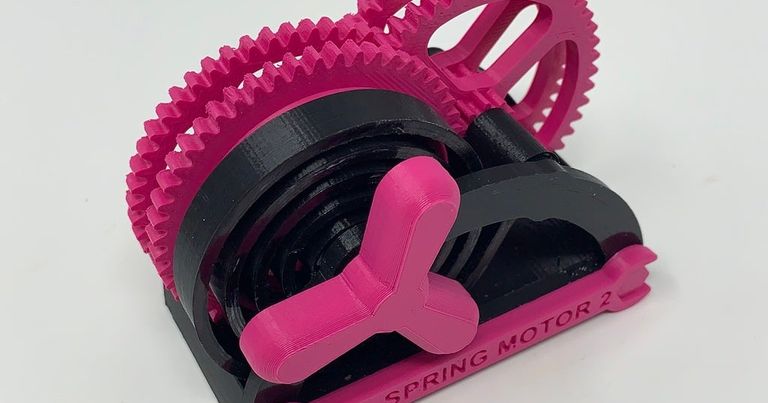
PLA Spring Motor Demonstrator 2 is an updated Autodesk Fusion 360 design of my original PLA Spring Motor Demonstrator design of 5 years ago.
The original PLA Spring Motor Demonstrator was designed as a "proof of concept" tool to test whether a 3D printed PLA spring could power a gear train and move a vehicle. As a result of that successful test, I was able to design a number of 3D printed PLA spring powered vehicles.
This updated version has a 1 (drive) to 125 (driven) gear ratio in three gear stages and, as shown in the side by side comparison photograph, is slightly smaller than the original. And while not a requirement, I used Ultimaker "Tough PLA" for the pawl, spring and frames for additional strength and longevity.
PLA Spring Motor Demonstrator 2 is a fairly easy print and assembly, and even though it was originally designed as a proof of concept tool, it is still a fun desktop conversation piece.
As usual, I probably forgot a file or two or who knows what else, so if you have any questions, please do not hesitate to point them out as I do make mistakes in plenty.
Designed using Autodesk Fusion 360, sliced using Cura 3.5.0, and printed in PLA and Tough PLA on an Ultimaker 2+ Extended and an Ultimaker 3 Extended.
Step 1: Print and Prepare the Parts.
I printed the following parts at .15mm layer height:
- Four "Bolt, Frame.stl", 100% infill, Magenta PLA.
- One "Frame, Left.stl", 50% infill, Black Tough PLA.
- One "Frame, Right.stl", 50% infill, Black Tough PLA.
- Three "Gear, Idler (50, 1.12).stl", 20% infill, Magenta PLA.
- One "Gear, Pawl (50, 1.12).stl", 20% infill, Magenta PLA.
- One "Knob and Axle.stl", 100% infill, Magenta PLA.
- One "Pawl.stl", 100% infill, Black Tough PLA.
- One "Spring.stl", 100% infill, Black Tough PLA.
- Two "Wrench.stl", 20% infill, Magenta PLA.
Prior to assembly, I test fit and trimmed, filed, sanded, etc. all parts as necessary for smooth movement of moving surfaces, and tight fit for non moving surfaces. If you decide to make your own PLA Spring Motor Demonstrator 2, depending on the colors you chose, your printer model and your printer settings, more or less trimming, filing and/or sanding may be required. I carefully filed all edges that contacted the build plate to make absolutely certain that all build plate "ooze" was removed and that all edges were smooth. I used small jewelers files and plenty of patience to perform this step. I also used 6mm by 1 right hand threaded taps and dies to prepare the threaded parts prior to assembly
Step 2: Assemble the Spring Motor.


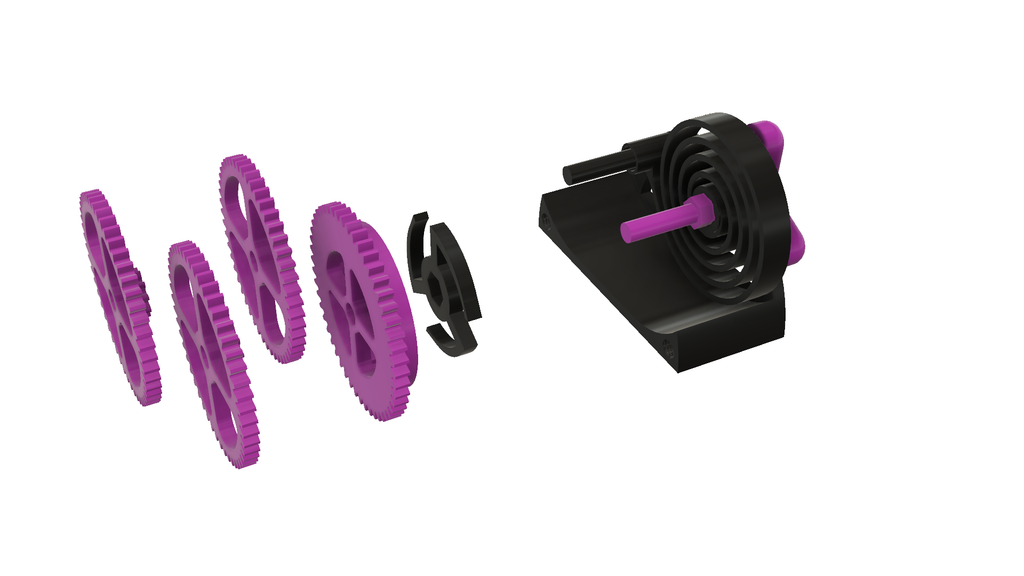
9 More Images
To assemble the spring motor, I performed the following steps:
- Place "Knob and Axle.stl" into "Frame, Right.stl".
- Press "Spring.stl" onto "Knob and Axle.stl" while placing the spring retainer over the axle on "Frame, Right.stl".
- Press "Pawl.stl" onto "Knob and Axle.stl".
- Place "Gear, Pawl.stl" onto "Pawl.stl".
- Place the first "Gear, Idler (50, 1.12).stl" onto the axle on "Frame, Right.stl".
- Place the second "Gear, Idler (50, 1.12).stl" onto "Knob and Axle.stl".
- Place the third "Gear, Idler (50, 1.12).stl" onto the axle on "Frame, Right.stl".
- Place "Frame, Left.stl" onto the spring motor assembly.
- Secured "Frame, Left.stl" to the spring motor assembly using two "Bolt, Frame.stl".
Step 3: Final Assembly.
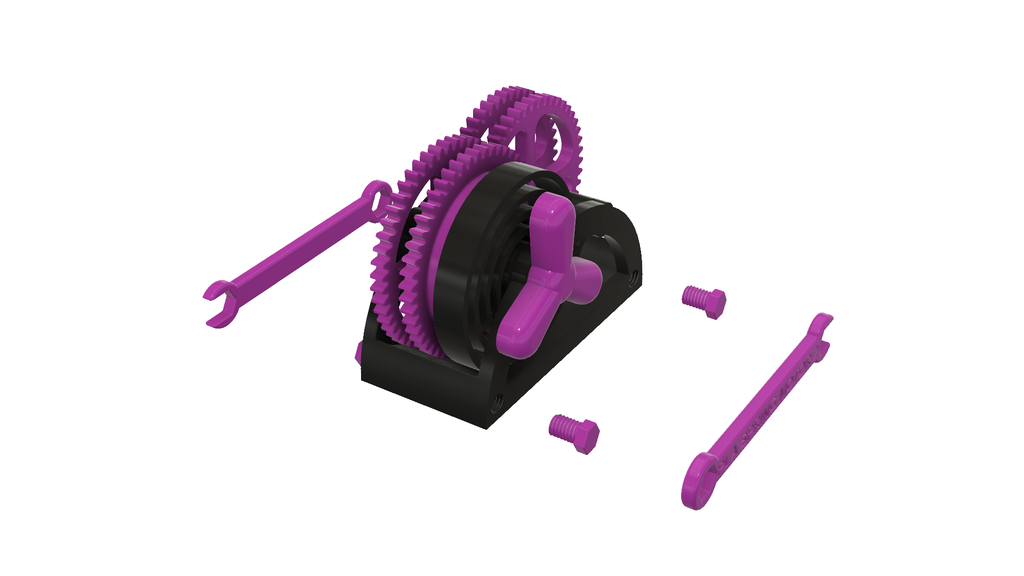


3 More Images
For the final assembly, I performed the following steps:
- Installed two "Bolt, Frame.stl" into "Frame, Right.stl".
- Secured one "Wrench.stl" onto "Frame, Right.stl" using double sided tape.
- Secured the remaining "Wrench.stl" onto "Frame, Left.stl" using double sided tape.
And that is how I printed and assembled PLA Spring Motor Demonstrator 2.
Hope you enjoy it!
Comment & Rating (1)

Related Models


