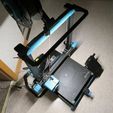
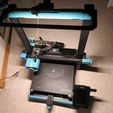
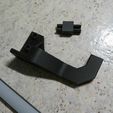
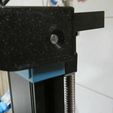
Let there be light on the SOVOL SV07 plus. The LED under the large print head doesn't actually produce much output.
You can connect the light directly to the 3D printer's power supply unit. You will also need a 2-core stranded wire, which must be routed to the outside.
I have seen that Creality has installed a great light at the end. I ordered the same from Creality. It's also available from Alibaba, and cheaper. But I didn't want to wait so long for it. Amazon also has the same lights in its range.
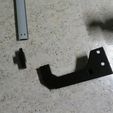
I have only recreated the two angle arms here and adapted them to the Sovol SV07 PLUS. Therefore does not fit the SV06 series, nor the small SV07!!!
You will find another suitable article for the SV07.
Due to the exact specification of the cable lengths, these angled arms are shorter than those of the SV07.
Creality offers all the accessories, I only offer you the mounting brackets here.
I have now screwed the brackets onto the sides.
You can attach the brackets from the side with a SPAX 3x12, or work from above with longer screws.
The drill diameter should be approx. 0.5 mm smaller,
than the SPAX screw has.
Do not want to open the printer yet because of the warranty.
you can also access an external power supply unit.
You need a DC power supply unit with a 24V direct current connection.
The light has 5W, the power supply unit should rather have 10W. Please pay attention to the correct polarity.
If you are not familiar with this, please always buy an external power supply unit for LED /SMD lights.
On Alibaba for approx. 7-8 euros. Otherwise up to 16 euros.
The light strip will cost you between 19.95 and 26 euros. Depending on the supplier.
For me, this effort was worth it. Now I have the necessary brightness on the print bed.
Update as of February 06, 2024:
There are two luminaire lengths:
1x with 292 mm and 1x with 300 mm.
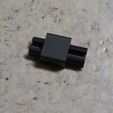
Therefore, two arm lengths can be found here, as well as intermediate adapters with lengths of 15 to 20 mm.
You only need to measure and calculate in order to print the correct intermediate adapters; the intermediate adapter and profile piece are printed vertically. Cut the profile piece to the required length using the cutter. For the 20 mm profile, please remove the bottom surface so that you can pull the cable through.
Assembly: Remove the switch from the Creality bracket and install it in the new bracket.
Please cut off the bottom surface of the plug-in profile. The cable for the left arm is pulled through here.
The left arm also has holes in the ribs; the cable is pulled through here.
Now assemble the light as described in the Creality instructions, only with my angle arms.
Please insert the light cable into the same cable groove that is used for the cable for the filament sensor. Pull the cable downwards. To do this, remove the cable cover and replace it.
I connected the light cable to the sensor cable with two cable ties, one at the top and one at the bottom.
Now you have to decide whether to use an external power supply or open the 3D printer.
Please pay attention to the correct polarity!!!!!!!
The SMD light gets very warm!
Therefore, only use a good power supply unit with sufficient power and good DC voltage.
Limitation of liability: I am not liable for damage to your home, your printers or your children caused by improper handling of electricity and heat.

